A wall-mounted coat rack allows easy access to coats, hats, and backpacks. Find out how to make a DIY coat rack out of wood here.
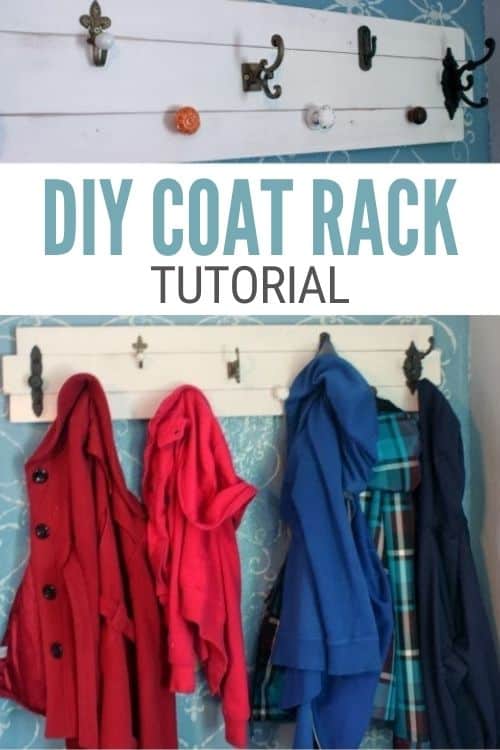
Lately, there have been jackets and coats everywhere in our living room and hanging off the back of the kitchen chairs.
We have a coat closet, but by the state of our house, hanging up our coats is just too much of a chore.
So I came up with a quick DIY coat rack to hang in our entryway. Now there are no more excuses!
Supplies You'll Need to Create this Project:
This post contains affiliate links.
- Knobs in different colors and styles
- Primed Pine Wood
- 1 - 1x4x8ft
- 1 - 1x3x8ft
- Sand Paper
- ½" Screws
- Screw Driver
Instructions:
Begin by arranging the coat hooks and knobs that will fit your space. This helps you to know how big of a piece of wood to buy.

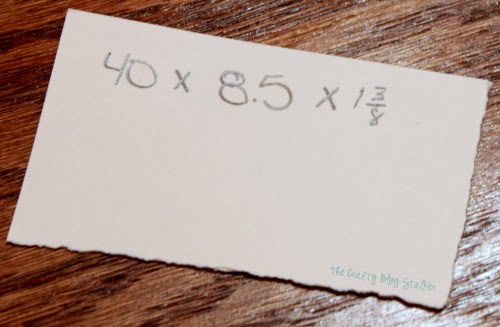
We decided that we wanted the coat rack to measure about 40 x 8 ½ inches.
The backing to the knobs is 1 ⅜", so we had to account for that as well.
If you have it, you could easily use scrap wood. But we didn't have what I was wanting so we went to Home Depot to brainstorm further.
We measured lots of different pieces of wood to see if we could get what we envisioned to work.
We ultimately decided to go with 2 different sizes of Primed Pine Board. We got one length of 1x4x8ft and one length of 1x3x8ft.
On a side note, wood measurements are crazy and inaccurate, What is the point? How hard is it to have a 1x4 if the sign says they are 1x4? But in all actuality they are .75x3.5! A man had to come up with that system because it makes absolutely no sense at all.
Here is my best sketch of how it will all go together. I felt I could explain it better with a drawing, BUT this drawing is not to scale, just wanted to show you what I was thinking.
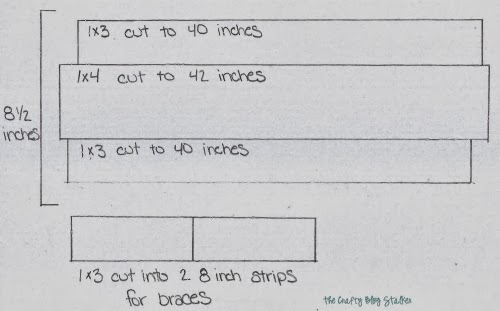
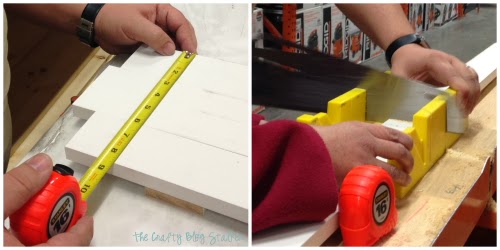
Once we knew what we were doing we went to the saw table and cut our lengths of wood to what is stated in the sketch above.
We used the entire length of 1x3x8 but had a good chunk of the 1x4x8 left for some unknown future project.
Once home, I began sanding the strips of wood.
The wood pieces are primed, not painted but that meant I wouldn't have to paint or stain.
I only sanded the pieces a little to give the wood a worn/stressed look to them.
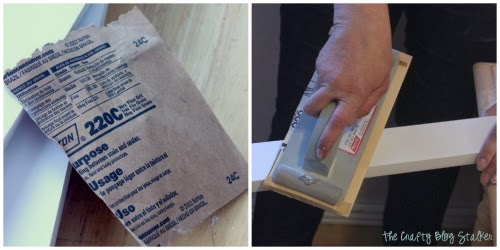
This is how the pieces looked when I was done sanding them.
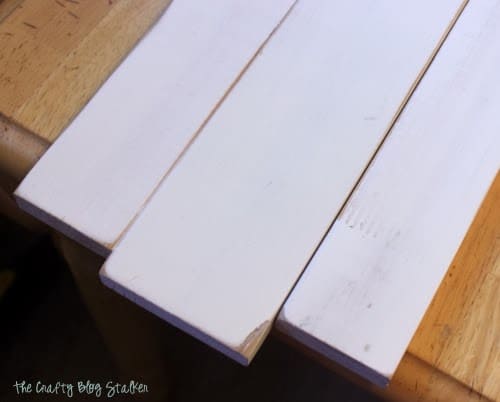
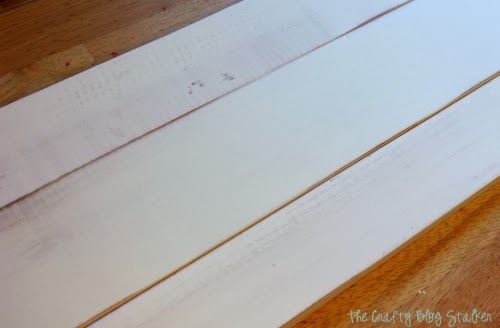
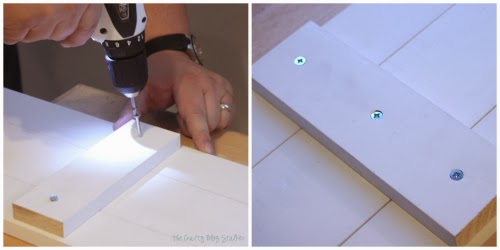
Before we add the knobs we need to add the support braces to the back. This will keep all of the boards aligned like we want and give the space on the back to allow for the screws of the knobs.
We used screws that are just a little bit shorter in length than the depth of the two boards so they didn't come out the front of the coat rack.
I measured out the placement of the knobs and then used a drill to make the holes to screw them in.
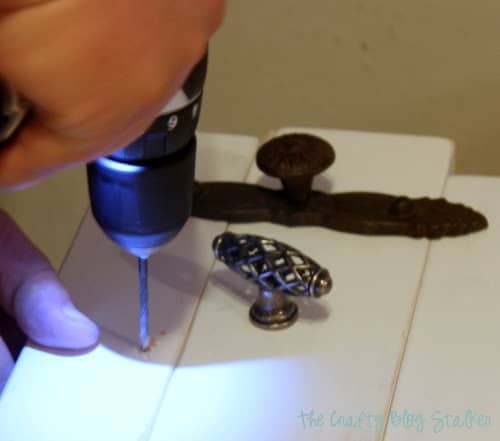
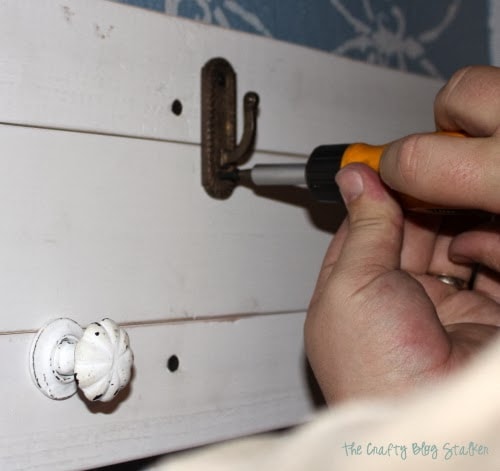
We put almost all of the knobs in but left a couple off where we would need to screw the rack into the wall.

The coat rack needs to be screwed into the studs in the wall so they are good and sturdy. We took that into account when we were putting the braces on the back and put them in the same plus where the studs are.
We used super long screws to attach it to the wall to make sure it went through both pieces of wood and into the stud of the wall.
My son also jumped in on the action so he could help Dad keep the coat rack level and I could be the photographer.
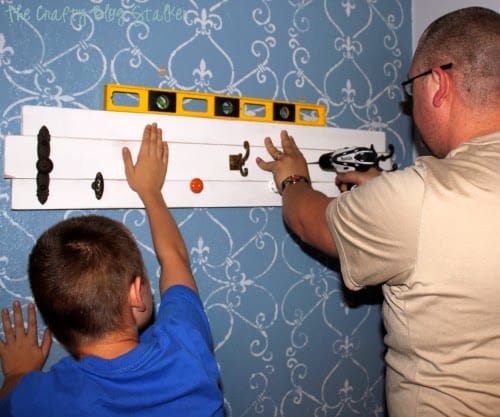
Once everything was secure we screwed the last couple of hooks into the board.
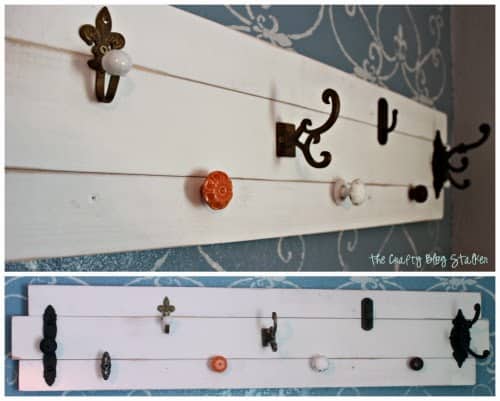
Then I took some white paint and dabbed it over the dark screws to help hide them.
Doesn't it look awesome, and completely functional too? I love the mish-mash of all the different knobs.
After it was done, it took about 2 hours to put it all together.
If you love this coat rack tutorial, please give it a five-star review and help me share it on Facebook and Pinterest!
Our Crafting Essentials:
- The Cricut Cutting Machine is easily our favorite crafting tool. We use it in so many of our tutorials!
- These MakerX Crafting Tools are perfect for keeping in the craft room and are always ready when needed!
- This Fiskars Paper Trimmer is easy to use and cuts nicely without frayed edges.
- These Scotch Precision Scissors cut like a dream, and you get multiple pairs in a pack!



Alison P.
Sounds like a great idea! We don't have room in our entry way for something to hang out in the open and we don't have a coat closet so this seems like a great idea. I know we have wood in the basement but now I am going to go on the search for nobs and hooks!!!! Our only problem is we have plaster so we can't screw into the wall like that but we will have to figure that out before building it 🙂
myfabulouschaos
I love this idea~ thanks for sharing! I had never thought of doing three boards together! Brilliant!
Lara from myfabulouschaos.com
Bonnie H
It turned out great. Love all the different hooks and knobs.
~Bonnie @ Our Secondhand House
Mabey She Made It
So cute! I love that the knobs and hooks aren't the same and that it holds lots of stuff! I'd love it if you came and linked up to the Do Tell Tuesday party (it's live now) over at mabeyshemadeit.com
Carolyn Zick
Very cute!1 Love the variety of knobs!!
ashley @ my craftily ever after
I love this and I think I am going to go hunt some fun knobs for my own closet makeover! I would love to have you link up to our party at http://www.mycraftilyeverafter.com/2014/01/14/awesome-things-tuesday-9/
Alison Agnew
so clever and cool looking
and i have a few 'simple' projects
that are taking forevah too
would love for you to share
at Fridays Unfolded this week!
Alison
Nancherrow
Katie Drane
I love this, Katie! What a clever idea.
Katie
OneKriegerChick
So cute...Loving the mix of hardware! Off to check out the story behind the stenciled wall! Thank you for linking up to the Hit Me With Your Best Shot Link Party...I'm featuring you this morning on OneKriegerChick!
Happy Weekend!
~Ariean
Mel {MamaBuzz}
Oh my, I so identify with you. I have a little bundle of knobs I purchased way back when, just waiting to be used for a project I've had in mind for over a year. LOL I love this! I love that you used all sorts of different knobs and hangers. It's so pretty. Thanks so much for sharing on Inspire Me Wednesday. Featuring you in next week's issue.
MommyonDemand
I just bought one, but I like yours a lot better! Thanks for sharing at The Weekend Retreat, hope to see you back on Thursday night!
Katie @ Made to be a Momma.
Love this coat rack and all the different knobs you used..it gives it more texture--my favorite is that orange one 🙂 --thanks for sharing at our "Hit Me With Your Best Shot Link Party!" Hope to see you again tonight!
Deborah L Melian
Love this Coat Rack--pinning it!--Deb from DialMforMoms.com
Marilyn Clark
Wow..LOVE this coat rack! We featured it at the project stash! 😀
Ivy and Elephants
Oh wow this coat rack came out sooooo awesome. Love it! I would love for you to share this great post at our WIW Linky Party. I hope you can join us.
Paula
Ivy & Elephants
Linda Bouffard
Love this so much! Thanks for showing how to do it, too. Linda Crafts a la mode
Rhinestone Beagle
That is just beautiful! It has a clean look but at that same time old time charm. I am definitely going to nab this idea. Thank you for linking @ Doggone Dirty Craftin!
Steph Seibert
This coat rack is so cool. I love the variety you found.
Chelsey
Gorgeous! I love all the different handles and knobs you put on it! Definitely pinning and stumbling this!
I found you on The Creative Exchange, btw. Thanks for sharing!
Deborah
Oh I love all the different hooks!!! Thanks for linking up to #homemattersparty
Katie
Thank you Deborah! It was a fun project to put together! I am glad you like it.
Kimm at Reinvented
I like that look from using boards of different widths not to mention the variety of hooks.
Thanks for sharing at Funtastic Friday!
Katie
Thank you, Kim! I am so glad that you like my Coat Rack. I love the style it adds to my home, and helps keep coats off of the back of chairs!
Ariel
This is definitely needed in our home! Lol, and I know the perfect spot...
Katie
You should make one Ariel! It is easier than you might think and it really helps with the coat clutter!