

Make a handmade card that is perfect to give for any occasion. A complete step-by-step tutorial.

A handmade card can be a gift all by itself. I love making the cards that I give to friends and family because I truly believe a handmade card means just a little bit more.
Going through my cards, I had many Birthday and Christmas cards but I didn't have much of anything else. That is when I decided to design a card that could be used for any occasion.
The card would need to be simple but still beautiful and could work as a sympathy card, a birthday card, or whatever I need at the moment.
Craft Tutorial Video:
Like videos? I have a video tutorial for you! Please subscribe to my YouTube Channel so you don't miss out on any future video tutorials!
Supplies You'll Need to Create this Project:
Some links may lead to similar items when the exact item is unavailable.
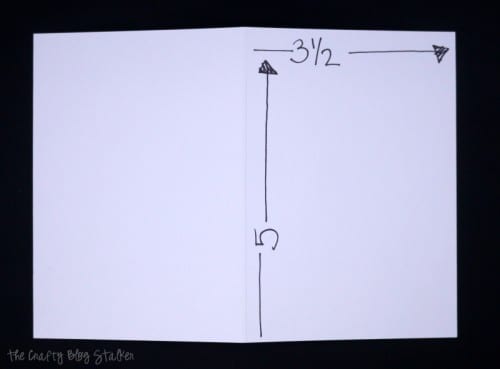
- 3 ½ x 5 inch White Card Base
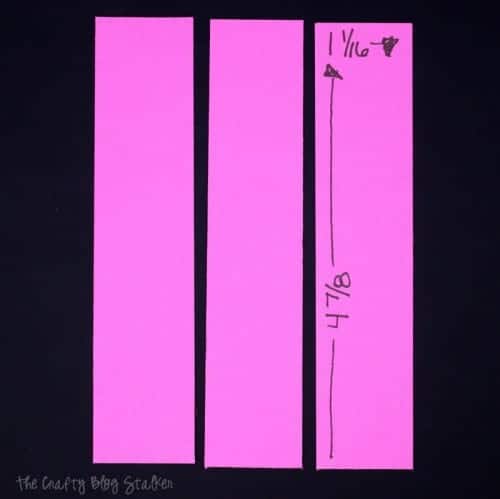
- 1 1/16 x 4 ⅞ inch Pattern Paper Pieces
- 5/16 inch Ribbon
- Craft Knife
- Adhesive
Any Occasion Handmade Card:
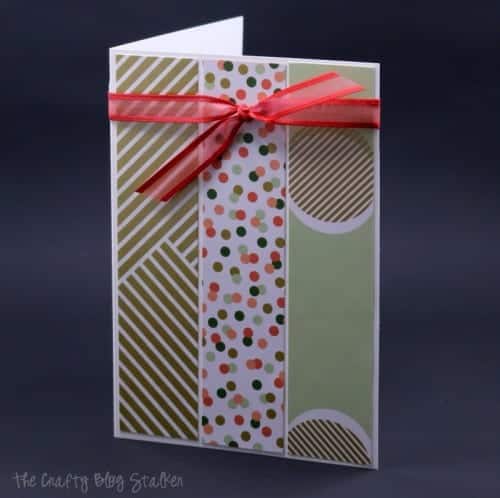
My card bases are 3 ½ x 5-inch cards. That means that is the measurement of the front of the card once it is folded in half.
Across the front of my card, there are three panels each measuring 1 1/16 x 4 ⅞ inches.
This part is math - so skip ahead if you don't need the explanation.
In case you are dealing with a different-sized card base, I want to share how I got my measurements.
I wanted some white space around each of the panels so I couldn't just divide the width by three. I first subtracted 5/16 to allow for the white space. This made for a width of 3 5/16, then divided that number by 3 for 1 1/16. For the length, I didn't need to divide anything only subtract a little for the white space on the top bottom of the panel. So the 5 became 4 ⅞. Are you with me? Math isn't my strong suit so if I made this more difficult than necessary I'm sorry, just use a 3 ½ x 5 card base. 🙂
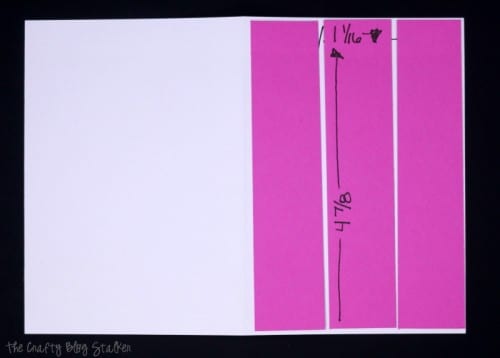
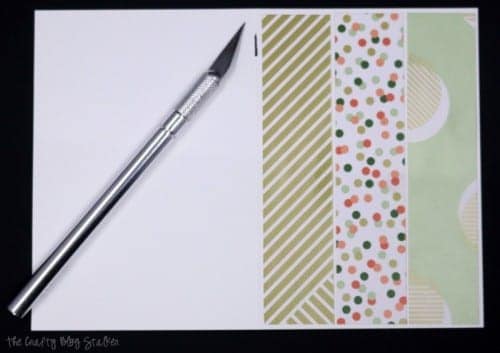
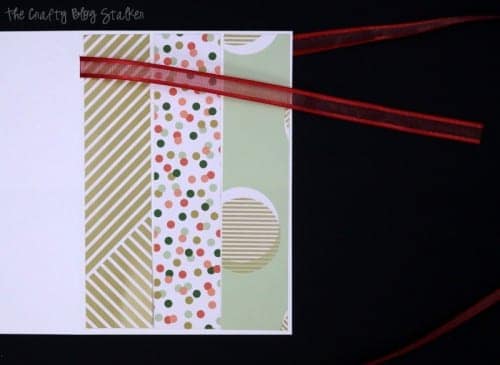
Adhere the pattern piece panels to the front of the card using your favorite paper adhesive. It really doesn't matter if you use double-sided tape, liquid glue, or a glue stick. Whatever you have is fine.
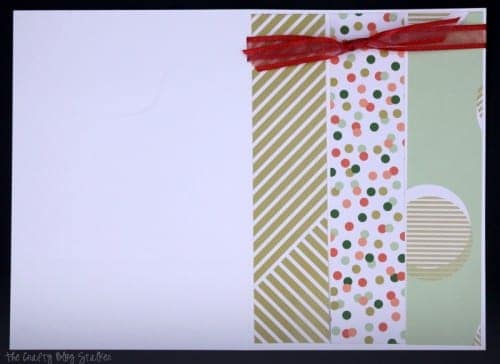
Using a craft knife cut a small slit on the fold of the card for the ribbon to go through. Mine is about ½ in down from the top of the card.
The slit doesn't need to be too long, just wide enough for the ribbon.
Tie a flat knot. If you aren't sure how to tie a flat knot I do show in the video. The key to a flat knot is going slow.
Fold your card, write your heartfelt message, and your handmade card is ready to be given away!
If you love this tutorial, please help me share it on Facebook and Pinterest!
Crafting Essentials
- The Cricut Cutting Machine is easily my favorite crafting tool. We use it in so many of our tutorials!
- These MakerX Crafting Tools are perfect for keeping in the craft room and are always ready when needed!
- This Fiskars Paper Trimmer is easy to use and cuts nicely without frayed edges.
- These Scotch Precision Scissors cut like a dream, and you get multiple pairs in a pack!
Pam@over50feeling40
You made it look easy! Thanks for sharing with the Thursday Blog Hop!
Katie
OF course Pam! Thanks for stopping by.
Jamie
It's always so fun to make a card for someone. Being personal and one-of-a-kind, means so much! Thank you for sharing this one with us at the #HomeMattersParty
Katie
I totally agree Jamie! Thank you.
Jacky @ Joyful Savings
Beautiful card Katie.... It is great to connect with you through the Happiness is Homemade Linky Party!
Katie
Thank you Jacky for stopping by! I'm glad you like the tutorial.
lindsay
Love this! so smart to have these around the house for when you need them! thanks so much for sharing at Funtastic Friday!
Katie
Thank you Lindsay! These cards really are super nice to have around. Thanks for stopping by.
Danielle from storypiece
I need these cards in my life! I tell myself all the time that I will make them, but I never do. Perhaps your tutorial is just the kick in the pants that I need. 🙂
Thank you for sharing at the Celebrate Your Story Link Up Party.
Katie
You are so welcome Danielle! I am glad that you like the tutorial.
Janet Vinyard
Hi Katie, What a clever card! I have lots of long strips of various papers for scrapbook borders - I can see cutting them down to make these lovely cards. I often use a small hole-puncher to make 2 holes from which to tie a bow - just another way to do the same thing you did with a slit. Thanks so much for sharing your ideas! Blessings, Janet
Katie
Great tip Janet, thanks!
Suzy
very nice. I like it that you suggest using what you have on hand. I'm a card maker and like to choose paper, ribbon and adornments at random. I'll be back to visit!!
Katie
Thank you Suzy! I have an entire box of scrap paper so I love when I can dig into that box and mix and match.
Denise/DIY Crush
Cutest little card! Love it! Thank you so much for sharing at my craft party on Thursday! I pin all your posts! Would love to see your newest posts this week, which starts at 7pm EST.
Katie
Thank you Denise! Of course I'll be there, I love your party!
MELANIE REDD
What a practical idea!
Love the handmade card!
I came over to find your post today on Party in PJ's.
Hope you have a blessed day~
Melanie
Gina
This looks so good! I made a handmade card a few months ago on my own. I didn't really use any tutorials, but one definitely would have helped. This is great to give me more of an idea what to do. I was just randomly cutting and gluing before. Thanks for giving such clear tutorials!
Katie
You are so welcome Gina! I am glad that you found the tutorial useful.
sue
Hi Katie how lovely and I do love homemade cards or gifts. Thanks for the video too! Great to have you link up and share with us at Over the Moon.
Katie
Thank you for stopping by Sue! I am so glad that you liked the tutorial.
Debra
I love getting handmade cards 🙂 My sister-in-law makes them and they are so cute. Thanks for sharing with us at Funtastic Friday!
Katie
Thanks, Debra! I agree, there is something extra special about receiving a handmade card.