Image Map

a tutorial blog that covers crafts, diy, home decor, sewing, paper crafting and more.

  • Home
  • Start Here!
  • Crafts
  • Holidays
  • Home Decor
  • Jewelry
  • Recipes
  • Sewing
  • SVG Shop

How to Make Mercury Glass Ornaments

September 15, 2020 By: Katie9 Comments

This post is brought to you by Consumer Crafts and Blueprint Social. All opinions are my own. #ShopConsumerCrafts

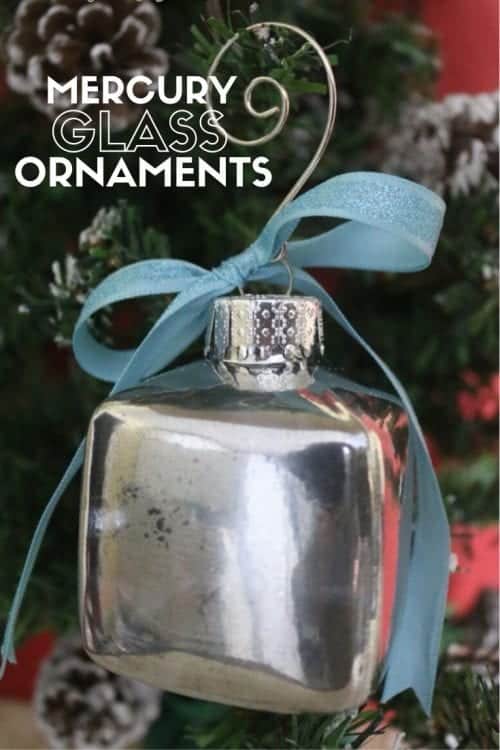
Follow this tutorial to make a vintage Mercury Glass Ornament. A beautiful keepsake ornament for your Christmas Tree that you can keep or give as a gift.

How to Make Mercury Glass Ornaments, a tutorial featured by top US craft blog, The Crafty Blog Stalker.

The holiday season is all about fun family traditions. Every year all of the women in my family do a handmade ornament exchange. There are 8 of us, so each year we make 8 of the same ornament and they exchange them at Thanksgiving. So everyone goes home with 8 unique handmade ornaments.

This year I turned to Consumer Crafts for help with the supplies for my ornament. Consumer Crafts is an amazing online resource for craft supplies. They easily have the lowest prices, over 1,400 craft tutorials and awesome project ideas on their blog, Crafts Unleashed. 

I wanted to give my ornaments that vintage mercury glass look, and it is actually quite simple to do.

Supplies Used to Make Mercury Glass Ornaments

Some links may be on similar items when exact items couldn’t be found online.

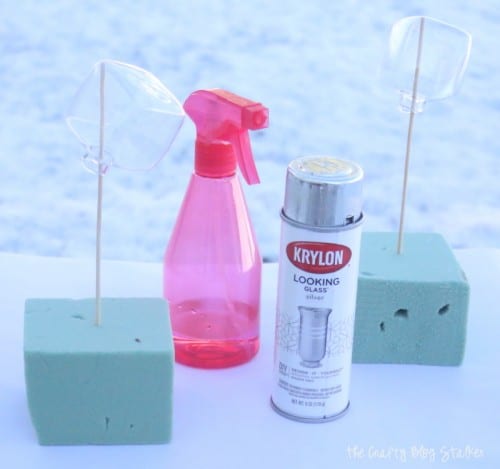
  • Glass Cube Ornaments
  • Krylon Looking Glass Spray Paint
  • Blue Glitter Ribbon
  • Spray Bottle
  • Paper Towel
  • Vinegar & Water
How to Make Mercury Glass Ornaments, a tutorial featured by top US craft blog, The Crafty Blog Stalker.

How to Make Mercury Glass Ornaments

It snowed yesterday, so my snowy back lawn is the perfect backdrop. Since I am spray painting, I took it outside. I love the look mercury glass look but not on everything I own.

In a spray bottle, mix 1 part water to 1 part vinegar. I used about 1/4 cup of each. I also used a foam block and bamboo sticks to hold the ornaments for me. This way I could spray them without touching them.

How to Make Mercury Glass Ornaments, a tutorial featured by top US craft blog, The Crafty Blog Stalker.

Steps

  1. Lightly mist the glass
  2. Apply a light layer of Looking Glass spray paint
  3. Dry 1 minute
  4. Lightly mist the glass
  5. Apply a light layer of Looking Glass spray paint
  6. Dry 2 minutes
  7. Pat dry with a paper towel
  8. Repeat if necessary
How to Make Mercury Glass Ornaments, a tutorial featured by top US craft blog, The Crafty Blog Stalker.

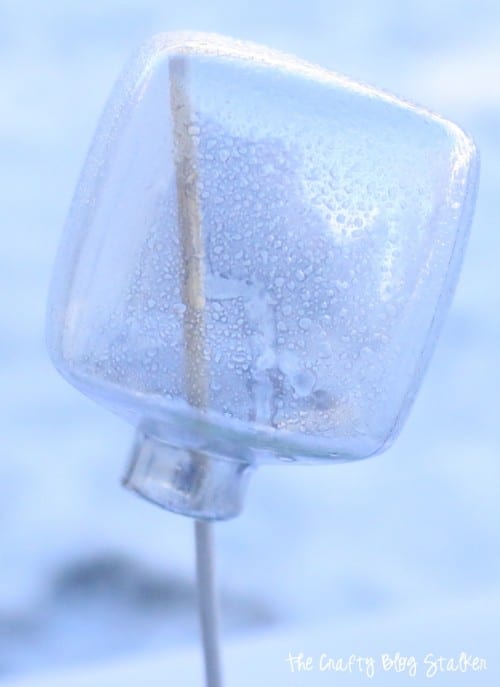
I did two rounds of the steps. My ornaments were still partially clear, but I could definitely see the silver Looking Glass as well. You can do as many layers as you want to get the look that you like.

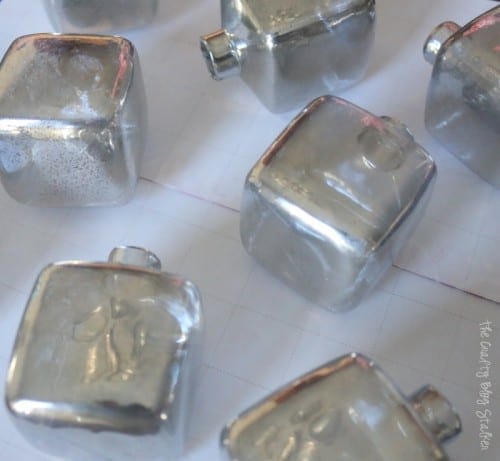
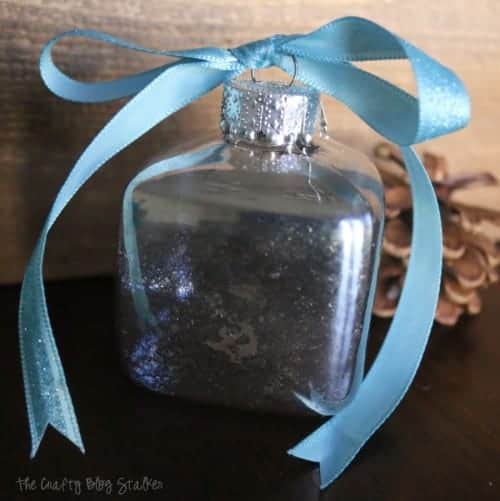
Here are the Mercury Glass Ornaments drying after all of their layers.

How to Make Mercury Glass Ornaments, a tutorial featured by top US craft blog, The Crafty Blog Stalker.

To add a little bit of color to the ornament, I tied a bow at the top of the ornament with some blue glitter ribbon.

How to Make Mercury Glass Ornaments, a tutorial featured by top US craft blog, The Crafty Blog Stalker.

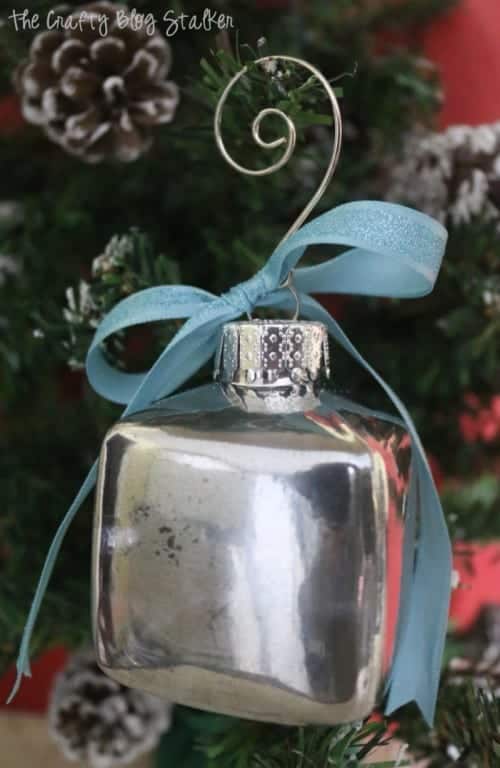
These ornaments are super simple to make and are very elegant looking. The ribbon tied to the top could easily be switched out to match any color or theme of your Christmas Tree.

How to Make Mercury Glass Ornaments, a tutorial featured by top US craft blog, The Crafty Blog Stalker.

Do you have a handmade ornament that you cherish? Share and leave a comment below!

CLICK HERE TO SAVE HOW TO MAKE MERCURY GLASS ORNAMENTS TO YOUR FAVORITE PINTEREST BOARD!

You Might Also Like These Tutorials:

  • Gold Animal Ornaments
  • Christmas Snowflake Ornament
  • Tree Snowglobe Ornament
  • Book Print Christmas Ornament
  • Sparkly Christmas Ornament

Follow The Crafty Blog Stalker

https://www.shareasale.com/u.cfm?d=625902&m=56778&u=747751

Comments

  1. Vineta @ The Handyman's Daughter says

    November 13, 2015 at 10:49 am

    So simple, and yet so pretty! I love the look of mercury glass, and it looks fabulous against the dark green tree.

    Reply
    • Katie says

      November 13, 2015 at 11:25 am

      Thank you Vineta! They were fun to make.

      Reply
  2. Sahana says

    November 15, 2015 at 6:51 pm

    Love the look of the Mercury ornaments. You have a great collection of ornaments. Thank you for linking up with us @ #HomeMattersParty. We would love to have you again next week.

    Reply
  3. Lorelai @ Life With Lorelai says

    November 20, 2015 at 9:31 am

    Hey, Katie! Just wanted to let you know that we loved your Mercury Glass Ornament Tutorial so much when you shared it at the #HomeMattersParty last week, we’ve FEATURED it THIS WEEK! Hope you can check it out when you get a sec! Happy Friday!!! http://lifewithlorelai.com/2015/11/19/home-matters-linky-party-64/

    ~Lorelai
    Life With Lorelai / Home Matters Linky Party

    Reply
  4. Audrey says

    November 21, 2015 at 11:33 am

    Congratulations on your #HomeMattersParty feature! What a cute project.

    Reply
  5. Sharleen says

    November 22, 2015 at 4:30 pm

    Congratulations on the feature, thanks for linking up to Home Matters Party. #HomeMattersParty

    Reply
  6. Jamie says

    November 27, 2015 at 3:13 pm

    Wow, that is beautiful!! So glad I saw this at the #HomeMattersParty

    Reply
    • Katie says

      November 28, 2015 at 12:25 pm

      Thank you Jamie. I am so glad that you like them.

      Reply
  7. Tracy Snyder says

    December 8, 2015 at 7:16 pm

    So pretty!!! I have some of that looking glass spray paint, so this is going on my to do list for the holidays.
    Thanks for linking up to Welcome Home Wednesdays!

    Reply

Leave a Reply Cancel reply

Your email address will not be published. Required fields are marked *

Recipe Rating


The Crafty Blog Stalker is a website filled with DIY Step by Step Craft Tutorial Ideas. You can make it and I can show you how!

The crafty Blog Stalker

Crafty Blog Stalker Privacy Policy

Copyright © 2021 · Modern Blogger Pro Theme By, Pretty Darn Cute Design

By continuing to use the site, you agree to the use of cookies.OK, I Agree Reject Read More

Privacy Overview

This website uses cookies to improve your experience while you navigate through the website. Out of these, the cookies that are categorized as necessary are stored on your browser as they are essential for the working of basic functionalities of the website. We also use third-party cookies that help us analyze and understand how you use this website. These cookies will be stored in your browser only with your consent. You also have the option to opt-out of these cookies. But opting out of some of these cookies may affect your browsing experience.
Necessary
Always Enabled

Necessary cookies are absolutely essential for the website to function properly. This category only includes cookies that ensures basic functionalities and security features of the website. These cookies do not store any personal information.

Non-necessary

Any cookies that may not be particularly necessary for the website to function and is used specifically to collect user personal data via analytics, ads, other embedded contents are termed as non-necessary cookies. It is mandatory to procure user consent prior to running these cookies on your website.