

This is a sponsored post on behalf of Jen Hadfield Home+Made. All opinions are my own because I love giving you helpful tutorials!
Last week Jen Hadfield from Tatertots & Jello sent me a bundle of her totally awesome new product and asked me to make something fun. I was completely honored and excited to play with all of these products.
You can see her complete line on Amazon.
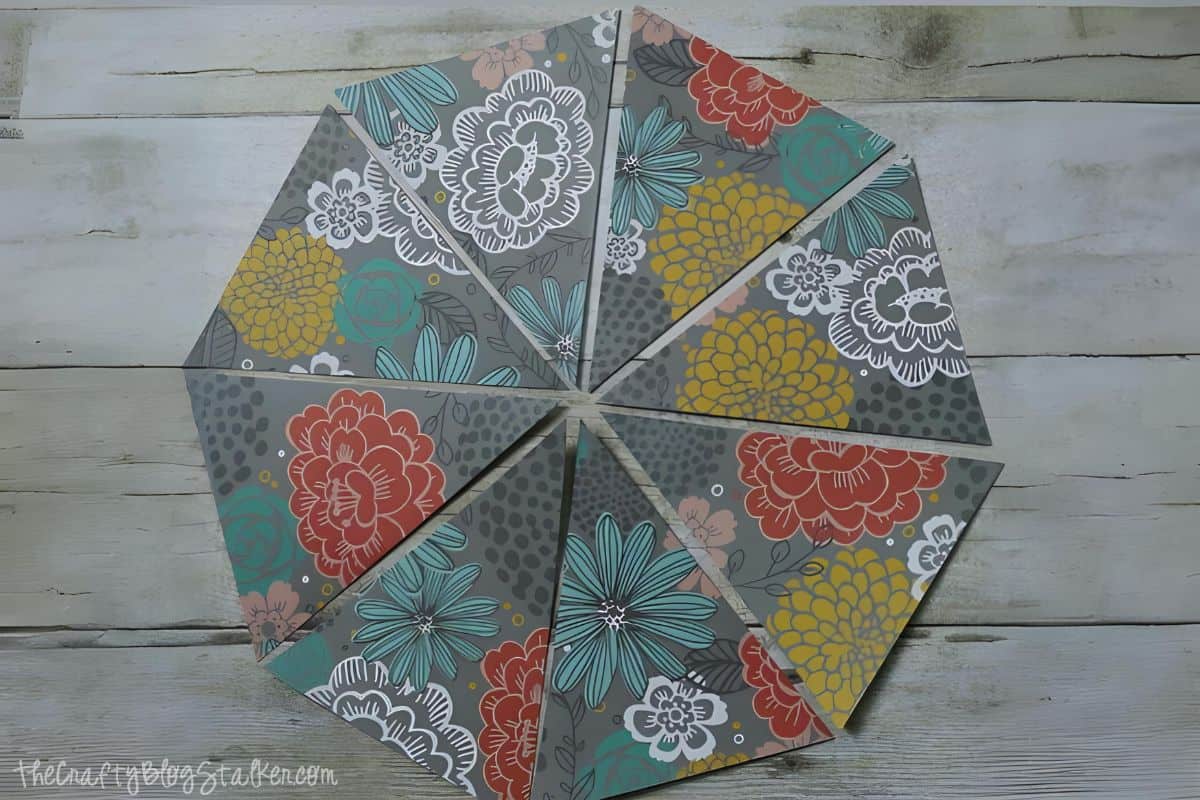
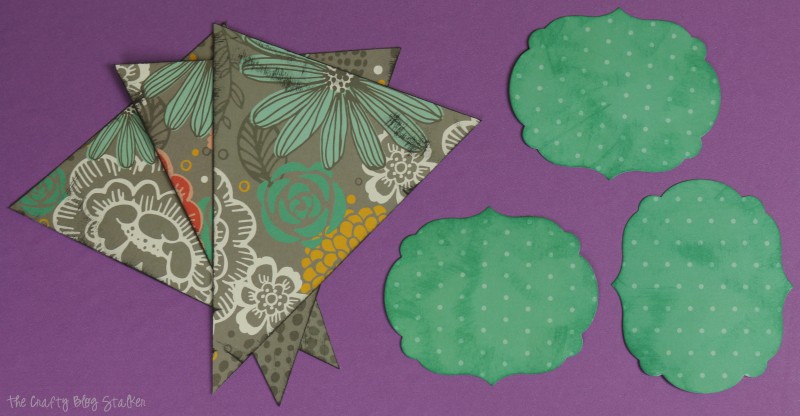
I knew right away that I wanted to make a pennant banner out of this beautiful paper.
Did you know that you can cut 8, 6-inch pennant banner pieces out of 1, 12x12 sheet of paper? And it's not that hard!
How to Cut 8 Pennants out of 1 Sheet Tutorial Video
Like videos? I do have a video tutorial if you would prefer to watch the tutorial. Please subscribe to my YouTube Channel so you don't miss out on any future video tutorials!
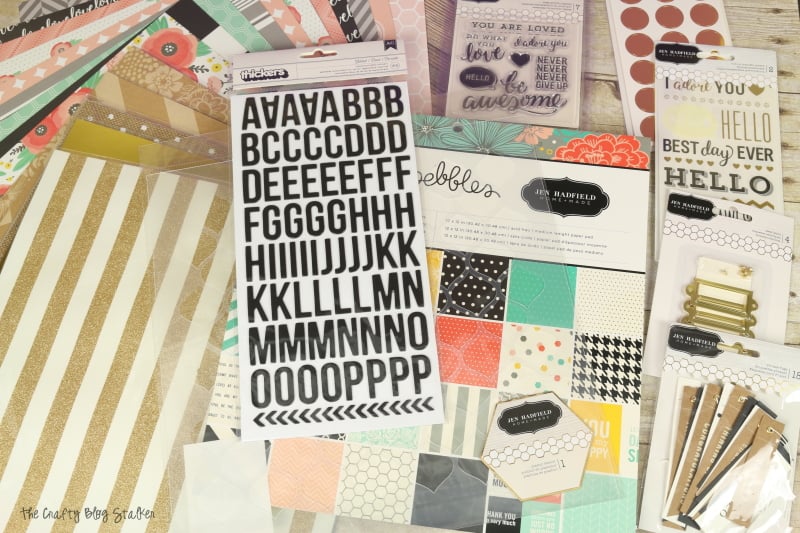
Supplies Used to Make a Fabulous Paper Pennant Banner
Items linked below may go to similar items when exact items couldn't be found online. Links are affiliate so when you purchase, I will get a small kickback to help fund the next tutorial!
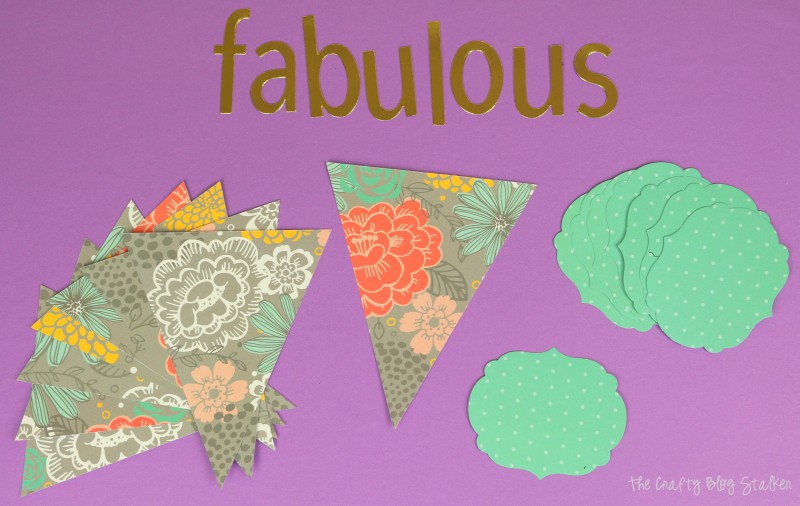
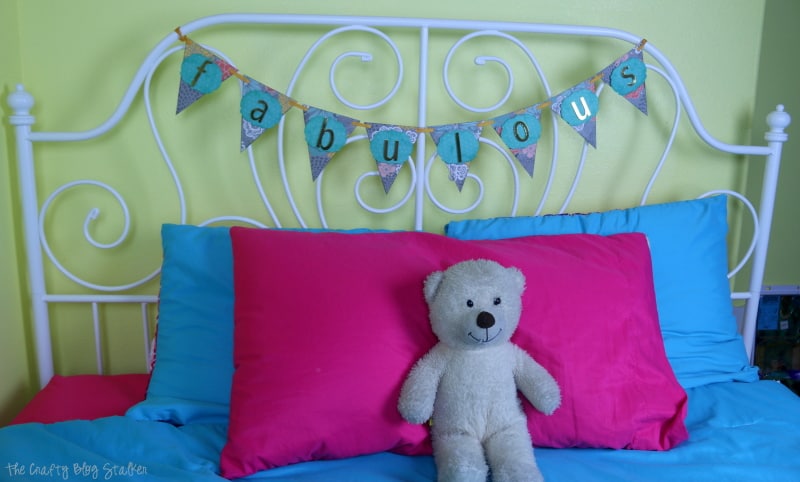
How to Make a Fabulous Pennant Banner
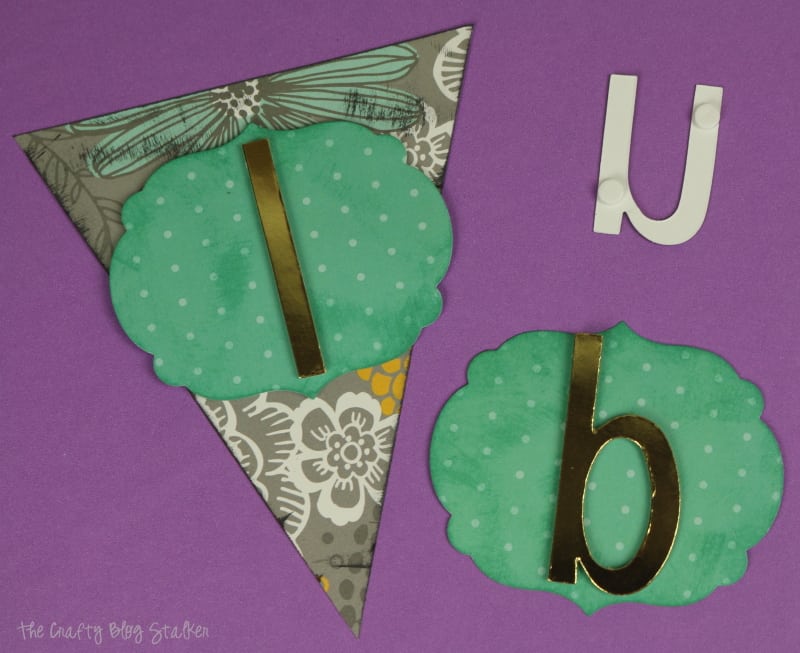
After the pennants are cut out, it's time to layer and design the banner. I used the gold foil cardstock to cut my letters out, and I have to tell you, this paper is shiny, sturdy, and gorgeous!
Then I chose a coordinating cardstock and cut out label shapes to layer on the pennants. I sued the Big Shot to cut out both the letters and the label shapes.
I love adding ink to paper. I think it adds texture and makes it so it doesn't look so flat. To do this scrape the edge of the paper or cardstock on a coordinating ink pad.
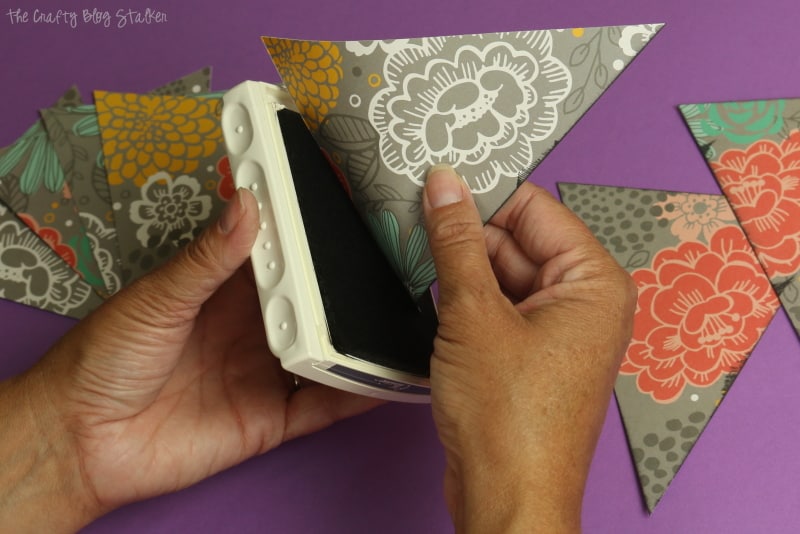
Ink the edges of the pennant banners and the label shapes. Don't they look awesome?!
The next step is layering. I used adhesive foam dots to make the layers "pop" and stick up from each other a little bit. This also helps add dimension so the layers of paper aren't so flat.
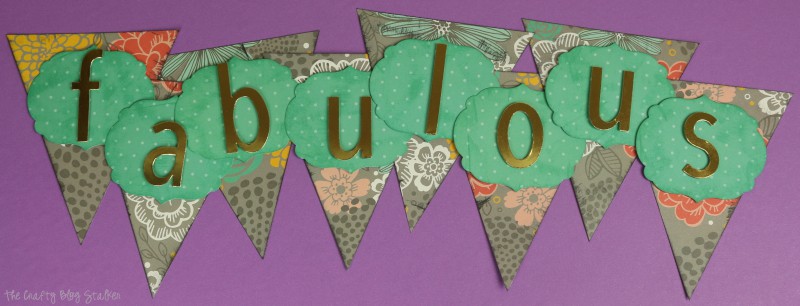
Do you ever have that moment of panic, when you're all done but not sure if you spelled it right? Yeah, I got them to this point and said, "uh oh!" I may have googled fabulous to make sure I didn't mess up - whew. I'm good. 🙂
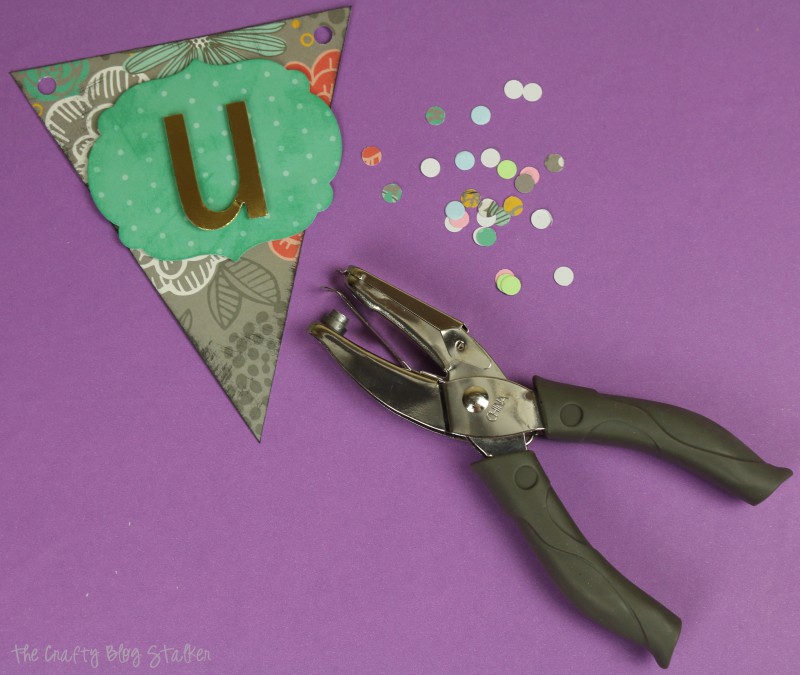
I used a hand hole punch to punch holes in the corner to run the ribbon through.
When the banner was finished I hung it on my daughter's bed because she needs to know how fabulous she is every morning and night.
Since you can make 8 pennant banners out of one sheet of paper, what other words could you make for your banner that are 8 characters or less? I thought of family, summer, smile, and welcome.
Share and leave a comment below and tell me what word you would make?
Crafting Essentials
- The Cricut Cutting Machine is easily my favorite crafting tool. We use it in so many of our tutorials!
- These MakerX Crafting Tools are perfect for keeping in the craft room and are always ready when needed!
- This Fiskars Paper Trimmer is easy to use and cuts nicely without frayed edges.
- These Scotch Precision Scissors cut like a dream, and you get multiple pairs in a pack!
Kati
I love this tip. I would have made it way harder than that! I am in the market for a new paper cutter, do you like yours? Can you let me know what brand it is? THANKS!
Melanie redd
Hey Katie,
These are so cute! I love the pennants hanging on the headboard. What a clever idea~
I was "parked" by you today on Mommy Moments.
Glad to have the chance to read your posts and to see your creative in action.
Blessings,
Melanie
Tina Wilkerson
Great video! I usually make banners with my Cricut, and it uses so much more paper. I will be trying this technique, soon.
Katie
Thanks for stopping by! When you give it a try, let me know it works for you.
Chris Dodsley @made by ChrissieD
Love the video - gives me an idea that I could use this to cut fabric in exactly the same way 😀 - Chris
Katie
Using this technique with fabric is genius! I didn't think about that.
Fiona - Coombe Mill
A lovely banner from your 8 pieces
Fiona - Coombe Mill
Do pop over and join my Trash2Treasure link up, this is a lovely upcycle tutorial
Katie
Thank you, Fiona! I m so glad that you stopped by.
Edye
Love the video, Katie! Great idea 🙂
Katie
Thanks Edye! I am so glad you like this little trick!
Julie
Thats brilliant, I would have marked them along one side and them probably only managed 6 with some weird wasteful half triangles! Pinning 'cos you just never know when you are going to need to remember this!
Katie
Thanks Julie! It is a nifty little trick! 🙂
Sarah @ Foxy's Domestic Side
How awesome is this?! So cool! Love it, off to think of some reason I need a pennant...how can I incorporate this into my daughters birthday party...hmmm...???
Katie
Thanks Sarah! Happy Birthday to your daughter - and of course she needs a birthday banner!
Deana
What kind of paper trimmer did you use on this? I'm just a beginner but have more time now to craft so I know it will be used. Thank you.
Katie
Thanks, Deana! With this project, I used a paper trimmer made by Stampin' Up! You should be able to use any trimmer to use this technique to cut pennant banners.
Although, recently I purchased this Fiskars trimmer http://amzn.to/2cmdr8b (affiliate link). This is by far my favorite trimmer I have ever owned. If you're looking for a trimmer, this is the one I recommend. I like that the arm goes to 15 inches instead of the standard 12, it has a large cutting surface, and my very favorite feature is the sure cut wire line. It shows exactly where that blade is going to pass through so there is no guessing.
amy
so what if you want to do 2 layers of colors ? What size would you cut the next set?
Katie
Great question Amy! It depends on how much of the back layer you want to see from the first layer. This will method will work for any square piece of paper. So for the top layer, maybe try a piece of paper that is 11.5 x 11.5. You may have to try a couple different sizes till you get the look you are looking for.
Johnston
This is so helpful, especially the video will help me to follow you. Love this so much.
Katie
Thank you, Johnston! I am glad you found this tutorial helpful.
Kelly
Thank You, worked perfectly!!!!!
Katie
You are so welcome Kelly!