

Learn how to sew a fabric wallet that's as stylish as practical! This easy tutorial guides you through creating a custom wallet in no time.

I'm so excited about this project!
This fabric wallet is an easy DIY and thoughtful gift idea, perfect for beginners.
In fact, this year, these wallets will be handmade gifts for five people!
They're simple to make, budget-friendly, and will bring a smile-mainly because I'm adding some cash. What's a wallet without some money?
Everybody needs a wallet, and this one is sure to be a hit! Let's get started!
Supply List
This is an excellent project for fabric scraps! Here is what you'll need.
- ¼ yard of Tweed or other thick fabric
- ¼ yard Cotton Fabric for the pockets
- ¼ yard Cotton Fabric for the lining
- Fusible Interfacing
- Large Grommet (optional)
Cutting List
- 1 - 4 x 9-inch piece of tweed fabric for exterior
- 2 - 4 x 9-inch pieces of fabric for the pockets
- 3 - 4 x 9-inch pieces from the lining fabric
Instructions
Use ¼ seam allowance UNLESS specified otherwise.
Start with the two 4 x 9-inch pocket pieces.
Fold in half lengthwise and top stitch along the fold with a sewing machine. Repeat for both pieces.

Lay the sewed pocket piece on top of the lining piece.
Pin it in place 1 ¼ inches from the raw edge of your lining.
Top stitch along the bottom of your pocket piece. This creates the bottom of your first card pockets.

Line up your other pocket with the bottom edge of the lining piece.

Lay the second 4 x 9-inch lining piece on top with the right sides together and sew along the top edge.
Turn the pieces right side out, press, and top stitch along the top.
Sew a line directly down the middle and on the sides to create card slots.

Baste your pocket piece (above) onto the right side of your last 4 x 9 lining fabric. This creates the lining for your money pocket.
Line them up along the bottom and only baste along the sides and the bottom. This will create the dollar bill pocket.
The 4 x 9-inch lining piece will stick out above your pocket piece.
Follow the interfacing directions and attach the exterior fabric to the wrong side of the wallet.

Place the exterior piece and the pocket pieces, right sides together.
Sew around the outside, leaving about a 3-inch gap in the bottom to turn. Make sure to backstitch around your opening.
Turn, pulling the fabric out through the hole so the right sides are facing out.
Press the gap and top stitch all the way around, making sure not to sew up the money pocket.
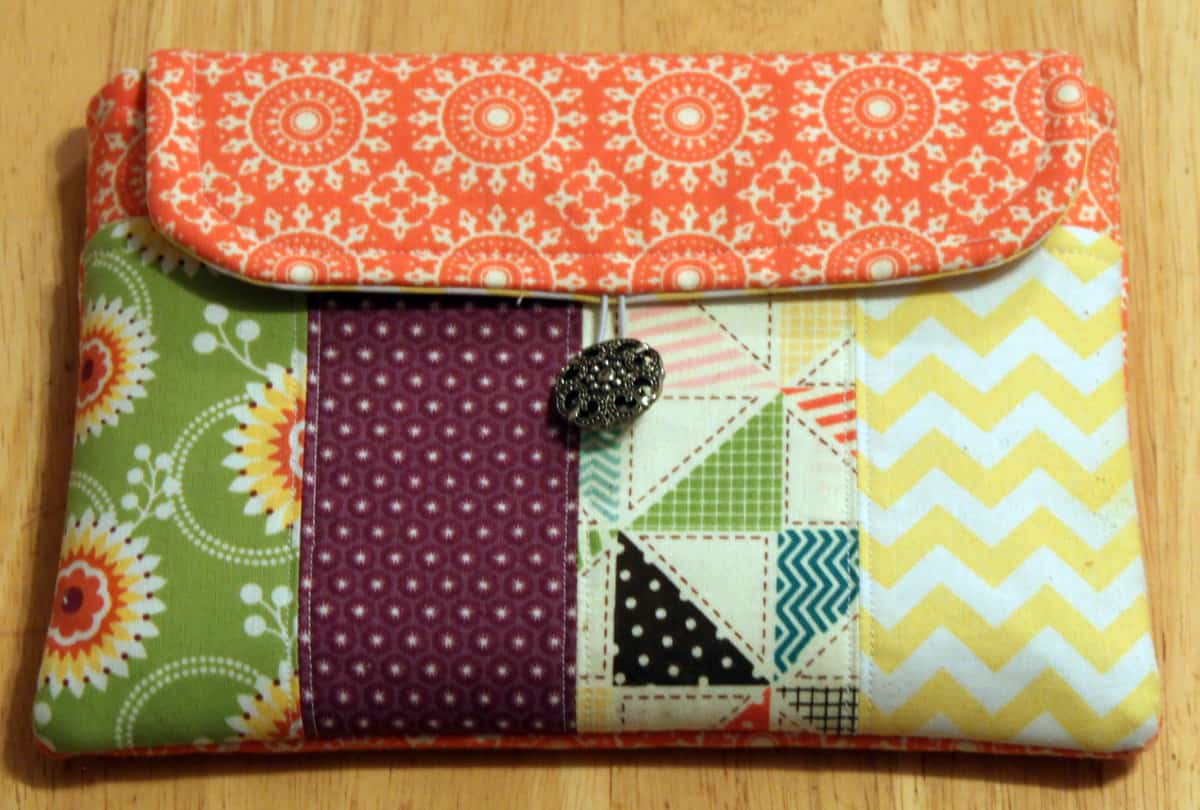
Last but not least, accessorize it!
I chose to put a grommet in the front just for a little something extra, but you can leave it the way it is or do something completely different. Have fun with it!


More Sewing Ideas
Sewing is such a fun hobby! Here are a few more ideas to keep you sewing.

Courtney Rae
Very cool, & very well done tutorial! I may have to try this out one day!
Betsy J
These are so cute! I love your fabric choice. Thanks for the sweet tutorial!
Kara @ Mine for the Making
LOVE this! Great tutorial and I love the fabric.
ElisabethAndrée
Like your wallet! Thank you so much for the tutorial!!
Pandora31
Love this tutorial! It took me longer to pick out the fabric than sew! Thanks so much!!!
Nat and Holly
This is SO fun. Seriously wishing I had an older boy to make it for (mine's 1.) Definitely one of my favorites from the CSI party! Great tutorial and pics!
Laura
I am so confused. When I finished mine the dollar bill pocket was sewn together. What did I do wrong?
Cindi
The instructions aren’t proper. I had a hard time with the. Took my stuff to my friend and she had sewn a wallet in 10 minutes. She eliminated some steps. Her way was way faster.
Katie Adams
I’m so sorry it was hard to follow. That’s definitely not my goal.
I write tutorials step by step for beginners, but I know everyone has their own methods and shortcuts. I’m glad your friend helped you get it finished quickly.
If you’re willing, I’d love to know which steps felt confusing so I can make it better. 💛