

Add a pop of fun in a small closet with this tutorial for how to Install Cedar Planking. It's the perfect way to add a rustic element!
I shared the design plans for my son's bedroom last week and I'm kicking off his room makeover with his closet. It was originally about 5" deep because there was a shower behind it, but when we remodeled that bathroom we decided to make it a full size Cedar Closet. While this little space isn't quite done, I still have the How to Install Cedar Planking tutorial for you and then a full reveal later this week!
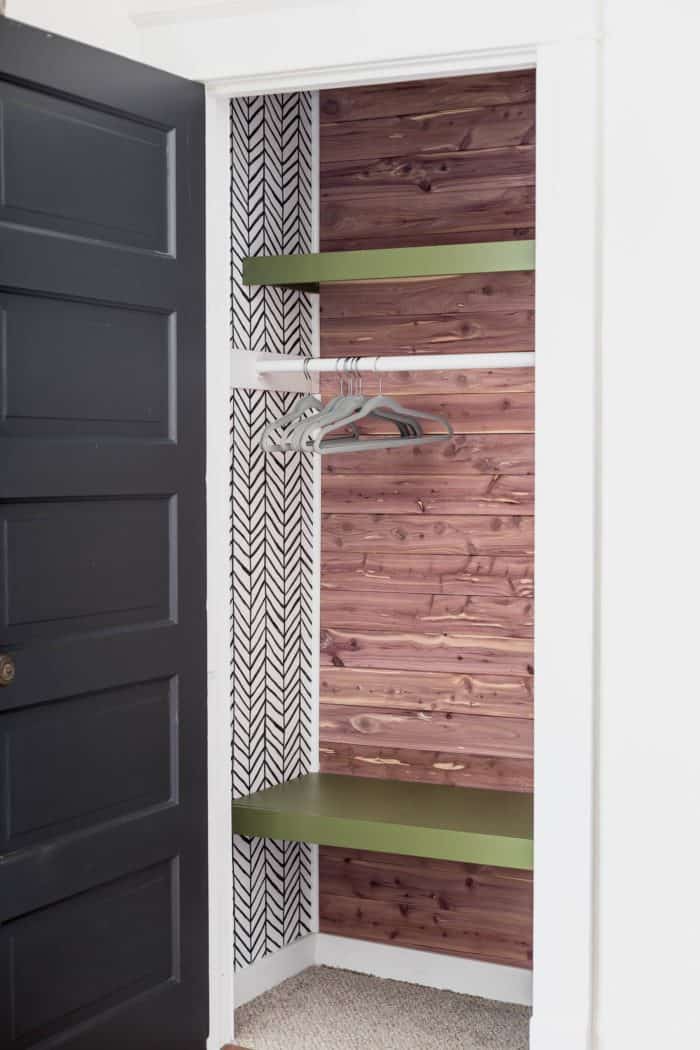
This is a small bedroom and I didn't want to do anything too crazy just thinking about resale so I thought a closet would be a fun way to bring in some character and a pop up fun for my youngest!
His room is going to have a modern explorer theme because this boy loves being outdoors and he's such a happy kid in general. I felt like he needed something bright and cheery, but still with a rustic touch. Ultimately I went with these Cedar Shiplap planks for the back of his closet and that rustic element. (It also comes in tongue and groove if you prefer that method.) I've installed both and they are both extremely easy! You can see how I used it in our very first flip house.
You won't need very many tools to install this either, so if you're new to DIY projects this is a great way to test the waters.
How to Install Cedar Closet Planks
Supplies:
- Cedar Planks
- Miter Saw, Circular Saw, or Handsaw
- Level
- Pencil
- Nail Gun (or hammer and nails)
- Tape Measure
- Stud Finder
How to Install Shiplap Cedar Planks
First determine a layout plan. For this closet I didn't want any seams on the back wall, but rather a very clean modern look. In the first closet I staggered them and you can see how that turned out here. When you don't stagger them you definitely end up with a little more waste.

Once you know how you are going to install the planks you can measure and start making cuts. I installed mine between two walls so I just measured between there to determine my cut lengths.
Installing Shiplap Cedar Planks
In this particular closet there is no flooring or baseboards, so I just started at the bottom, but if you have baseboard you can start right on top of that. The most important thing to remember when installing planking is that your first row has to be completely level. This allows for the following planks be level. I will say that I still checked every board to make sure it was level because not all boards are perfect so sometimes they are slightly off, but it's so small you can easily adjust for it with just a slight movement.
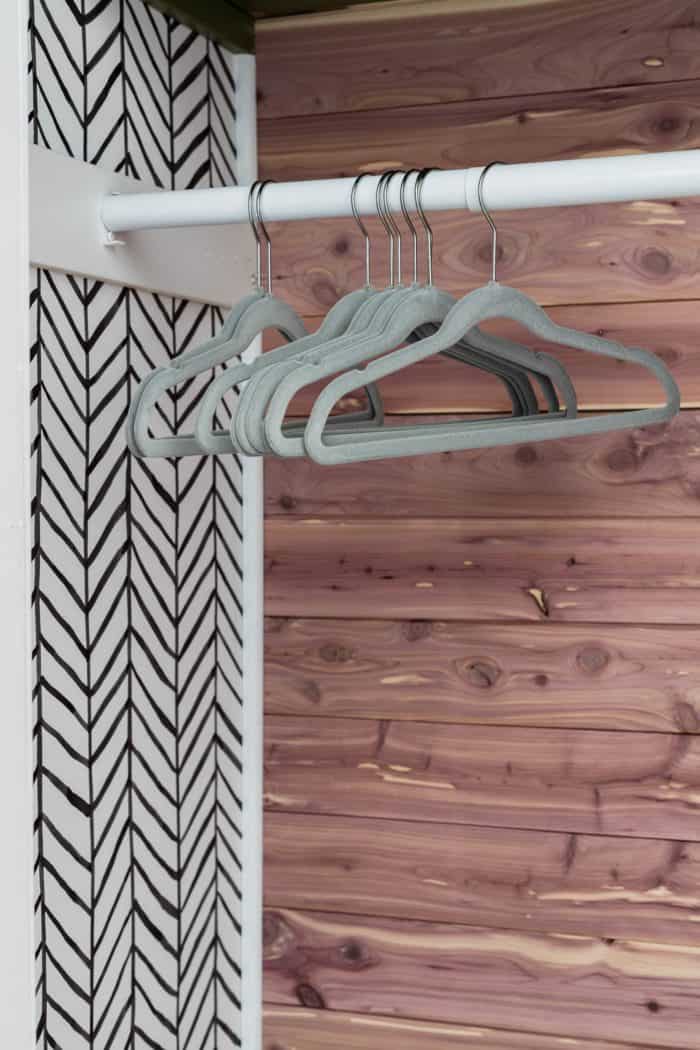
From there I used my finish nailer to attach the planks directly to a stud. If you don't know where your studs are, this is the perfect time to use your stud finder! This one is my favorite!

Keep installing one row at a time until you reach the top of your wall. It's always best to nail into a stud, but as long as you hit a stud in at least two spots you can use nails just in sheetrock to make sure it sits flush against the wall. Some people use an adhesive to attach planks, but I've never seen the need for that, especially in a smaller closet. If you install them vertically though I would definitely recommend an adhesive.
Trimming out a Cedar Closet
As you might have noticed, the edges of my planks aren't perfectly straight. Very rarely will you come across a wall that is the exact same measurement all the way up and down. For that you have to adjust as you go and it's pretty impossible to have it perfectly straight. So you just simply add some trim with your nail gun to cover up those edges, caulk and paint if necessary.


And that's it. With cedar there's no need to seal, paint, or stain so it's crazy simple!
Adding shelves in a Cedar Closet
Once I finished installing the cedar planks I began working on the faux floating shelves. This is probably my favorite method to create shelves! I've used it many times and you can get the tutorial for those here. You won't need to do anything special. You can attach your shelf support directly to the cedar, just make sure you are still going into a stud. Sometimes it's a good idea to make note of where your studs are before you cover the wall in cedar planks!

So that's it for the bones of this closet! I can't to share the final reveal with you and how we will make this space functional for our 6 year old! Make sure and subscribe so you don't miss out!
How to Install Cedar Planking

Mary Loveland
Cute little closet; those floating shelves really look good and that nice piece of carpet finishes the deal! Job well done.
Natalie
This is stunning work!
Anonymous
Thank you!