

Increase the storage in any room of your house with this easy to build DIY Faux Floating Shelf Tutorial. Customize the finish to match any decor!
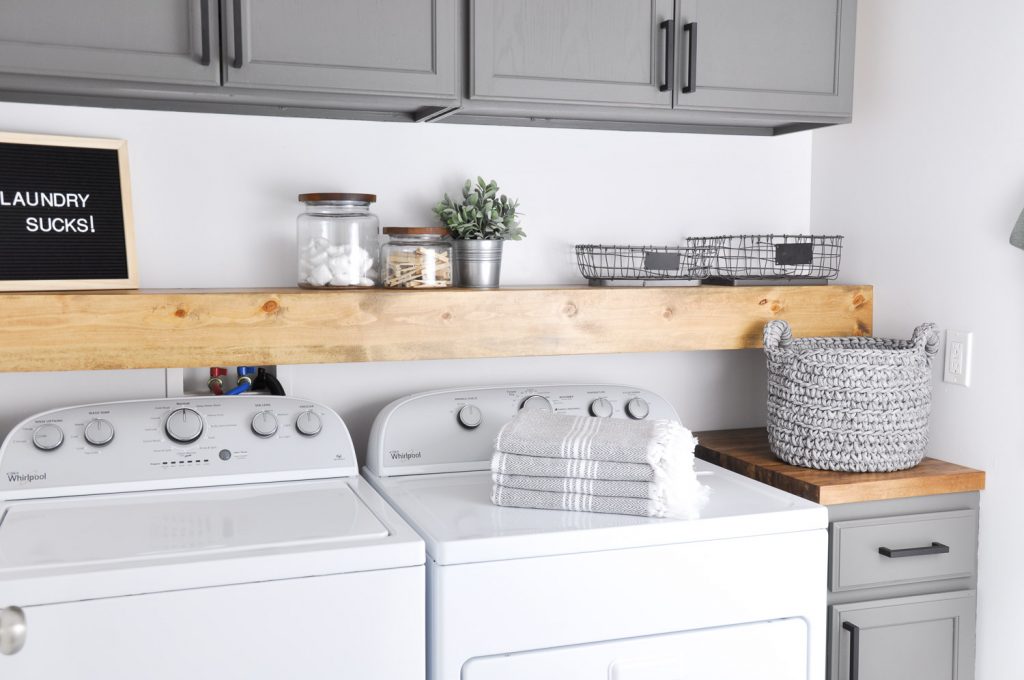
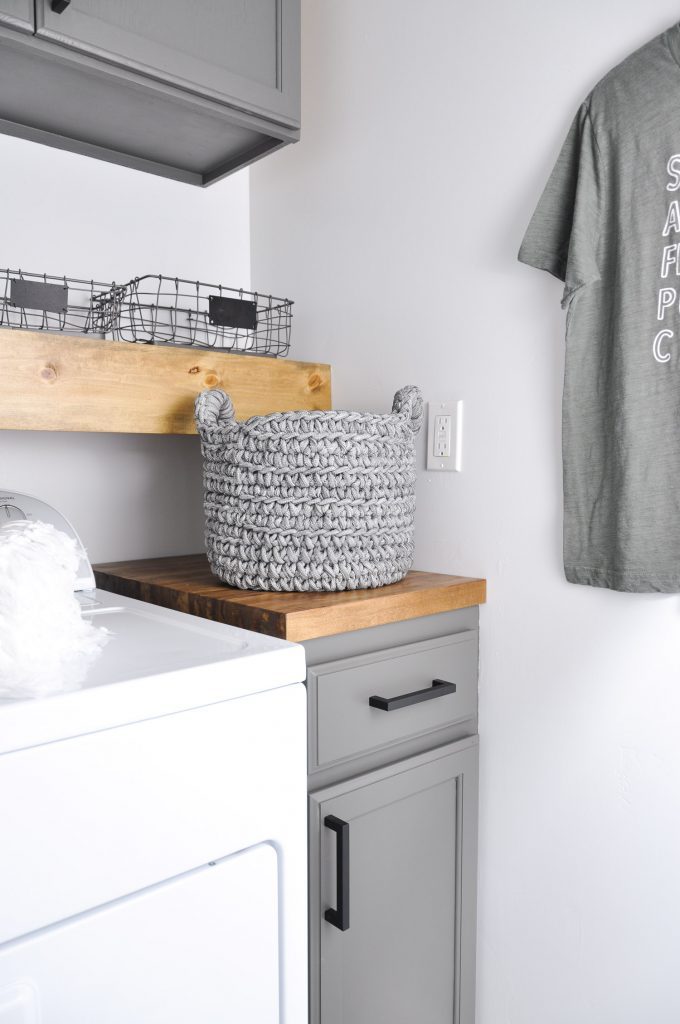
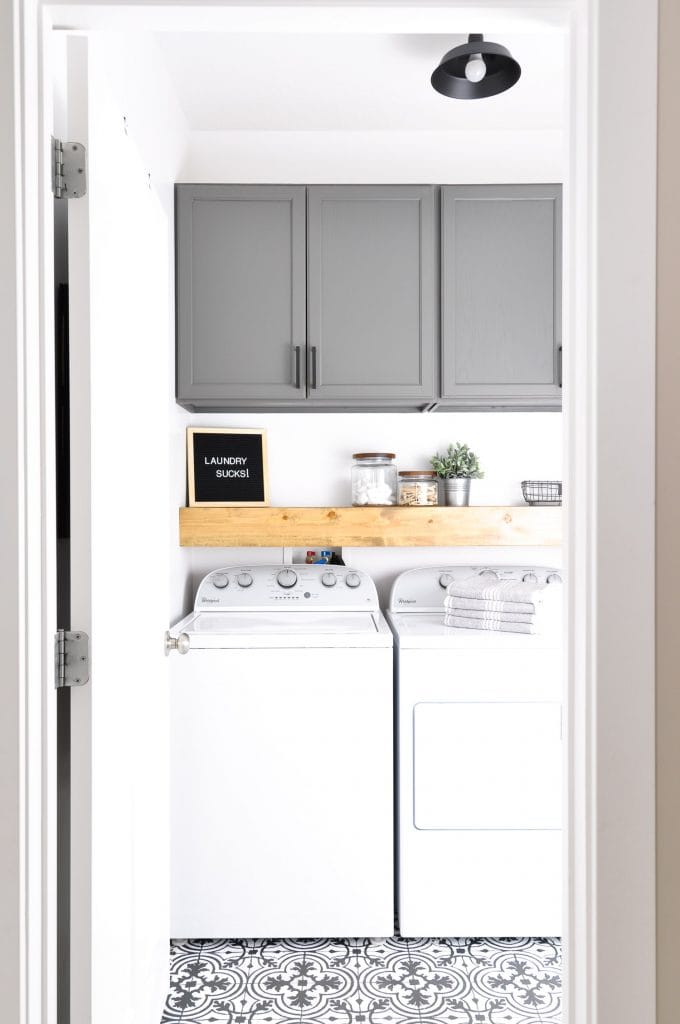
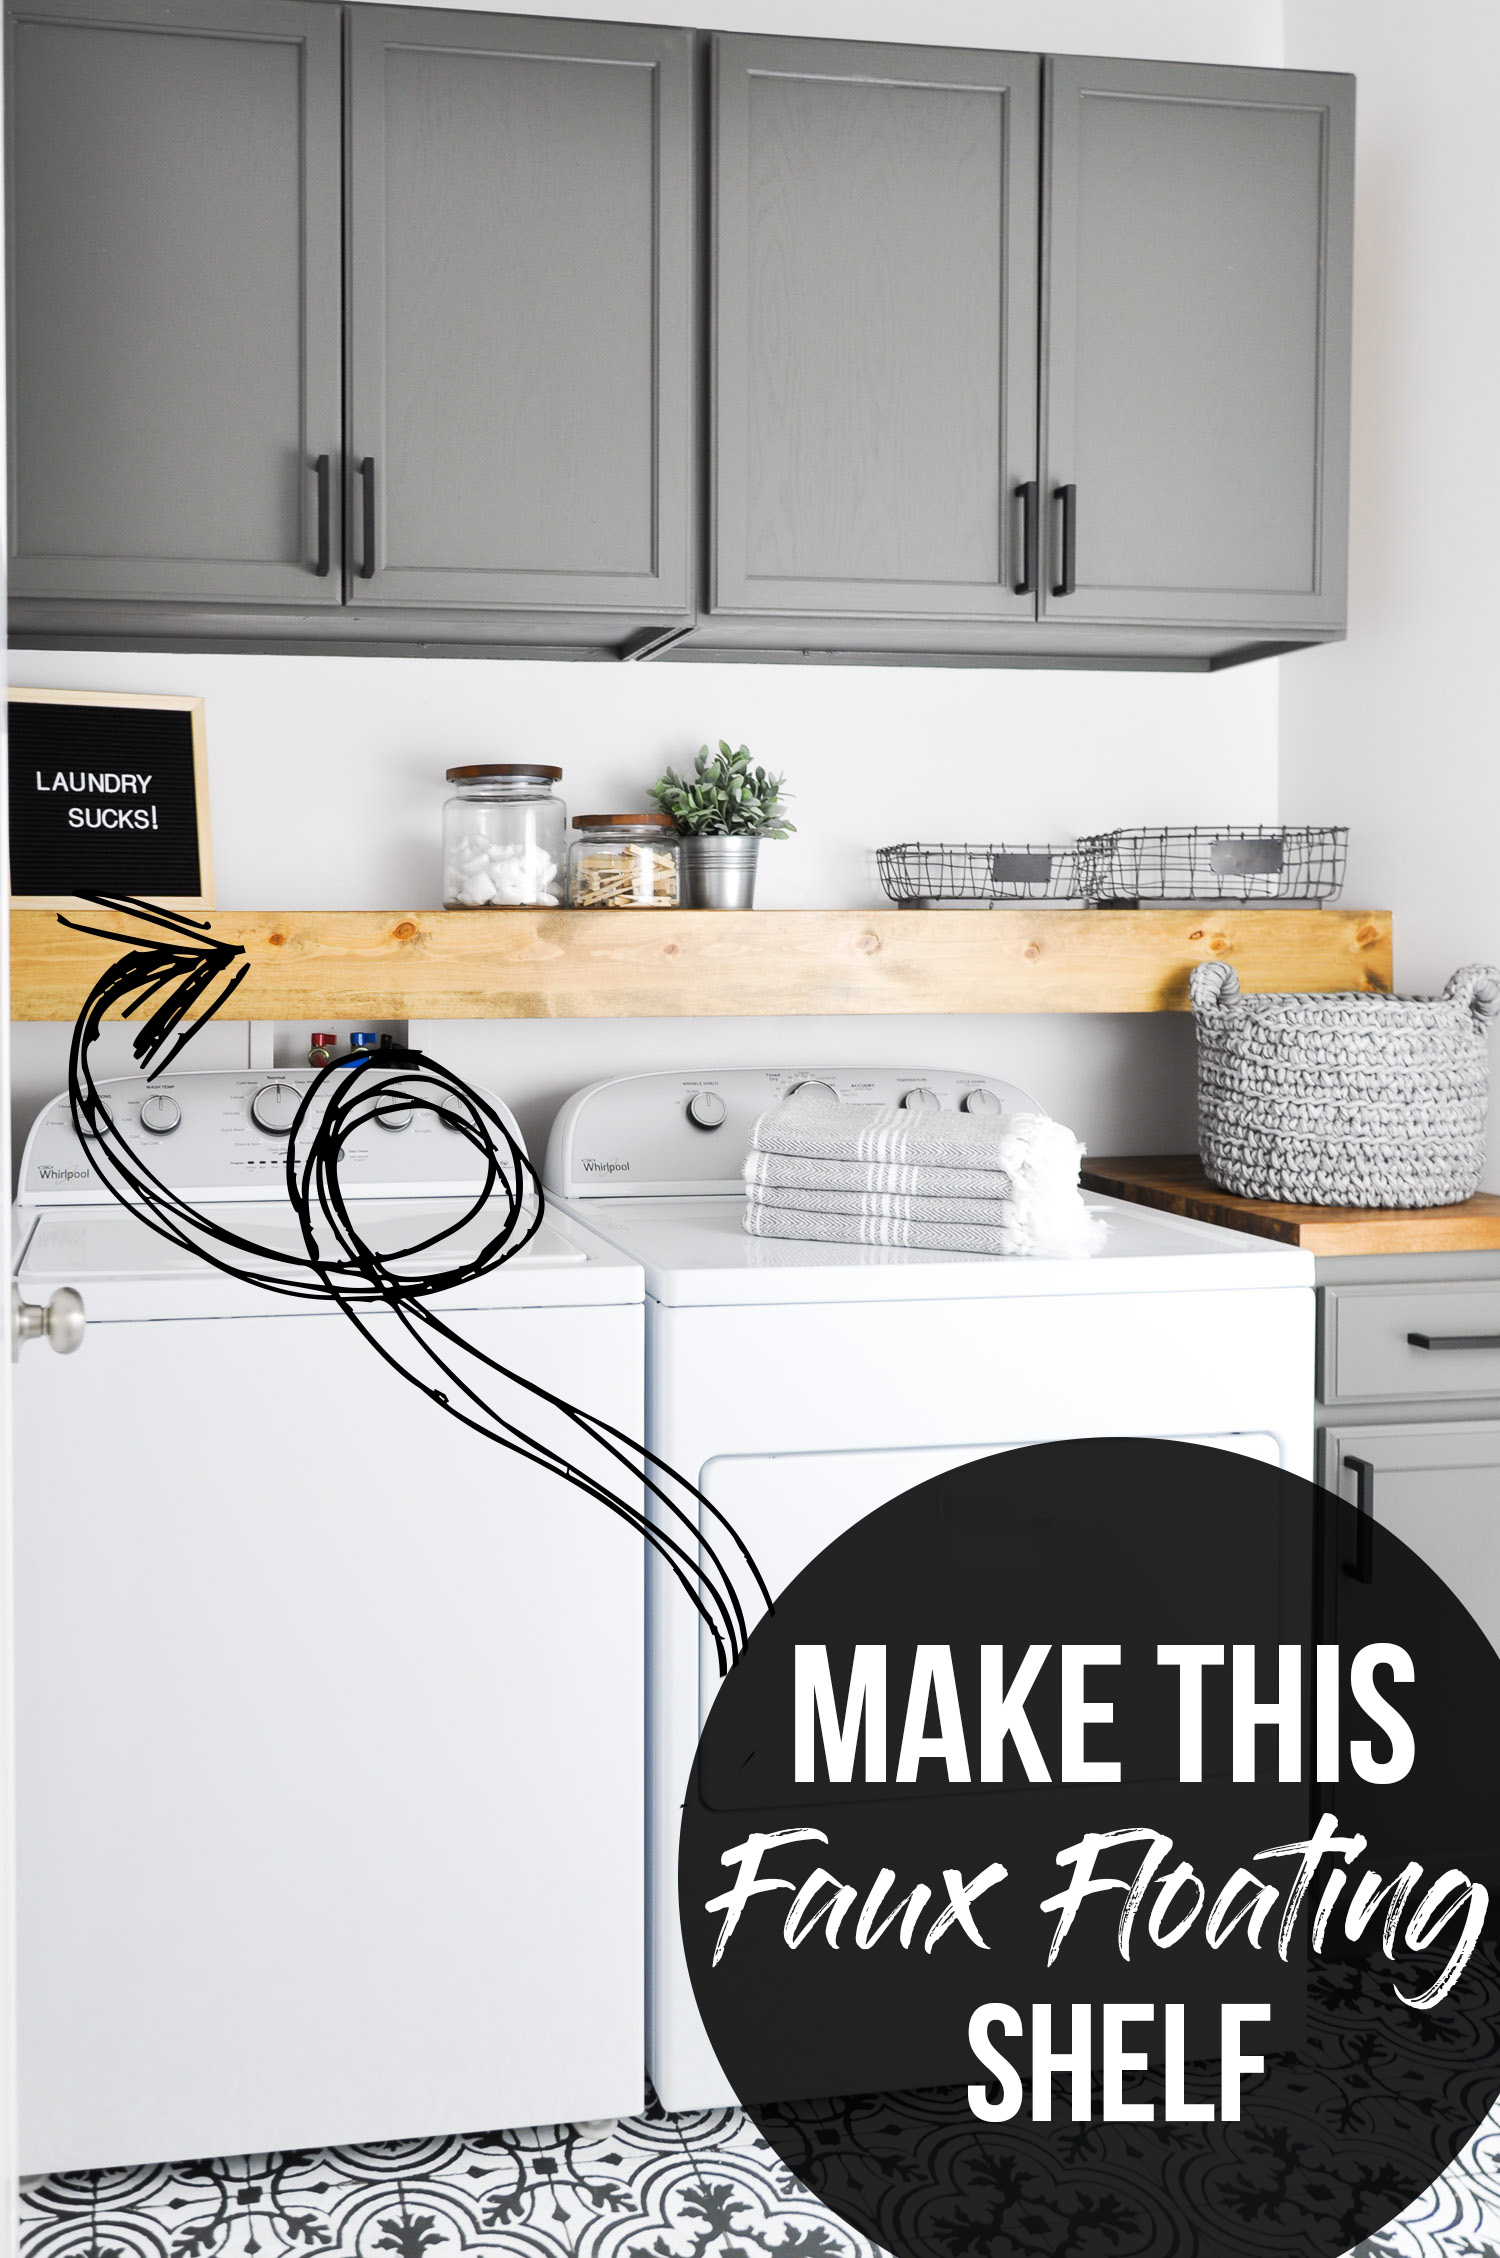
This DIY Faux Floating Shelf Tutorial from my Laundry Room has probably been the most requested tutorial in the history of this blog! It's a very easy build that instantly increases storage allowing you to display decorative items, jars for organization or leaving items out for easy accessibility.
This Faux Floating Shelf can essentially be placed in between any two walls, so the measurements will really depend on your space, but I'll give you tips along the way.
Tools Needed:

Lumber and Supplies:
All Cuts of wood will depend on your specific space, so measure before making any purchases!
- 2x4
- 1x6
- 2x10
- Wood screws (3 ½" and 2 ½")
- 1 ½" Finish nails
DIY Floating Shelves
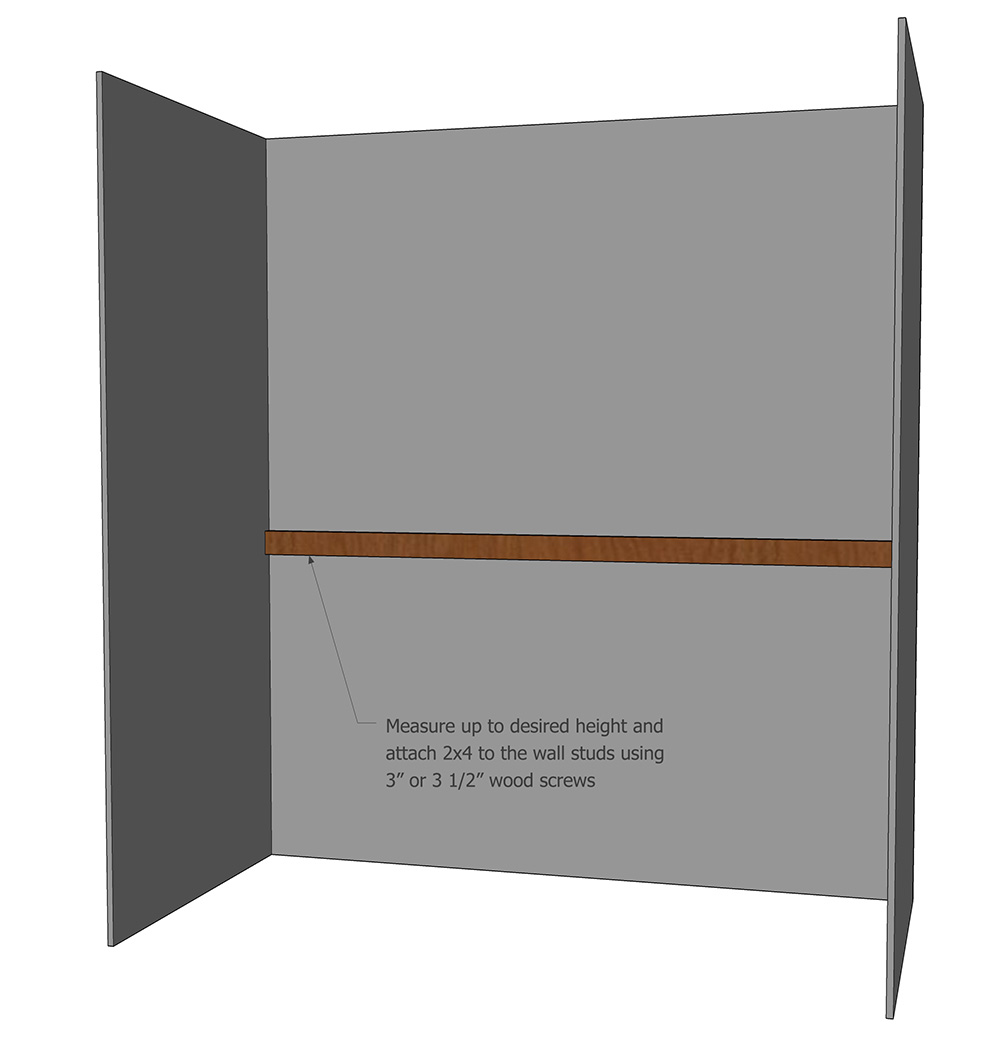
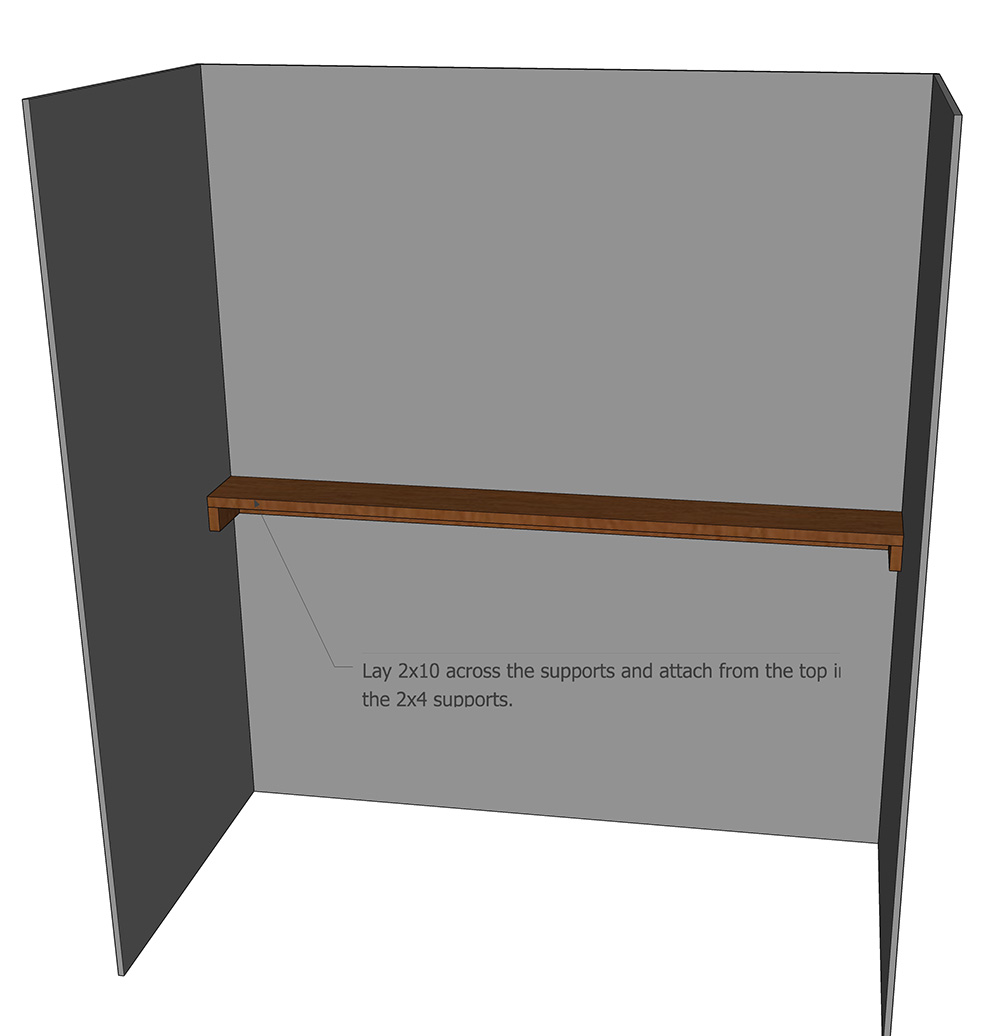
Step one. Using a stud finder, mark the studs in your wall. Measure the width of your shelf and cut a 2x4 to fit that width. Then attach the 2x4 to the wall using your 3 ½" wood screws (where you marked your studs). When deciding how high to place your shelf, please note that you will be putting a 2x10 on top of this 2x4 so it will raise the height 1 ½". You can adjust accordingly.
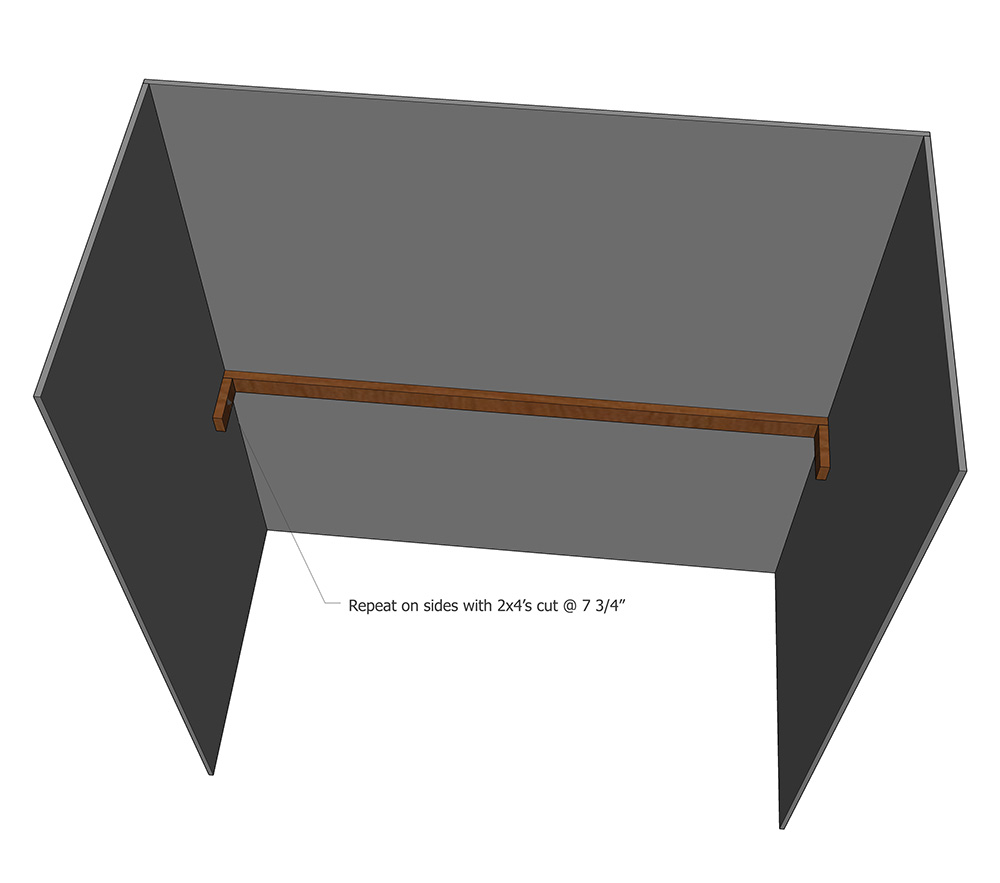
Step two. After the 2x4 support is in place it's time to attach the side supports. For this tutorial I used a 2x10 for my shelf so your side supports will need to be cut to 7 ¾". If you change the depth of the shelf, this measurement will also need to be changed. I do suggest measuring everything in place rather than just getting to the exact measurements given because all lumber can vary slightly and these 2x4's can't stick out in front of the shelf or it will affect the next step!
Step three. Now it's time to attach the actual shelf. Cut your 2x10 to the width of your rear support (the size you want your finished shelf to be). Place the shelf on top of the supports, making sure your side supports are flush with the front of the shelf. Using your 2 ½" wood screws attach the shelf (from the top) into the supports. You can sink the screws and use wood filler to hide them if you don't want to see the screws.
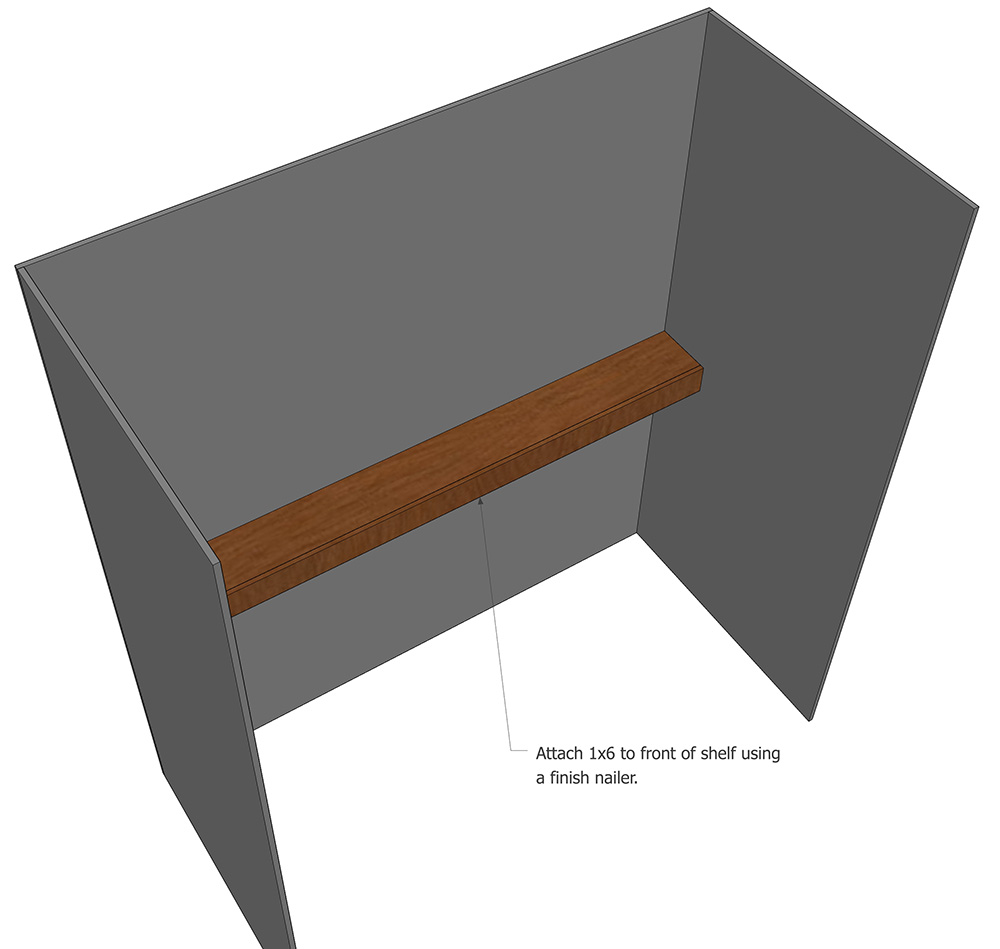
Step four. Next the front board needs to be attached. I used a 1x6, but if you want your shelf to appear thicker you can use wider board, and this board needs to be cut the exact width of the shelf. Hold it up, making sure it's flush with the shelf and use your finish nailer to nail in place. Don't forget to nail it into the side supports as well.
This DIY Faux Floating Shelf Tutorial will leave you with a fully stable shelf for all your storage needs!
Floating Shelves
Shop This Room:
More Laundry Room Posts:
Our Previous Small Laundry Room Makeover
DIY Shelves
Julie @ Restyle Relove
Your laundry looks beautiful Katie. Great tutorial for the shelf too. Thanks for sharing and best wishes, Julie
Katie
Thanks Julie! <3
Jean C.
Thank you for this easy to follow shelf tutorial! I love the way these look-minimalist is a fave of mine.
Katie
Thanks so much! Yes I think I'm slowly turning into an extreme minimalist! : )
Stephanie @ Casa Watkins Living
What a great idea Katie! Love the floating shelf and the painted gray cabinets!
Katie
Thanks so much Stephanie! I'm a big fan of shelving! ; )
Sara
What stain color and what type of wood did u use?
Katie
Hi Sara, I just used regular pine wood from Home Depot. The stain I used was Minwax Special Walnut. : )
Sara
Thanks! 🙂
JessieK
Omgawsh! Finally, a 'floating' self that I may actually be able to do!! Thank you so very much!! Love your site!! =)
Jesse
Where did you get the shelves
Kippi
Your shelf is really pretty and easy!
Pinning!
Have a great day,
Kippi
Jo (A Rose Tinted World)
Great tutorial. What an easy way to add some much needed extra storage space!
Cynthia
Thanks for linking up at the Happiness is Homemade Link Party. Hope you'll come back next week. I'll be featuring you on Sunday. I love your faux floating shelf.
Julie Briones
It was so exciting to see you at Tuesday Turn About this week! I can see why this is one of your most requested tutorials! Great faux floating shelf tutorial, Katie! I'm delighted to be featuring you this week!
Bernadette Young
Thank you for the directions. Your laundry room is beautiful. Where did you find those gorgeous gray cabinets?!
Katie
These were actually unfinished cabinets I purchased from Home Depot and painted in Cracked Pepper from Behr. : )
Linda Johnston
I love this. An aswr to my ugly laundry room that doesn't have enough shelves that are low enough. Who needs a step stool when doing laundry? Thanks fo sharing.
Selma Flores
Love, love, love this project!! May I ask, what color did you stain the wood for the floating shelf.