

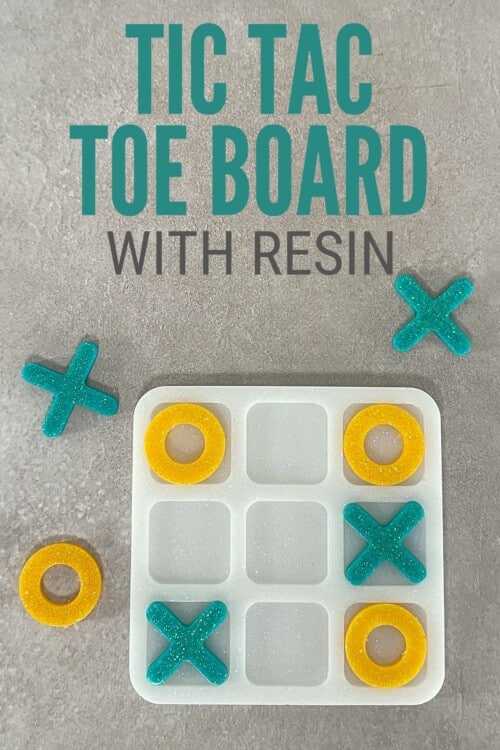
A tic-tac-toe game is surprisingly easy to make. This tutorial will show you how to mix and add the resin to the mold to make your own tic-tac-toe board.
Have you ever created resin art before?
Using resin can be a bit scary when you are new. But I am here to walk you through it step-by-step, so you won't need to be worried.
Craft Tutorial Video
If videos are your thing, you're in luck-I've got a full tutorial ready for you!
Subscribe to my YouTube channel and stay inspired with every new project.
Supply List:
Some supplies were gifted at no cost. When exact item are unavailable online, links may point to comparable products.
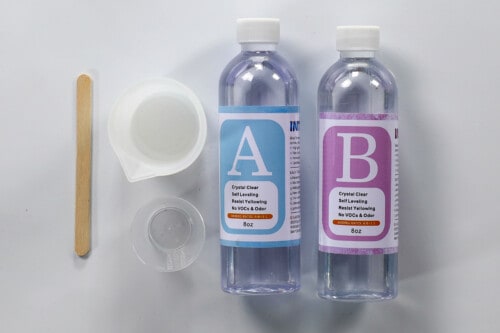
- Epoxy Resin
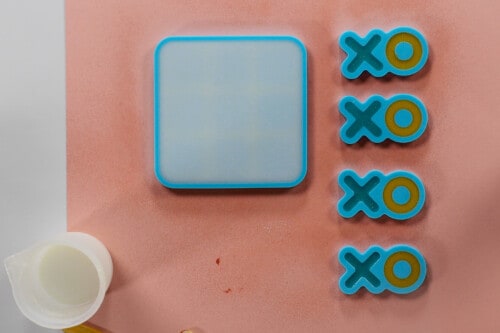
- Tic Tac Toe Resin Mold
- 3 Silicone Mixing Cups
- Stir Sticks
- Yellow Colorant
- Turquoise Colorant
- White Colorant
- Yellow Glitter
- Turquoise Glitter
- Isopropyl Alcohol
- Small Spray Container
How much resin to make?
Before we begin mixing resin, we need to know how much to make.
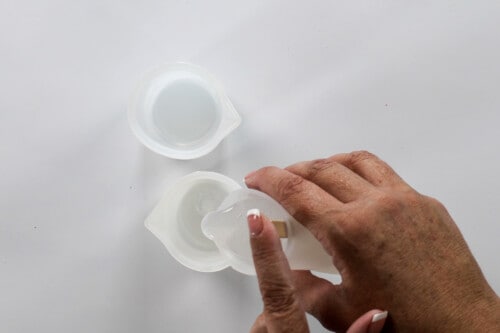
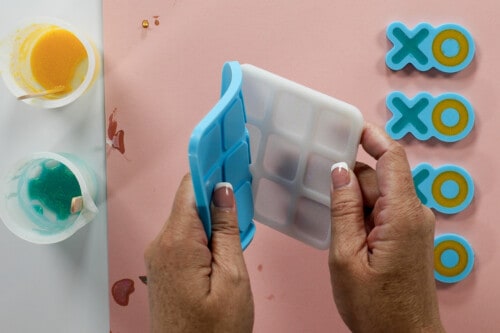
I find it easiest to fill a small measuring cup with water. Note where the water is on the cup. For example, let's say I filled the measuring cup with 4 ounces of water.
Pour that water from the measuring cup into the mold.
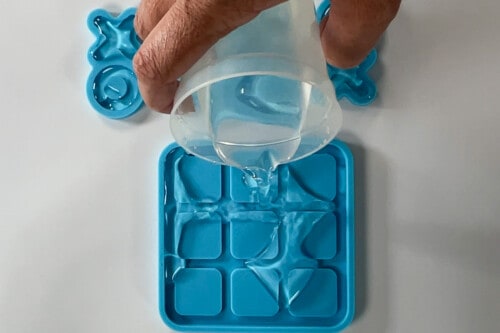
After the mold is filled, place the measuring cup upright on a table and see how much water is left.
For my example, I started with 4 ounces of water. After I filled the mold, I was left with half an ounce of water. That means my mold will take about 3 ounces.
Plus, you always want to make a bit extra. This means I will make 4 ounces of epoxy resin.
Mixing the Resin:
According to the direction for the resin I am using, I will mix equal parts of A and B together.
Since I need a total of 4 ounces, I am going to combine 2 ounces of A compound and 2 ounces of B compound into a silicone measuring cup.
This mix should be stirred for about 2 minutes, scraping the sides and bottom as needed.
If the mixture isn't stirred properly, the resin will not cure properly. So, it is important to stir thoroughly.
Adding Glitter and Colorant to the Resin:
For this Tic Tac Toe silicone mold, we need 3 colors of resin. So I pour 1 ounce into 2 other silicone measuring cups, leaving my first cup with 2 ounces.
The X's and O's for the board will come from the 1-ounce measuring cups.
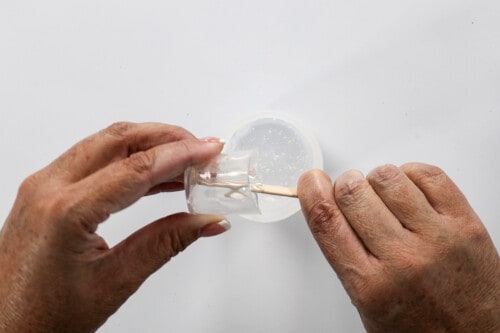
In one 1-ounce measuring cup, I add a couple of drops of yellow colorant and a good shake of yellow glitter. Stir until well combined. There is no set amount; just add colorant and glitter until you get the look you want.
In the other 1-ounce measuring cup, I add drops of blue and green colorant to make my turquoise color and a good shake of turquoise glitter. Again, stir until it is well combined.
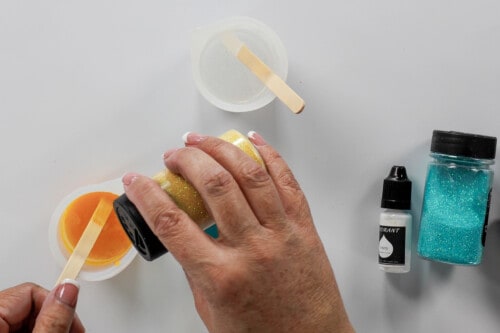
I haven't added glitter or colorant to the 2-ounce measuring cup yet. I wanted to ensure I had enough resin for the Xs and Os.
Pouring the Resin into the Mold:
Slowly Pour the yellow glitter resin into the Os of the silicone mold, being careful to not overfill.
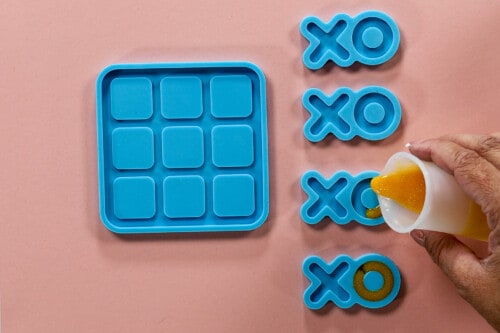
Then, pour the turquoise glitter resin into the Xs of the mold. I used a wooden stir stick to help push the resing to the ends of the Xs.
Once I knew I had made enough resin for the Xs and Os, I added white colorant to the 2-ounce measuring cup and a good amount of white glitter as well.
Then, pour the white glitter resin into the board part of the mold.
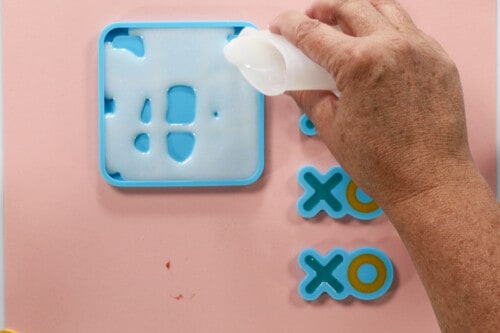
You may see little bubbles at the top of the resin. To get rid of these bubbles, pour undiluted isopropyl alcohol into a small spray container and spray the resin molds.
This will not affect the resin at all; it just pops all of those little bubbles, resulting in a nice smooth surface.
The resin will need to cure for a full 24 hours before unmolding, so I left the resin molds as is until the next day.
Unmolding the Project:
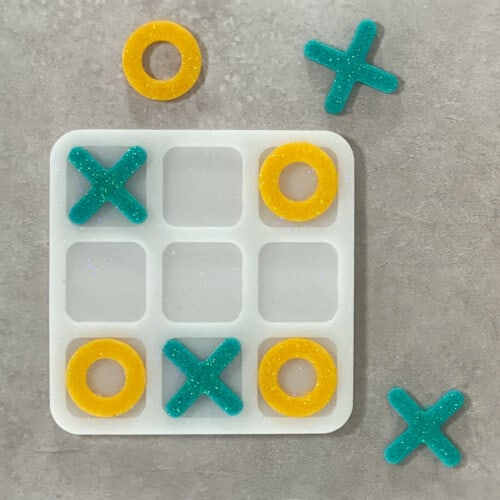
Now that the 24 hours are up, it is time to unmold our pieces. This is my favorite part of resin projects!
Carefully peel back the silicone molds from the resin pieces.
This finished tic tac toe board is so cute!! I will definitely be challenging everyone in my family to this classic game! 😁
This is a perfect size, not large, you could even bring it with you, or you could leave it out as home decor on a coffee table!
Clean-up Tip:
I wanted to make sure and let you know of this clean-up tip that is my favorite!
The tip is to not clean up.
Leave the wet resin in the silicone measuring cups. A day later is when you clean up.
Once the resin is cured you can cleanly remove the resin from the mixing cups by squishing the cups and turning them inside out.
Then run them under a little bit of water and your mixing cups are clean and ready to be used again. Easy Peasy!
Frequently Asked Questions:
What material does epoxy resin not stick to?
Epoxy resin does not stick to plastic materials. Silicone molds are great because you can easily bend the silicone while removing the cured resin without damaging the mold or the project.
Hard plastics can be used as molds, but aren't ideal since removing the cured resin from the hard plastic mold is much more difficult. The hard plastic can't be bent and manipulated to release the resin item.
What mold is best for resin?
Silicone molds are ideal. The resin won't stick to the silicone and the mold can be bent or pulled back to release the resin item.
Where to buy resin and molds?
My favorite website to purchase materials to make resin art is IntoResin.com
Into Resin has everything you need from resin, silicone molds, colorant, glitter, resin tools, kits, and so much more!
They have SO MANY silicone molds, that it is fun to just browse through them, and see all that they have.
Crafting Essentials
- The Cricut Cutting Machine is easily my favorite crafting tool. We use it in so many of our tutorials!
- These MakerX Crafting Tools are perfect for keeping in the craft room and are always ready when needed!
- This Fiskars Paper Trimmer is easy to use and cuts nicely without frayed edges.
- These Scotch Precision Scissors cut like a dream, and you get multiple pairs in a pack!