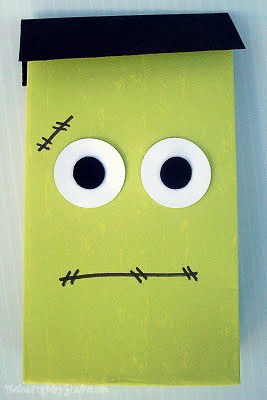
Learn how to make Frankenstein Goodie Bags in less than 15 minutes! Below is the step-by-step tutorial.
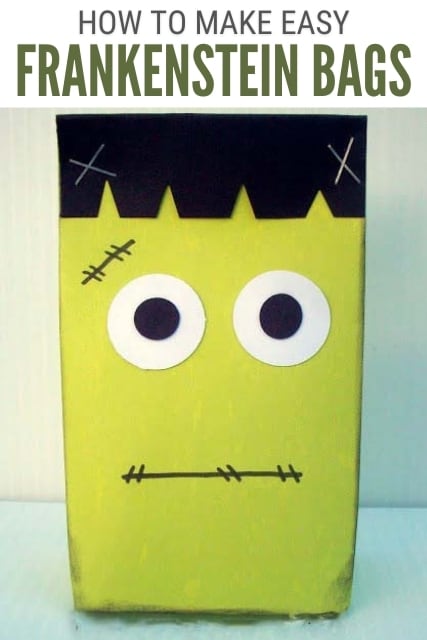
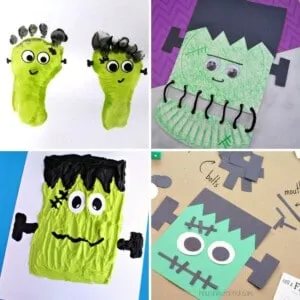
These cut Frankenstein goodie bags are anything but scary, in fact, they are super cute!
These are perfect for Halloween or any monster bash you may have. The best part, they only take minutes to make. Seriously.
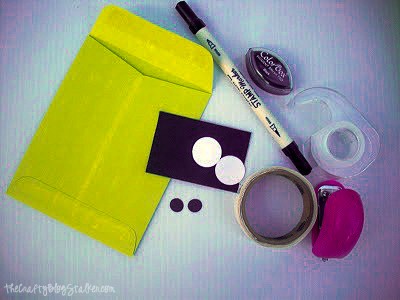
Supplies You'll Need to Create this Project:
Links may go to similar items when exact items couldn't be found online. Help me continue to provide free tutorials by shopping my affiliate links. Please review our Privacy Policy.
- Green Envelopes
- Black Cardstock
- White Cardstock
- Black Marker
- Black Stamp Pad (optional)
- Staples
- Tape
- Scissors
- Glue Dots
- Candy and other fun goodies
Craft Tutorial:
Any size green envelopes really should work – mine measures 5 ¾’ x 4 ½ “.
Cut the flap off the envelope. and fold over the bottom of the envelope – about 1 inch.
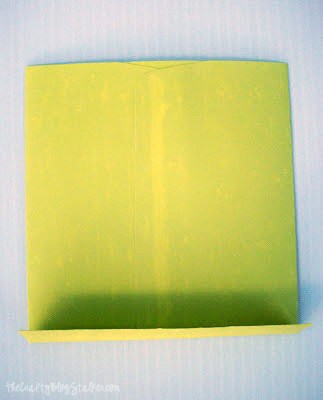
Unfold the bottom and fold over both of the sides – about ¾”
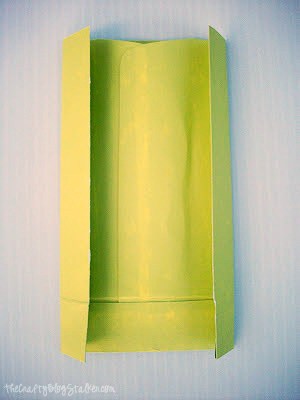
Before turning the envelope into a bag you want to put Frankenstein’s face on because it will be more difficult to put the face on once the bag is made.
Turn the bag over so the folds are in the back. Take your piece of black cardstock and fold it in half length-wise.
Temporarily place it on the bag to get an idea of where you want the eyes.
Take your two white circles and using a glue dot place them where you think the eyes should be.
Using your black marker draw on the mouth and stitches.
Now unfold all of the folds, place your hand inside the envelope and stretch open the envelope.
This part is a little hard to describe so looking at the picture would be helpful. At the bottom, you will want to press down the middle and it will form some corners on each end.
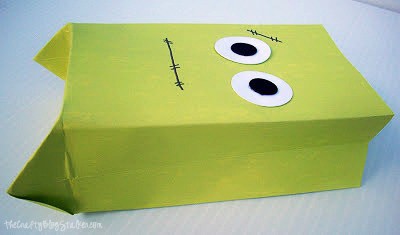
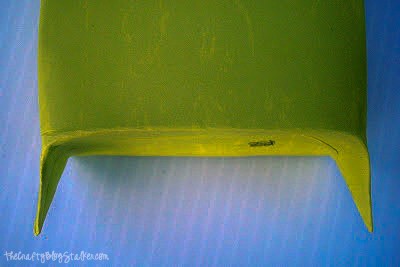
Fold the two corners down and tape them down.
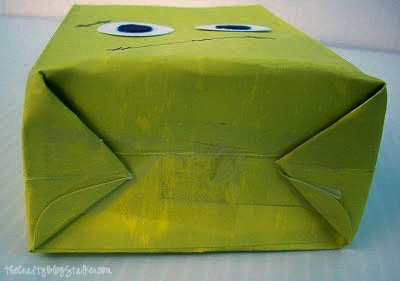
Let’s work on Frankenstein’s hair next. Take your black cardstock and make a few triangle snips along the front.
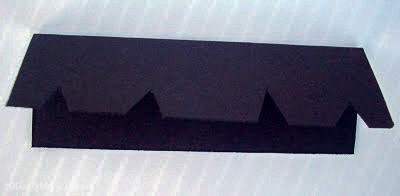
Fill your bag with fun goodies and candy and place the black cardstock over the opening.
Staple each side – I stapled twice in an X to be Frankenstein’s bolts.
Using the black ink, ink the edges of the envelope (this is optional, I just like how it looks).
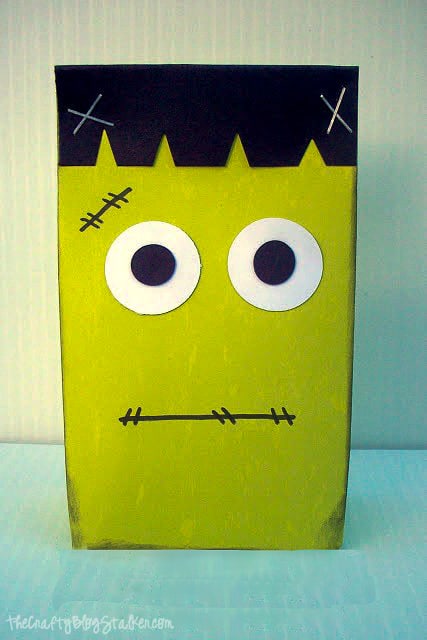
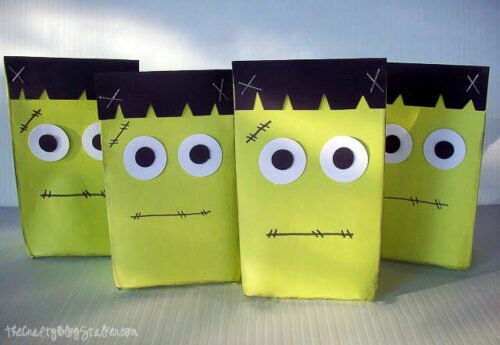
So quick and easy you can make a bunch up in no time!
I hope you liked it and if you have any questions on how to fold the envelope to make a bag please let me know!
Our Crafting Essentials:
- The Cricut Cutting Machine is easily our favorite crafting tool. We use it in so many of our tutorials!
- These MakerX Crafting Tools are perfect for keeping in the craft room and are always ready when needed!
- This Fiskars Paper Trimmer is easy to use and cuts nicely without frayed edges.
- These Scotch Precision Scissors cut like a dream, and you get multiple pairs in a pack!
If you love this tutorial, please give it a five-star review and help me share it on Facebook and Pinterest!


Gina
Cute and simple!
Summer Rumsey
Thanks Gina!
marissa
um ridiculously cute! I love him
marissa
rae gun ramblings
Summer Rumsey
Thanks Marissa - so glad you love him!
Renea (cupcake-n-bake)
These are so cute! I'm going to have to make these.
Summer Rumsey
Thanks Renea! Let me know if you have any questions on how to fold the envelope to make it a bag - that is the trickiest part.
Paula
Summer...What is the name of the font you used for Frankenstein? And where can I find it? IT's perfect for him!!
Thanks...Paula
Summer Rumsey
Hi Paula! I would like to reply to you via email but your email shows up as a no reply blogger. Can you give me your email address or email me at [email protected]? Thanks!
Noreen
Fun idea - and so easy! Thanks for sharing.
Summer Rumsey
Thanks Noreen - it is so very easy!
Amber Monson
Where did you find Green envelopes?
Summer Rumsey
Amber these Green Envelopes were made by Making Memories - I think there is six in a package. If you can't find any let me know, I might have some extra ones.
Lady of Perpetual Chaos
So cute Summer!!!
Sharon @ Desert Willow Lane
Those are adorable! So creative and fun. Thanks for sharing your great idea 🙂
Summer Rumsey
Thanks Sharon! I am so glad you like them - they were fun to make!
Jill
Saw these on pinterest and think they're just great!
Summer Rumsey
Thanks so much Jill!
Tracy - FrugalorFree.com
This is just too darn cute, can't wait to help make these with the girls. I included this in my diy Halloween roundup, thanks for being so dang crafty. 😉
Summer Rumsey
Thanks so much Tracy - I think your girls will have fun making these - thanks for including me in your diy Halloween roundup!
Craftynight owls
Summer you knocked it out of the park again
Megan Romo-Sanchez
where can i find the green envelopes?
Summer Rumsey
Megan - the brand of my cards is Making Memories. I bought them several years ago and I don't believe Making Memories is in business anymore. I bet you find green cards at a card or paper store. We have a store here called XPedex that would probably have every color of card.
Catherine Holt
This is a great tutorial. These are perfect for a Halloween party 🙂
Summer Rumsey
Thanks so much Catherine!