

Thinking about painting wood trim white? This project can completely change the look of your home without replacing a single piece of trim.

After finishing a wood paneling makeover, it was hard not to notice how dark the wood trim suddenly looked.
The trim seemed to be everywhere, and while painting trim is definitely a time-consuming project, the transformation was worth every minute.
If you're looking for a way to brighten a room and update dated woodwork, this tutorial walks through the process from prep to paint.
It is not a perfect method, and there are a few shortcuts involved, but sometimes "done" really is better than perfect.
Skill Level: Beginner - Intermediate
Total Time: 1-3 days, depending on the room size and drying time between coats.
Supply List
Some links may lead to similar items when the exact item is unavailable.
- Plastic Drop Cloths
- Painter's Tape
- Paint Guide
- Paintable Wood Filler
- Sandpaper
- Zinsser Primer
- Paint Brush
- Semi-Gloss White Paint

Before You Start
If you have wood trim sitting directly against carpet, there is no point pretending this is the most enjoyable project on earth. It takes patience, careful prep, and a little bit of faith that you won't ruin the carpet.
- Will paint end up on the carpet at some point? Probably.
- Can it usually be cleaned up if you catch it quickly? Most of the time, yes.
- Should you sand your wood trim before painting? Ideally, yes.
- Was every piece of trim sanded during this project? No.
- Did the paint still adhere well enough? Yes.
- Was the finish absolutely perfect? Not quite.
- Would this same process be used again? Absolutely.
Sometimes older homes require balancing perfection with practicality.
Why Paint Wood Trim White?
Many older homes were finished with stained wood trim, and while it may have looked beautiful when it was installed, it can sometimes make rooms feel darker or more dated.
Painting wood trim white instantly brightens a space and helps walls, furniture, and decor stand out. It is also much more affordable than replacing trim throughout an entire home.
In this particular house, the previous owners had beautiful woodwork throughout nearly every room. The trim was in excellent condition, but painting it white helped create a cleaner and more updated look.
The Prep Work
Preparation is what makes the biggest difference in the final result.
Start by moving furniture away from the walls and laying down drop cloths to protect the floor. Even careful painters deal with occasional drips, so protecting the area first saves a lot of cleanup later.
Use a damp rag to thoroughly wipe down all of the trim. Years of dust, grime, and household buildup can prevent primer and paint from adhering properly.
Once the trim is clean and dry, inspect it closely for nail holes, dents, or damage. Fill any imperfections with wood filler and allow it to dry completely according to the package directions.
If there are gaps between the trim and the wall, now is also the perfect time to apply caulk. This small step makes painted trim look much more finished and professional.
For the best results, lightly sand the trim with fine-grit sandpaper. Sanding helps remove shine from the old stain and gives the primer something to grip.
If you decide to skip sanding, as happened during this project, just know that extra coats of primer become even more important.
Protecting Carpet and Floors
If your trim sits against carpet, this step requires a little extra patience.
Apply painter's tape directly along the edge of the trim. Work in small sections rather than trying to tape the entire room at once.
A paint shield or paint guide becomes incredibly helpful here. Slide it between the carpet and the trim, pushing it down as far as possible. This creates a barrier that helps protect the carpet while allowing paint to reach the bottom edge of the trim.

Once the tape is in place, attach plastic drop cloths to the taped area for additional protection. Carrying a small canvas drop cloth around the room is also a good backup plan in case the plastic tears.

Priming the Wood Trim
When covering stained wood trim, primer is not optional.
A high-quality bonding primer is the best choice for blocking stains and preventing them from bleeding through the finished paint. Zinsser Primer is the best primer because it provides excellent coverage over stained wood surfaces.
Apply the primer using a brush, working carefully along the edges and corners. If your trim sits against carpet, continue using the paint shield while painting.
Three coats of primer were needed to fully cover the stain. It may sound excessive, but wood trim often requires more primer than expected, especially when transitioning from dark stain to white paint.
Allow each coat to dry completely according to the manufacturer's directions before applying the next coat.
Painting the Trim
Once the primer has cured, it is finally time for paint.
A semi-gloss finish is often considered the best paint finish for trim because it is durable, easy to clean, and helps highlight architectural details.
Apply two coats of paint, allowing each coat to dry fully before moving on. Some areas may need a third coat, especially if the original stain was very dark.
To minimize brush marks, use long, smooth strokes and avoid overworking the paint. Working in manageable sections helps maintain a more even finish.
Painting trim can feel repetitive, but seeing the bright white color gradually cover the stain makes the effort worthwhile.

The Finished Results
Window trim is usually much easier to paint because there is no carpet to worry about. Once everything is finished, the difference is incredible.
The white trim creates a brighter, cleaner appearance and helps every room feel more open. It is one of those projects that takes a lot of effort up front but continues to improve your home's look for years afterward.

Recommendations Before You Begin
If there is one piece of advice to take away from this project, it is not to rush the prep work. Cleaning, filling holes, sanding, and priming take time, but they create a much better finish in the end.
The second recommendation is to tackle one room at a time. Looking at an entire house full of wood trim can feel overwhelming, but breaking it into smaller projects makes it much more manageable.
More Ideas for Your Home
Updating trim is just one way to give a room a fresh new look. Here are a few more home improvement projects that can make a big impact without a full renovation.

Hi, I'm Katie!
I'm so glad you're here. Want to make something fabulous? I'm here to help!
Crystal
I hate painting trim with a passion and somehow I always get stuck doing it. Fortunately, we do not have carpet in our house, but we do have two black dogs whose job is to shed 24/7. Thanks for the great tips!!
Emmy
Oh looks so good! Looks like a completely new room. I have used that primer before too it is good stuff
Katie
Thanks Emmy! That primer rocks my socks off! I love it!
Whitney
I'm 3 bedrooms 2 baths and a hallway into painting paneling some of which has horrible shiny paint and the rest is stain and varnish! You aren't kidding about work and plenty of patience!! I've changed primers, paints, brushes and rollers all to try to make the process quicker. There is no fast route!!!???? But finished product is so much better!!!!!
Crystal
Oh my gosh that's so many coats. Makes me shiver lol Have you every tried or heard of Benjamin Moore Stain Impervo? It's like 72$ a gallon but I wonder if I can get away with doing less coats?? 🙂 That'd be money well spent lol
Katie
Yes, it is a lot of coats 🙁 I haven't heard of that, but it might be worth it. I didn't use a whole gallon on my trim, so if that would get a lot of my trim done, I might look into that! After doing almost all of my main level. BUT I'd much rather paint than sand down the trim that would just be so messy and a lot of elbow grease. There is just no good way to deal with trim, lol. I'd rather clean toilets, haha!
Trevor
I'm in a rental apartment, and I would love to paint over the red oak trim, which looks like it's been varnished/treated. If I use your method without sanding, would I be able to remove the white paint later without damaging the wood/varnish? Thank you!
Jen
Trevor, if the landlord is smart (and the wood trim looks bad) he'll be happy to let you paint the wood trim - if you do a good job. Good luck!
Katie
Hi Trevor, I'm afraid not. The primer I use is specifically for bonding it to the wood as strongly as possible without sanding. In order to remove the paint you would have to sand it off and that would definitely damage the finish. You could probably sand it down and re stain it, but that would be a lot of work! I vote everyone should use white trim, lol... I'm still painting all of ours!
Jennifer
I get people painting the walls of their apartment, But do not, I repeat DO NOT paint the wood trim!
Walls can be painted and repainted, but wood trim never goes back to the beauty of wood trim after being painted. Sure you can spend hours stripping it, but no one wants to do that. Especially a landlord..
Keep your paint on the walls until the house you live in is your own.
Donna
I am about to paint my paneling. My walls, doors and trim appear to be exactly like yours. I couldn't tell from your photos - did you paint your doors and trim? My intention is to paint it all! I have been living in fear of the paneling for 15 years now (afraid to paint, miserable cause I haven't painted) and today is the day I shall rise! lol
Jen
Trevor, if the landlord is smart (and the wood trim looks bad) he'll be happy to let you paint the wood trim - if you do a good job. Good luck!
Katie
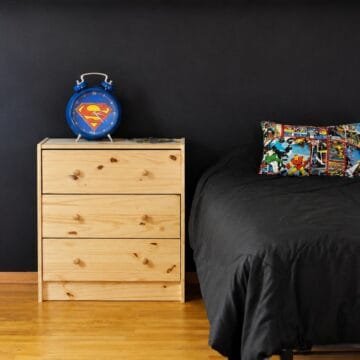
Do you recall the name of the blue paint color shown in the picture with the window? Thanks in advance!
Katie
Hi Katie, It's Palladian Blue from Benjamin Moore, but I had it color matched at Home Depot : )
Katie
Hi Katie, It's Palladian Blue from Benjamin Moore, but I had it color matched at Home Depot : )
Elden Gatley
It's good to know you don't necessarily have to sand. That can cut a lot of time out of the painting process. Wood trim can already be a bit challenging to paint, so not having to sand would also make it easier.
Y
Your window looks exactly like our windows. They are Renewal by Andersen. They have been here since we bought our house 10 years ago, and the house was built in 1991. How did you paint the windows without getting paint all over the window tracks? Our tracks are grey/beige, not white (to go with the oak stain, I guess). We have oak trim throughout our house and I am debating whether to paint it white or stain it darker. I stained two of our bathroom vanities with General Finishes Java gel stain and they look amazing. We had our oak cabinets painted (Turkish Coffee--not white). So we have gotten rid of a lot of the orange-y oak. I think I am finally ready to do something with the trim. It is a huge, huge task that I'm not sure I'm ready for. The windows especially seem like a major pain. Not to mention the beige interior doors that will also need to be painted...
Cyndi
Katie, Loved the information on the primer. Now I need suggestions. . . I am debating painting all the trim, but not the trim around the windows. The house is 42 years old and the stain color is very dark and the trim is very small (size wise). The color I was thinking of painting the trim is a white or . . . painting it the same as the wall and not bother with a noticeable trim color. I was also thinking of painting the doors the same color as the trim. Ideas/suggestions???? I'm stuck!
Dawn
Hello! I was wondering if I could use they zinsser primer on the orange oak color doors? What about prepping them?
BTW, thank you for your post on painting trim. ????I have my whole house to do...