

Ditch flimsy containers and make a DIY cupcake carrier box! This easy-to-build project keeps your cupcakes secure for parties, gifts, or bake sales.

Transporting cupcakes without them tipping over or getting smushed can be scary.
They are so pretty when they leave the house, and I want them to still be pretty when they arrive at the party!
Store-bought carriers are handy but often flimsy, expensive, or not the correct size. So why not make your own?
This DIY cupcake carrier box is a sturdy, reusable solution that keeps your sweet treats safe while on the go.
Let's get building and keep those cupcakes looking as good as they taste!
Supply List
Some links may lead to similar items when the exact item is unavailable.
- ¼-inch Plywood
- ½-inch Plywood
- Drawer Handle
- Table Saw
- Sander
- Router
- Router Bits
- Impact Driver
- Hole Saw
- Wood Glue
- Finish Nails
Cuts
¼-inch Plywood
- 11" x 11" (front)
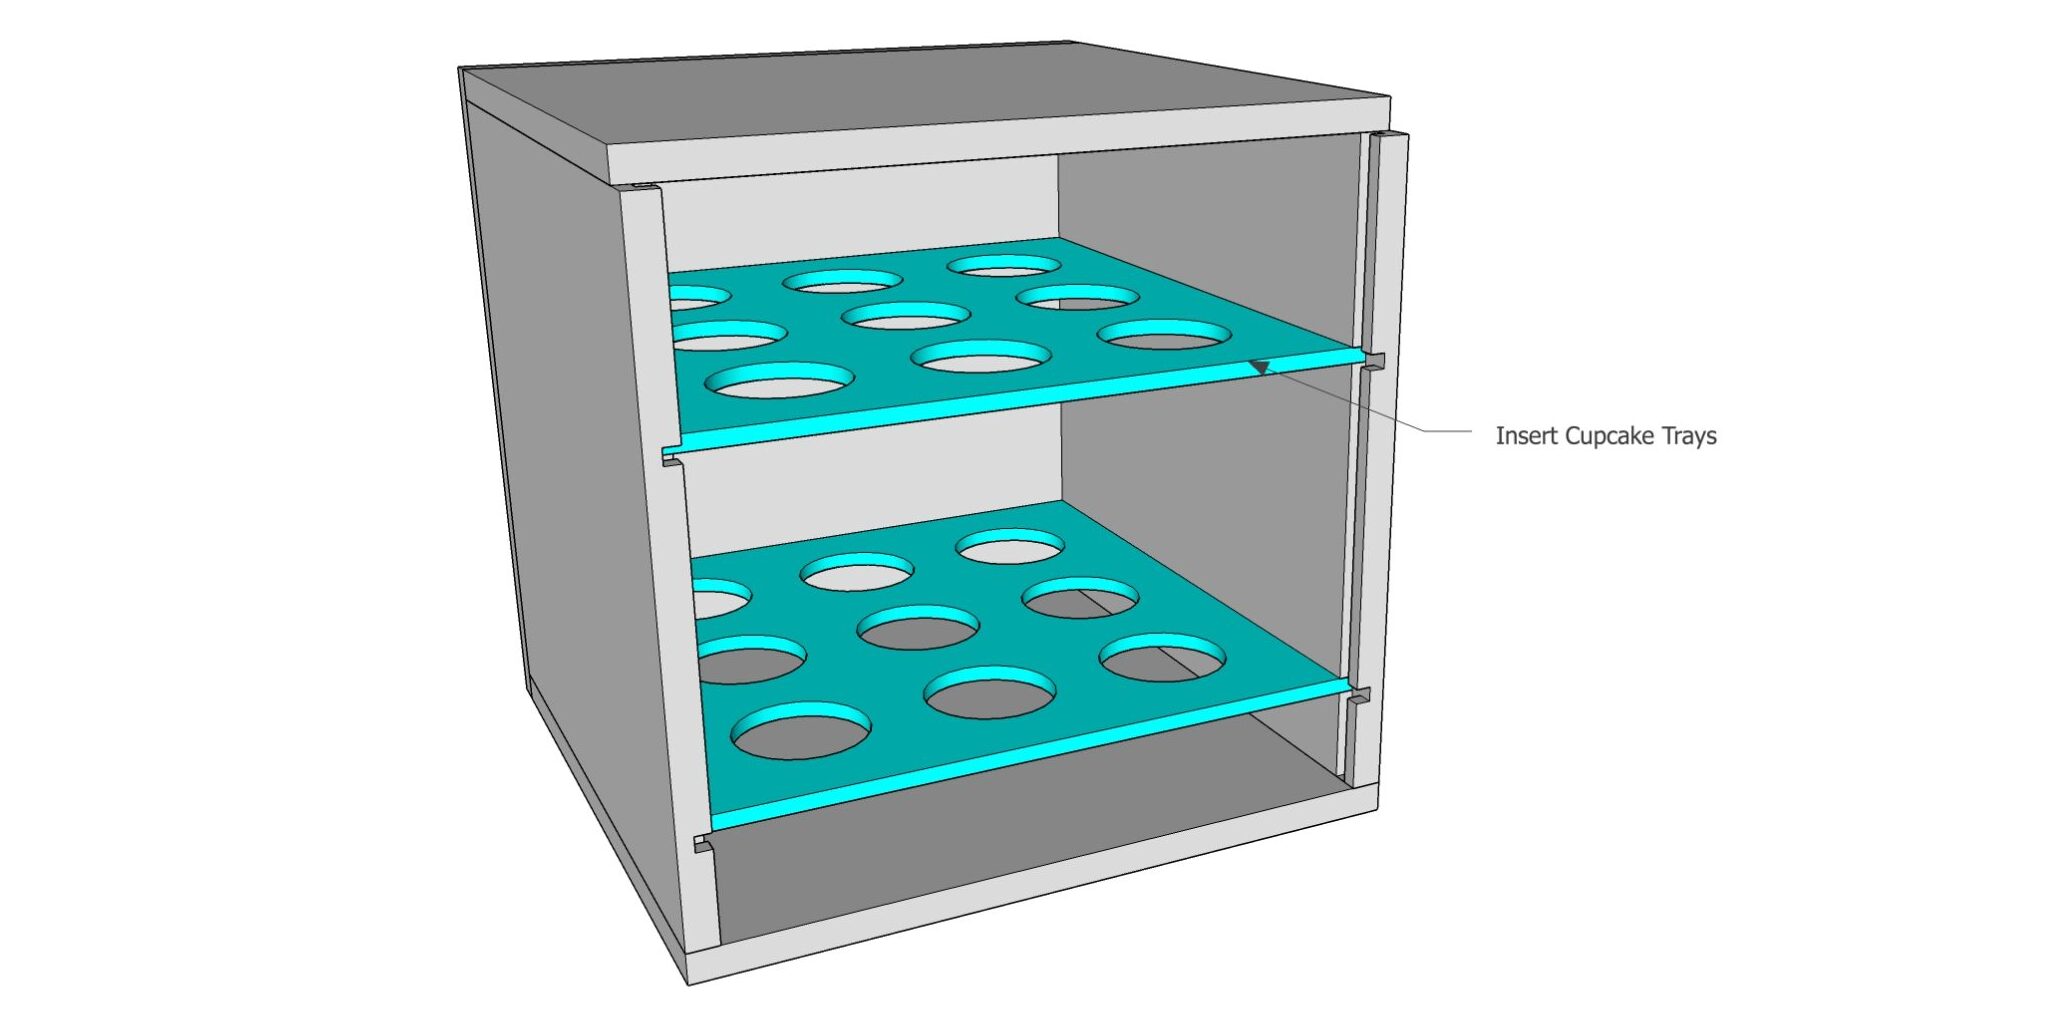
- 2 @ 11" x 10.5"(cupcake shelves)
½-in Plywood
- 10.5" x 11.5" (top)
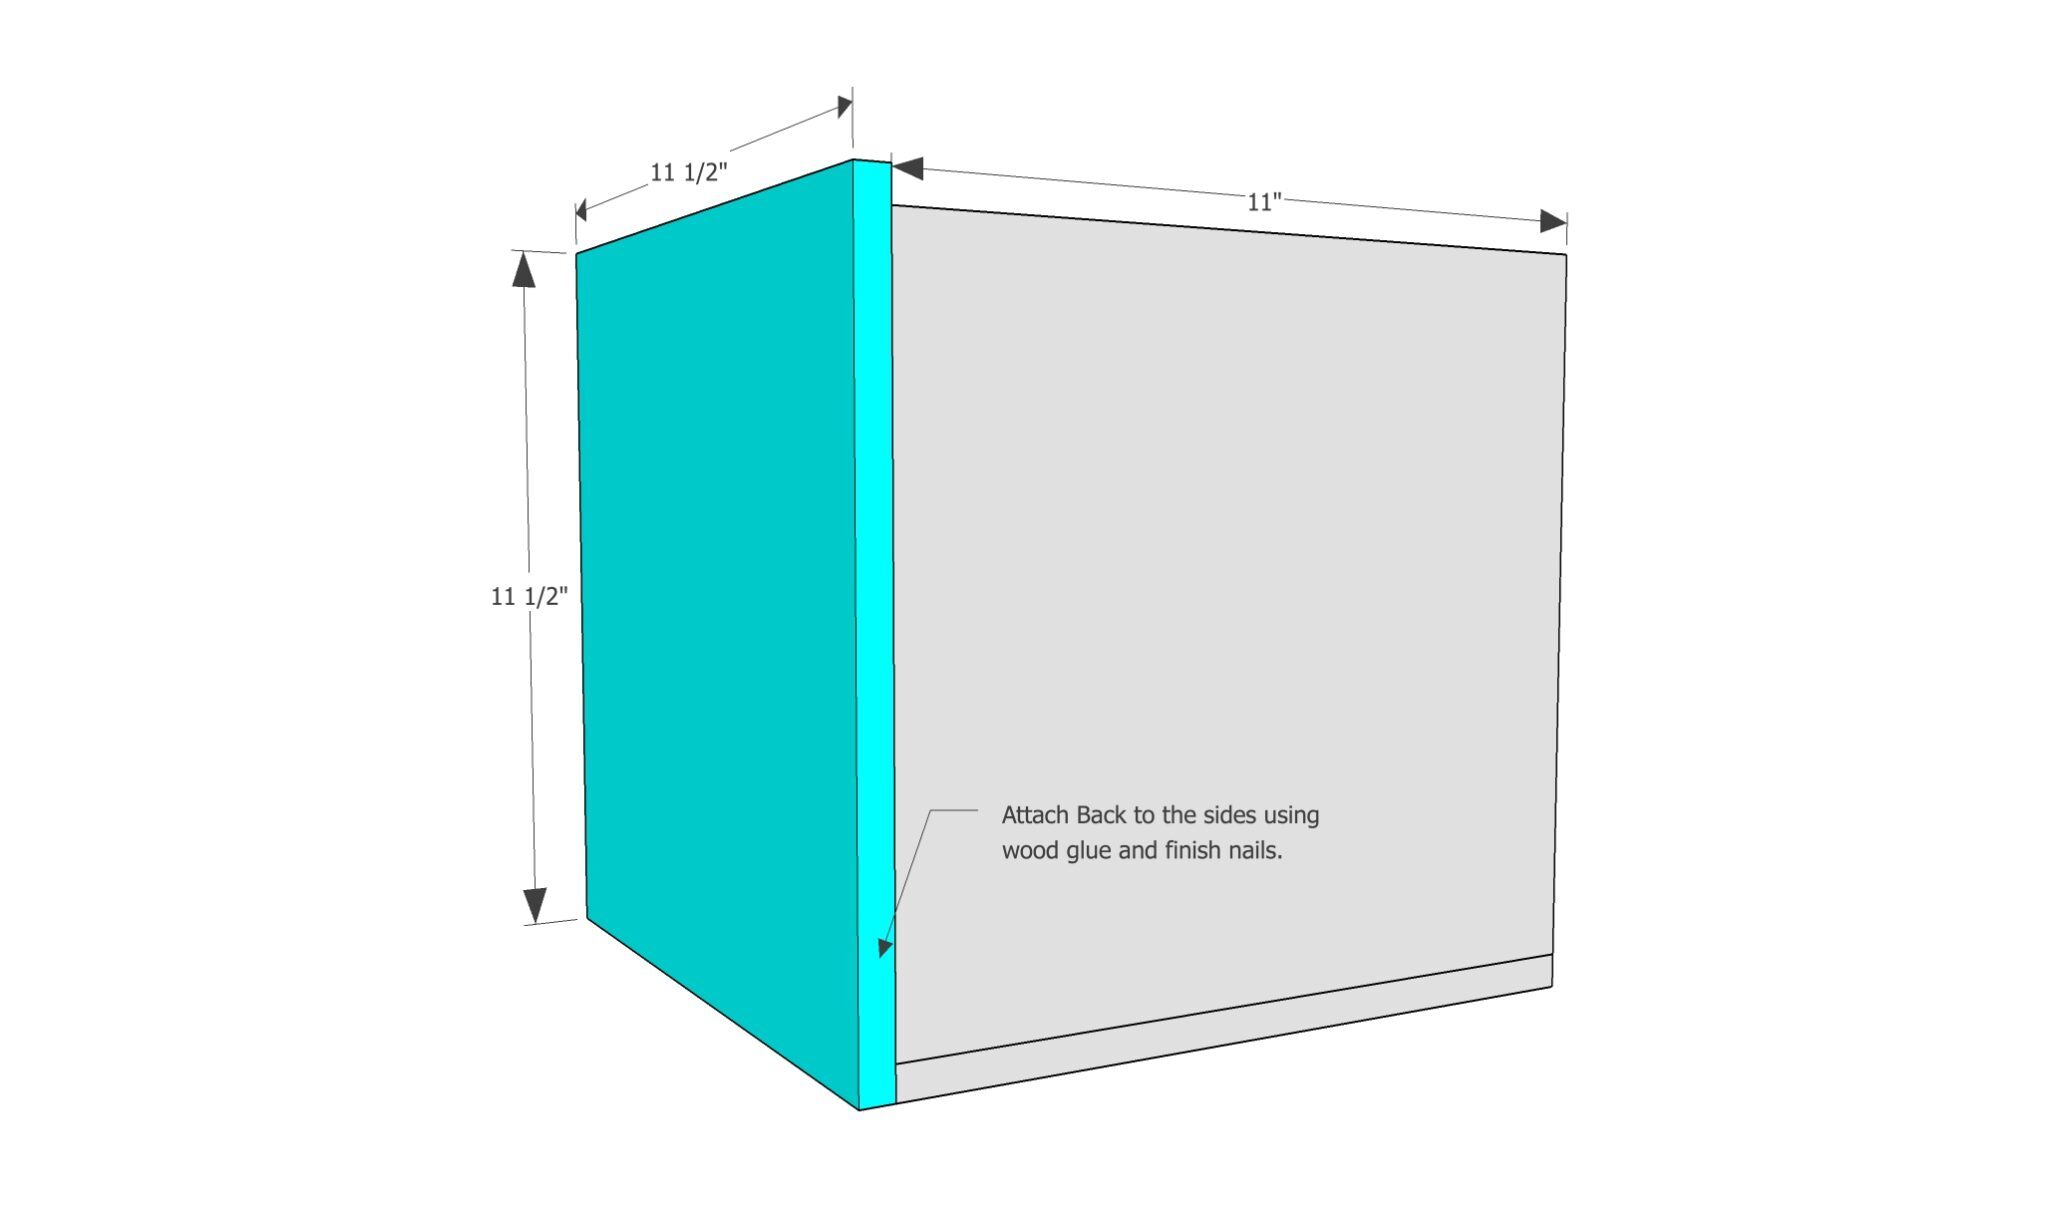
- 2 @ 11" x 22" (both sides)
- 11" x 11.5" (bottom)
- 11.5" x 11.5" (back)

Instructions
Use a router to cut a ¼" dado, or groove, along the side of the 11" x 22" board following the dimensions in the picture.
This will be for the front panel.
Cutting it as one piece eliminates the need to cut two separate grooves with the router.
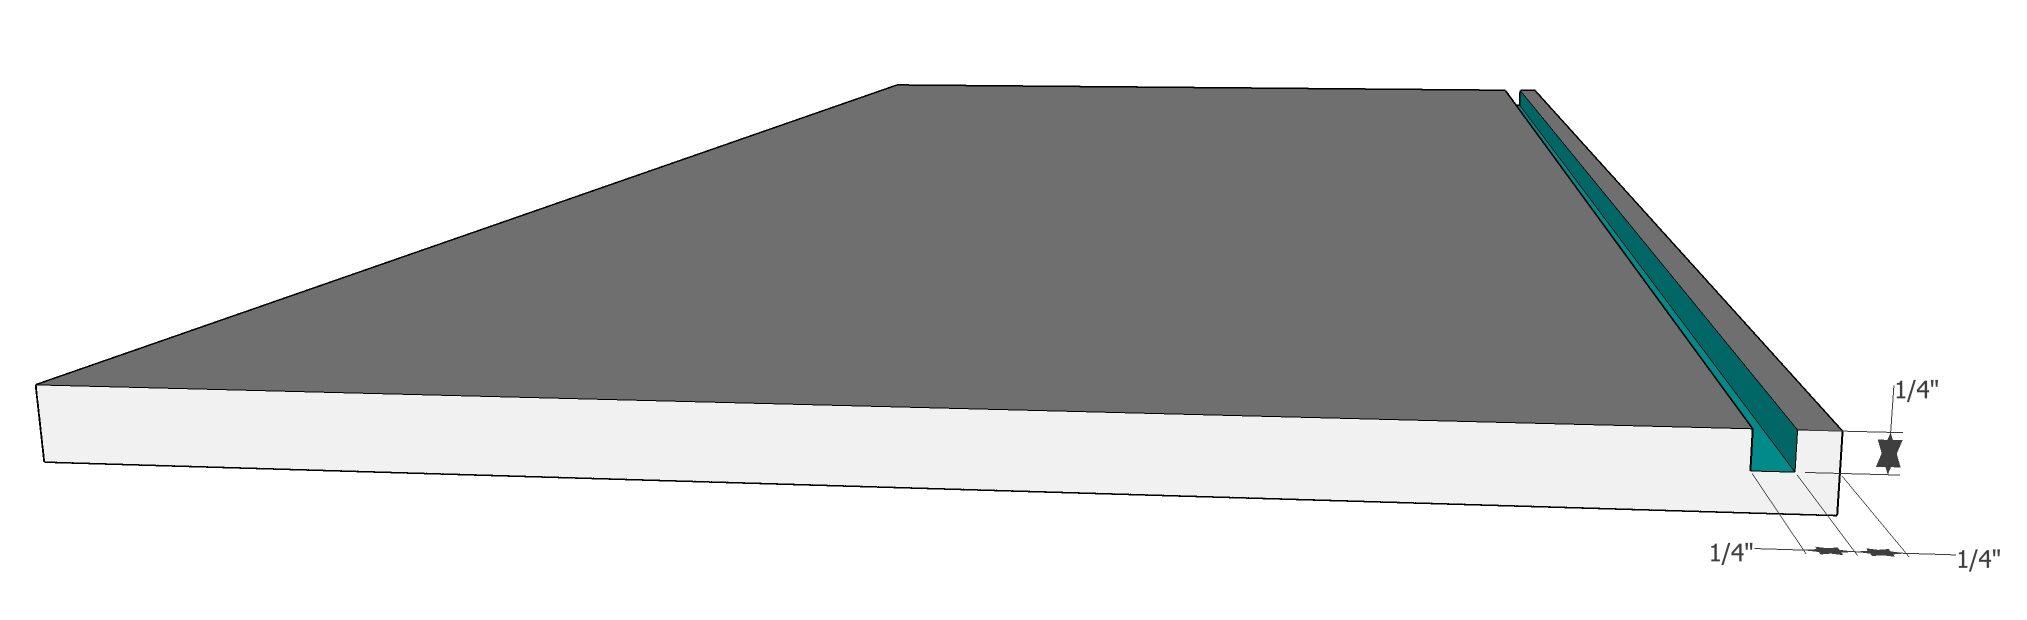
Cut both of the side pieces out of the board with the dado. Each side piece should measure 11" x 10.5"

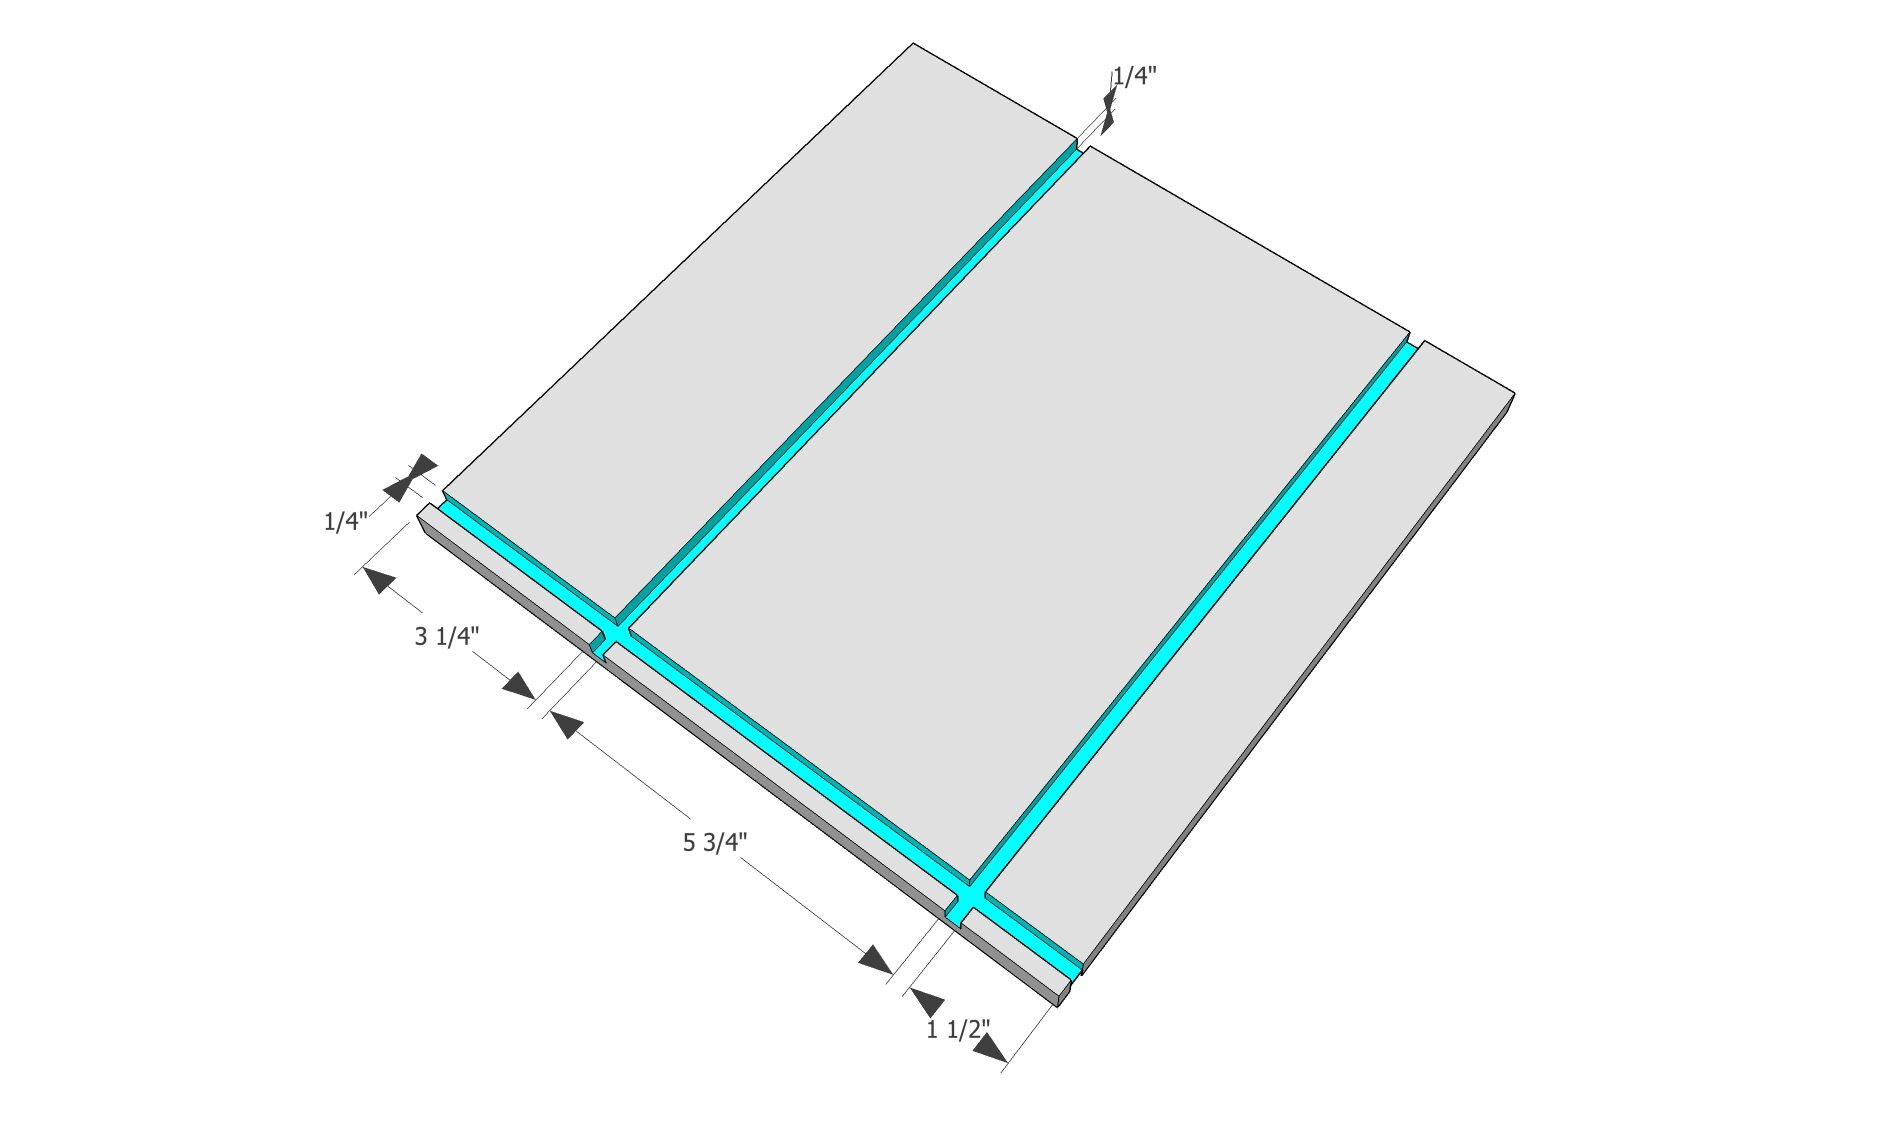
Using the router, create a ¼" groove that follows the dimensions in the picture below.
This will be for the cupcake shelves.
Drill a hole in the front panel using a 1" - 1.5" hole saw centered horizontally and about 1.5 - 2" from the top.
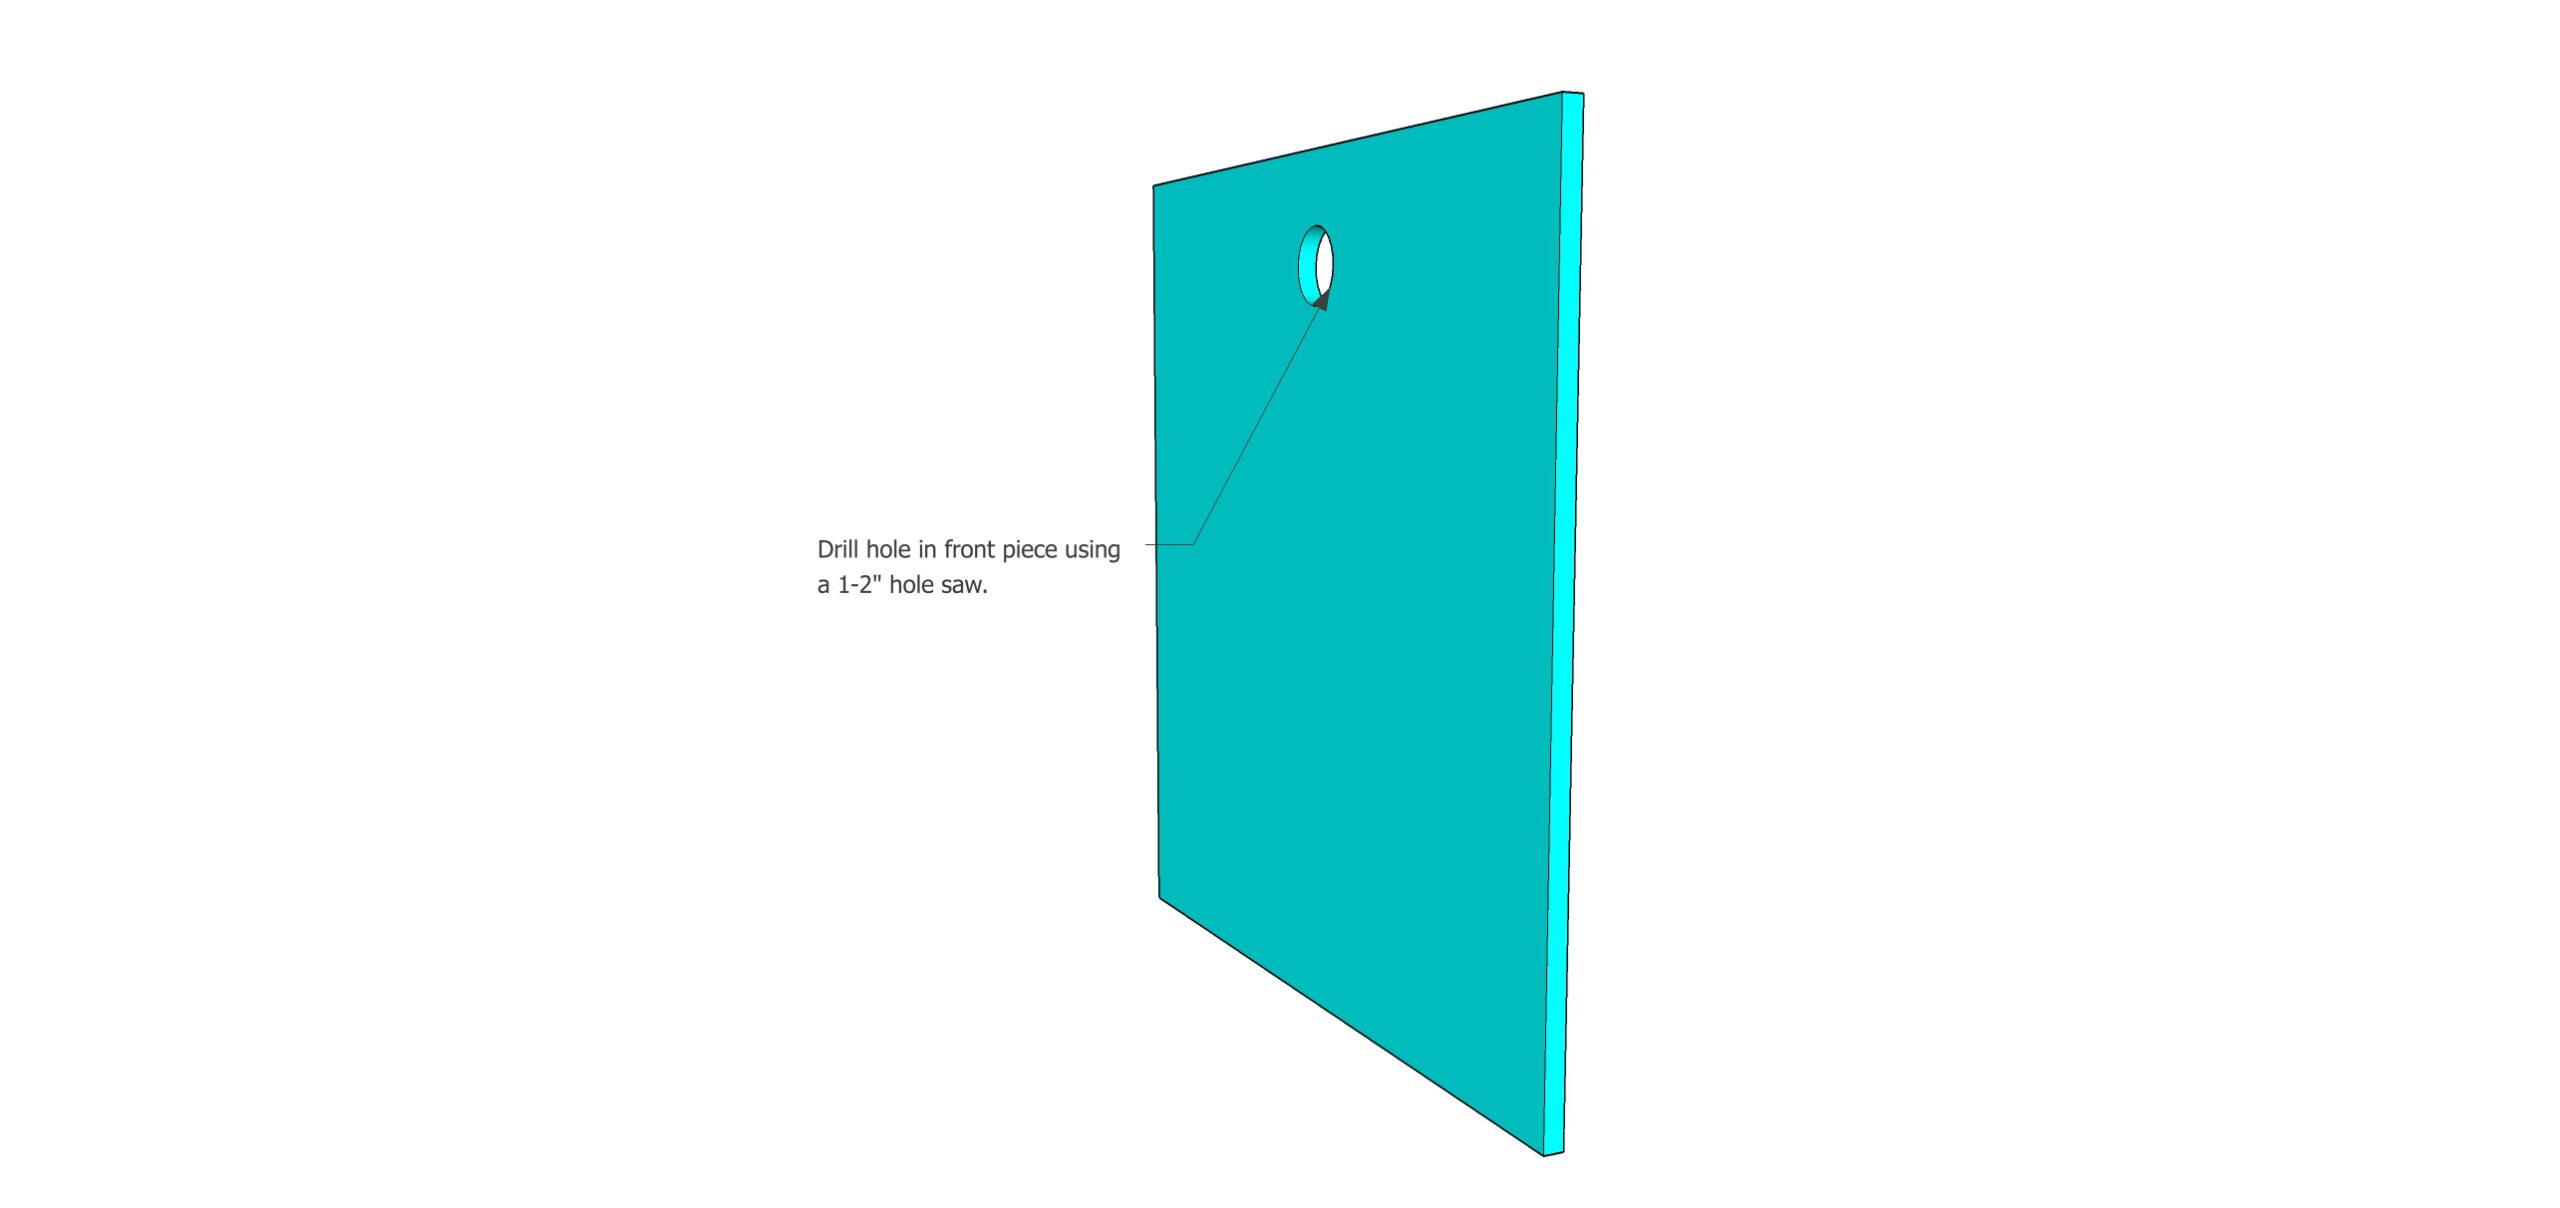
I also used a wood-burning tool to write out the word "cupcakes." This is totally optional, but I love how it looks!
Drill holes in the cupcake trays with 2 ⅛" hole saw.
Start by finding the center point and then evenly spacing the remaining holes.

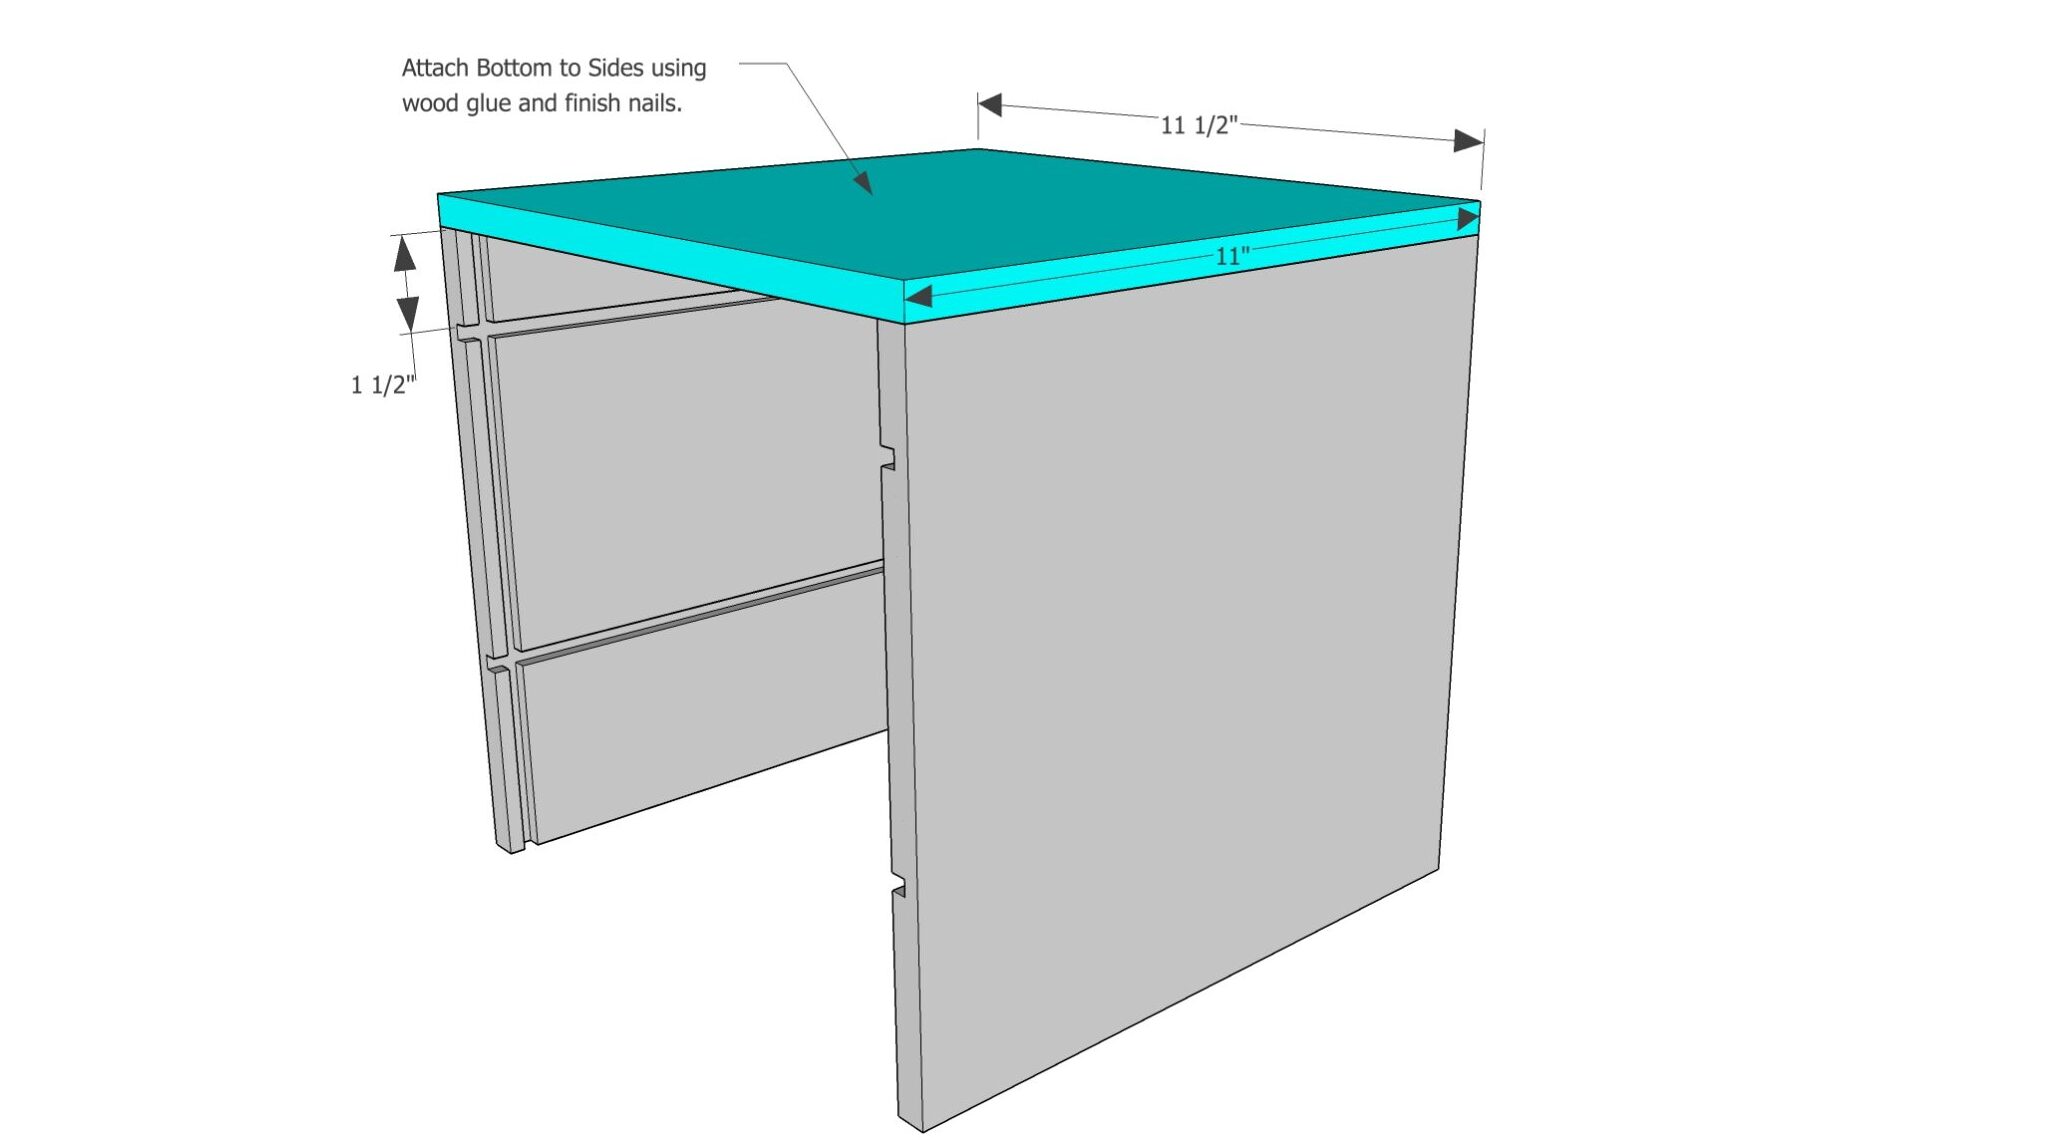
Attach both side pieces to the bottom piece using wood glue and finish nails
Attach the back piece to the sides and bottom using wood glue and finish nails, keeping the project square.
Attach the top using wood glue and finish nails.

Slide in the cupcake trays. You may need to sand down the edges if they are slightly off.
I would suggest using a belt or bench sander and then smoothing it with a palm sander.
Slide in the front panel.

Last, attach the handle to the top of the cupcake box.
Final Thoughts
I absolutely love my new cupcake carrier.

The most fabulous feature of this cupcake box is the pull-out trays.
They're perfect to grab a tray and dish out the cupcakes, especially if everyone is jumping out of pure cupcake excitement!
Who is ready to build their own?
More Building Plans
Don't put those tools away yet. There are more fun things to make!


Lisa Slade
Love this cupcake holder! No more icing all over your hands to hand out yummy treats. Thanks for sharing!
Brooklyn Limestone
Wow - i love this project so hard. Great job.
McKenzie
What a clever idea! Love it!
Sherrill Willis
I hope this isn't a dumb question, but...lol, how do you make sure to make the box so it will be "food safe?"
Katie
I used a food safe oil meant for butcher block counters to seal the wood, but I do also make sure not to touch the food to the wood directly. You could also clean the wood with a vinegar and lemon mixture like you would a cutting board, and then seal it after it dries. Other than that there's not much else you can do to make it food safe. I hope that helps ; )
Aani
Lovely DIY!!! Any idea on how you would clean the inside if icing touches the wood? Would it leave stains?