
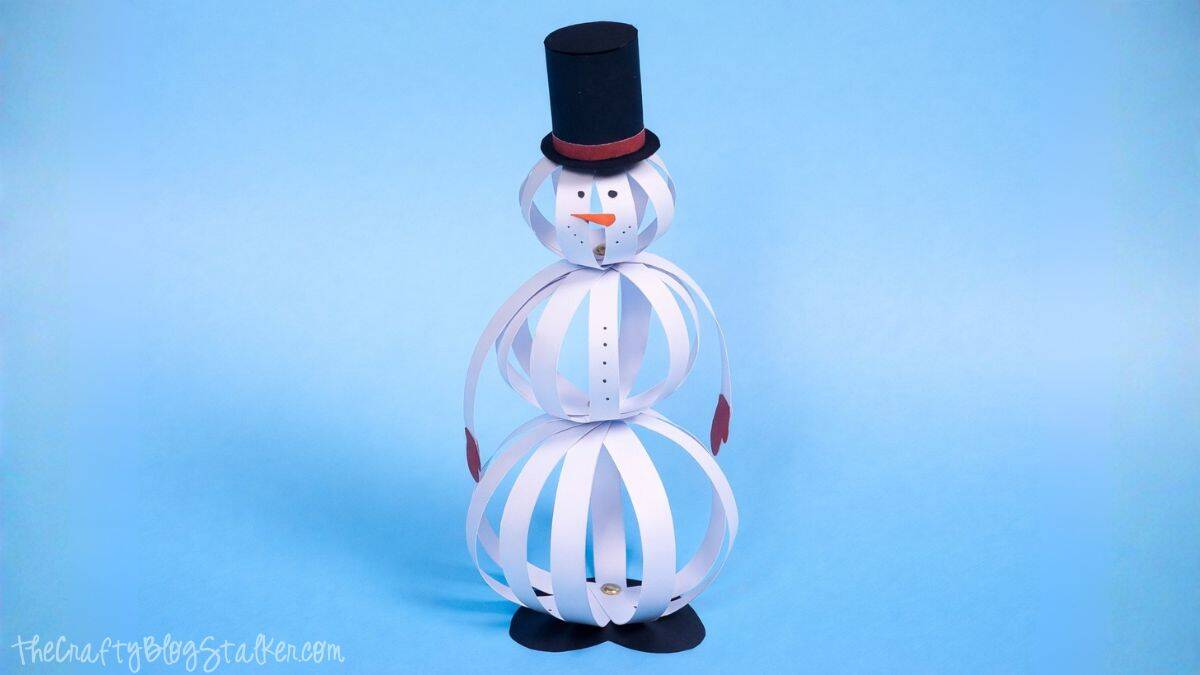
Make an easy paper-strip snowman craft perfect for winter crafts with kids. It's quick, cute, and uses basic supplies you probably already have.

This snowman craft is one of those projects that instantly brings a little winter cheer.
I love sharing simple ideas like this because they're easy for kids to make, yet still turn out adorable enough to display.
No big mess, no big budget, and you're done in about 20 minutes.
A heads up, this is a great project for kids, but an adult will want to stay close for a couple of steps (mainly the brads and shaping the "snowballs").
Once you get it started, most kids can finish it with minimal help.
Jump to:
Skill Level: Beginner
Total Time: 20 minutes
Craft Tutorial Video
If videos are your thing, you're in luck-I've got a full tutorial ready for you!
Subscribe to my YouTube channel and stay inspired with every new project.
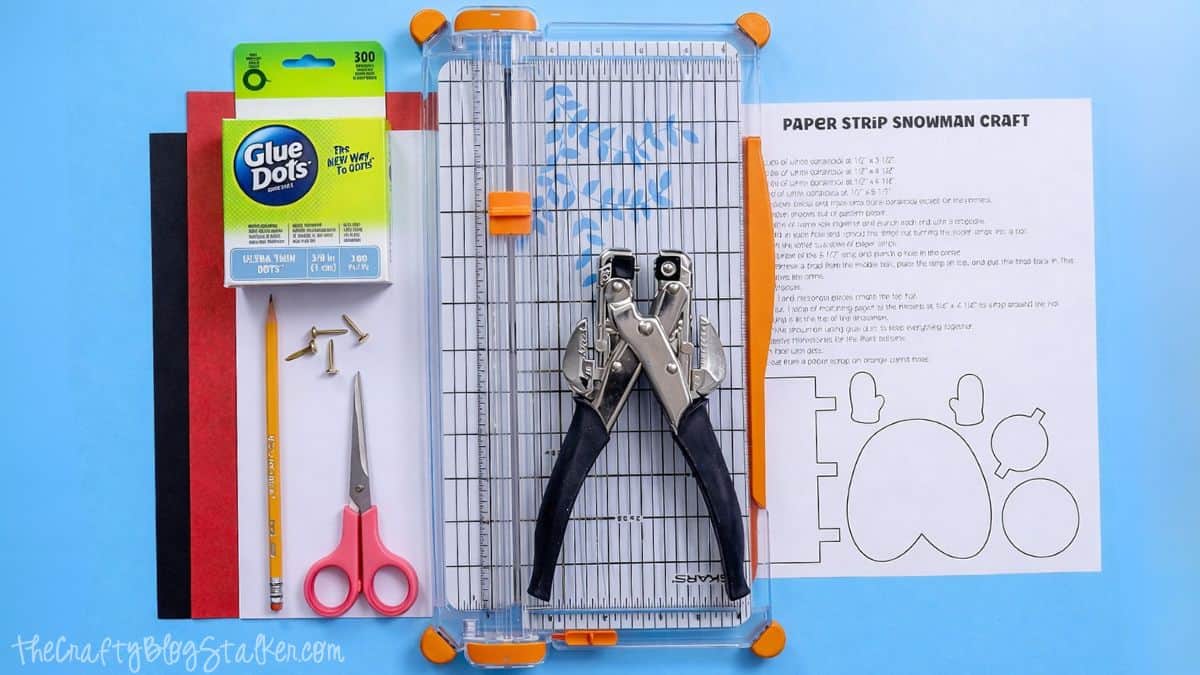
Supply List
Some links may lead to similar items when the exact item is unavailable.
- Snowman Template and Instructions
- White Card Stock
- Paper Trimmer
- Scissors
- Pencil
- Black Cardstock
- Pattern Paper Scraps
- Crop-A-Dile
- Paper Fasteners
- Double-Sided Adhesive
- Glue Dots
- Sharpie Marker
Paper fasteners are also referred to as brads in the crafting world. So if you don't know what a brad or a fastener is, it's the same thing.
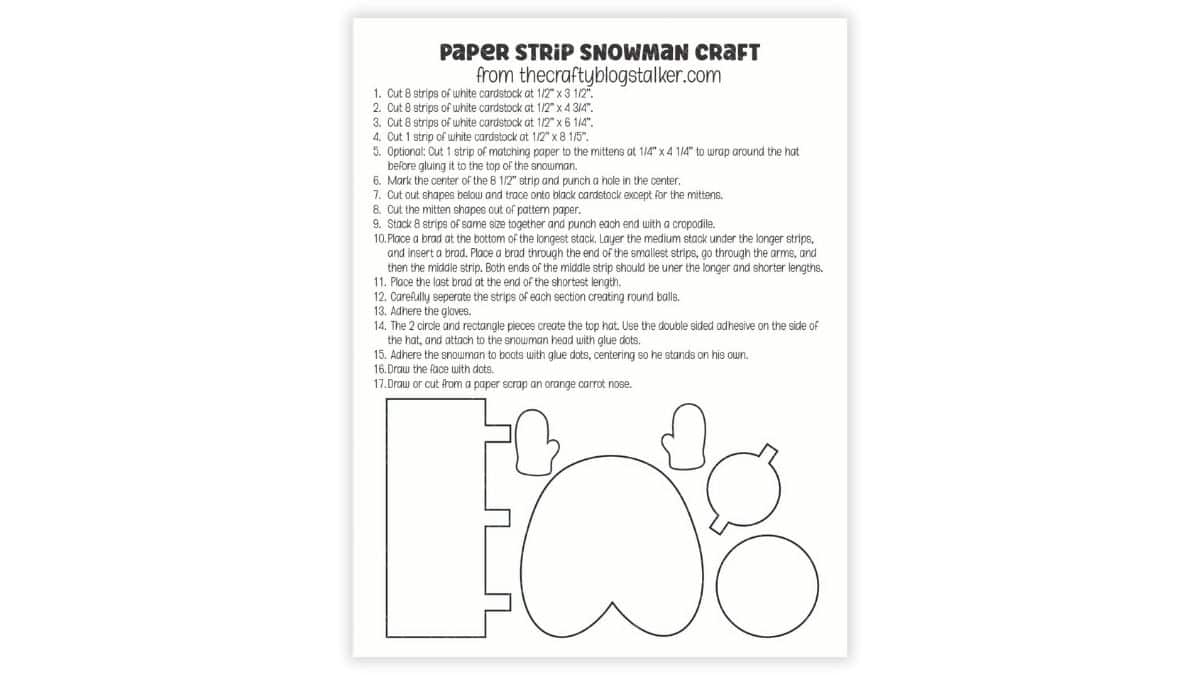
Grab the Free Printable
Print the template and keep it nearby while you work. It makes this snowman craft so much easier, especially if you're making more than one with kids.
Cut Paper
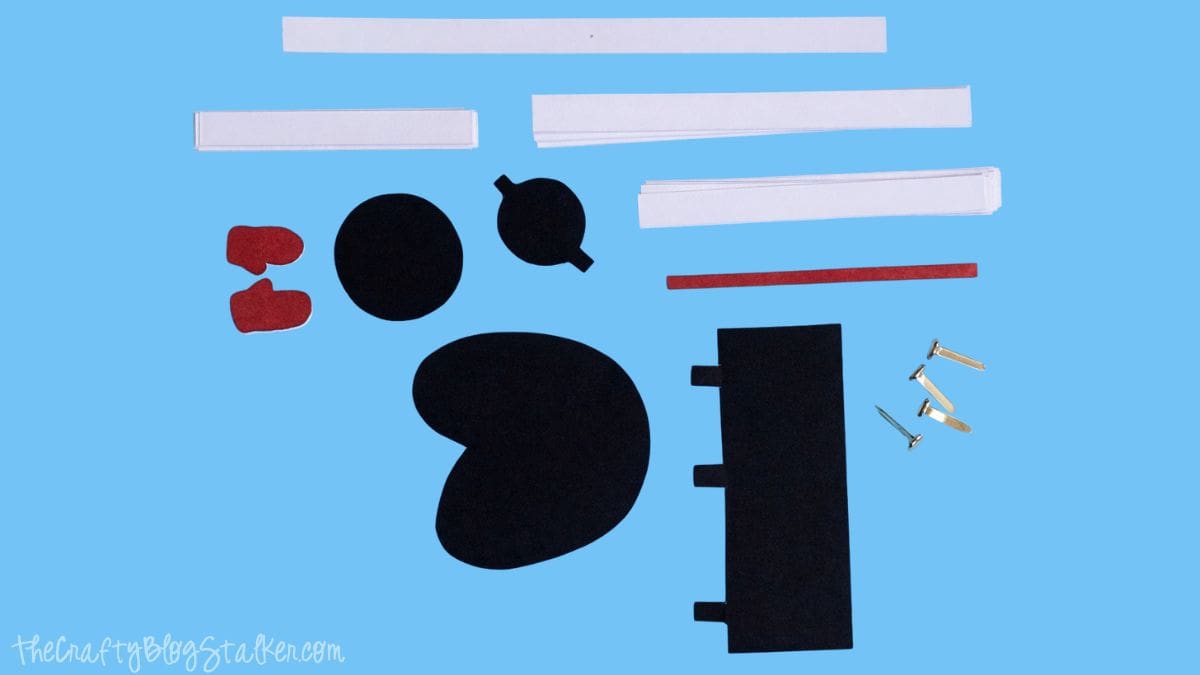
Start with one sheet of 8½ x 11-inch white cardstock.
Cut the white cardstock into strips:
- 8 strips: ½" x 3½"
- 8 strips: ½" x 4¾"
- 8 strips: ½" x 6¼"
- 1 strip: ½" x 8½" (this is the arm strip)

On the ½" x 8½" strip, make a small pencil mark in the center at 4¼".
Cut one thin strip from patterned paper:
- 1 strip: ¼" x 4¼" (this becomes the hat band)
Then cut out the template pieces from the printable. Trace them onto cardstock:
- Most pieces are black cardstock
- The mittens can be any color or pattern (I like matching them to the hat band, but you don't have to)
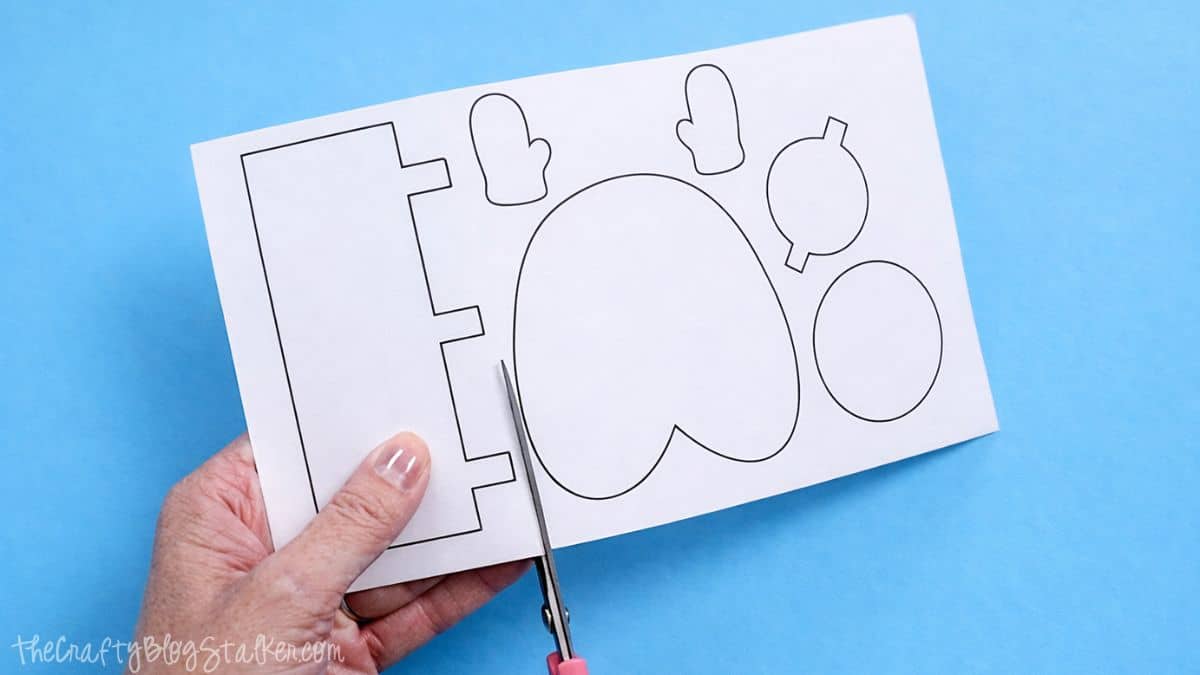
Once everything is cut, you're ready to assemble.
Hat Assembly
Let's build the hat first.
Curve the rectangle by rolling it over the edge of a table. This keeps it from creasing and helps it look more like a real little top hat.
Add a thin strip of double-sided adhesive to one short end and wrap it into a tube.
Add adhesive to the back of the patterned paper strip and wrap it around the base of the hat to create the band. Start near the back seam to keep it tidy.

Fold the tabs inward, add glue dots to the tabs, and press the hat onto the brim.
The circle with two tabs is the top of the hat. If that part is too fussy for small hands, it's totally fine to skip it.
Here is the finished hat!

Snowman Assembly
This is where the snowman starts to come to life.
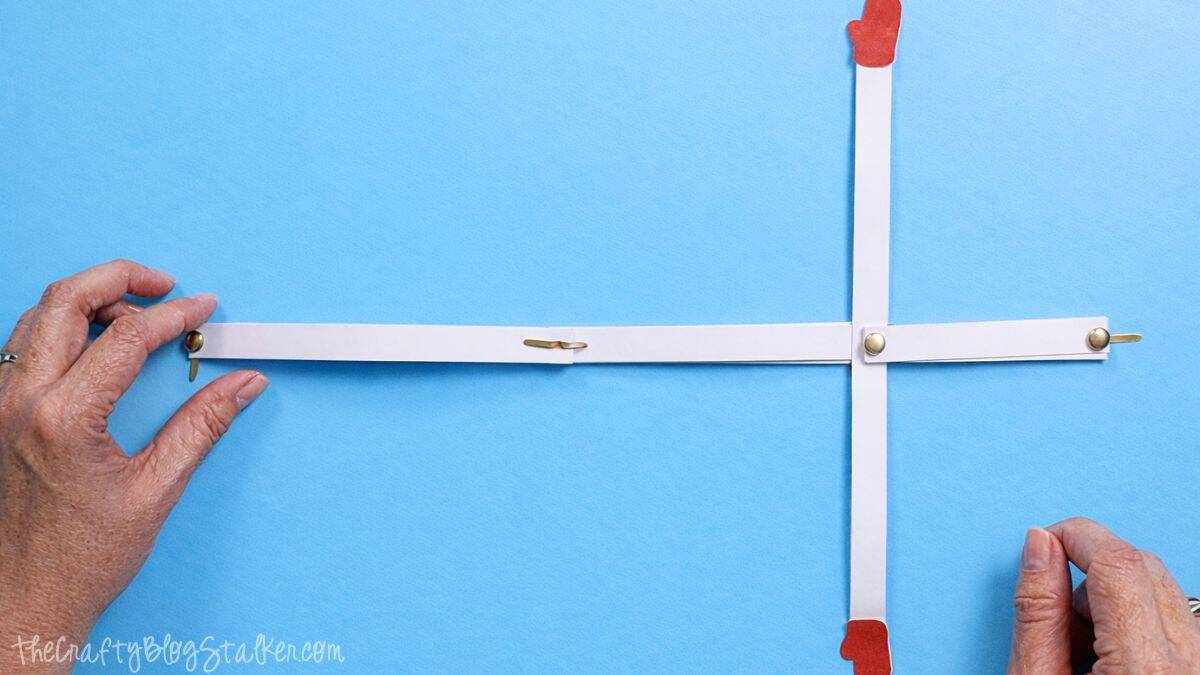
Stack your longest strips neatly, line up the ends, and punch a hole in each end using the ⅛" hole on the Crop-A-Dile.
Repeat with the middle strips and the shortest strips.
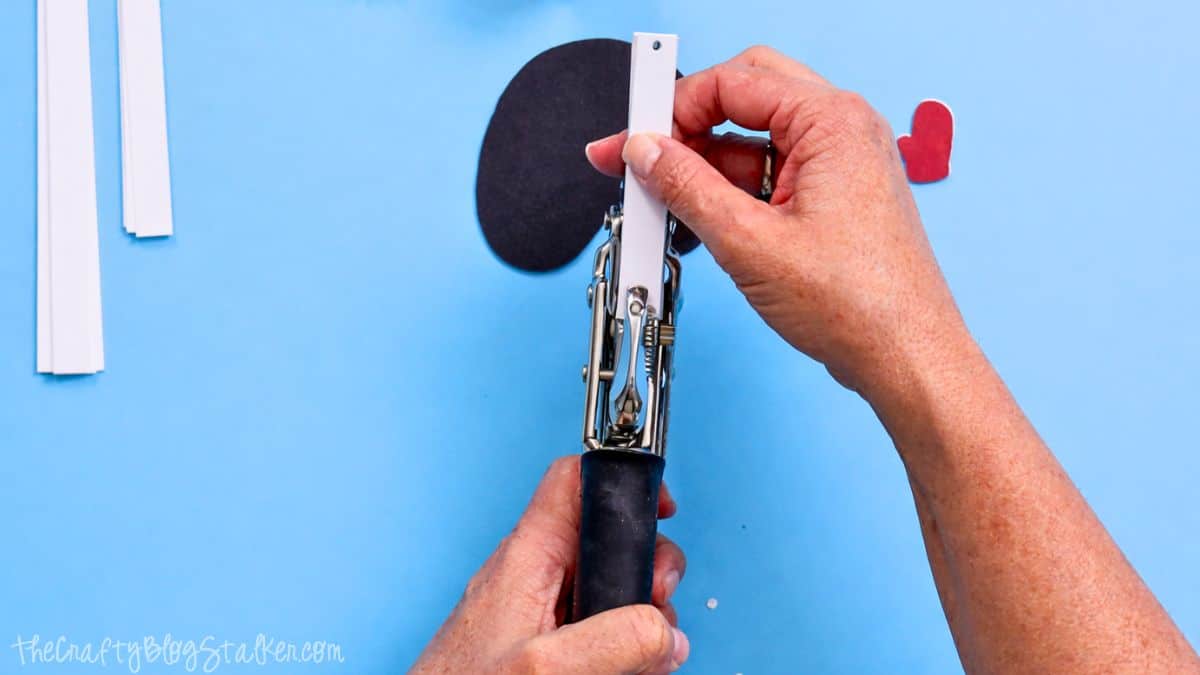
Punch a hole in the center of the ½" x 8½" strip where you made your pencil mark.
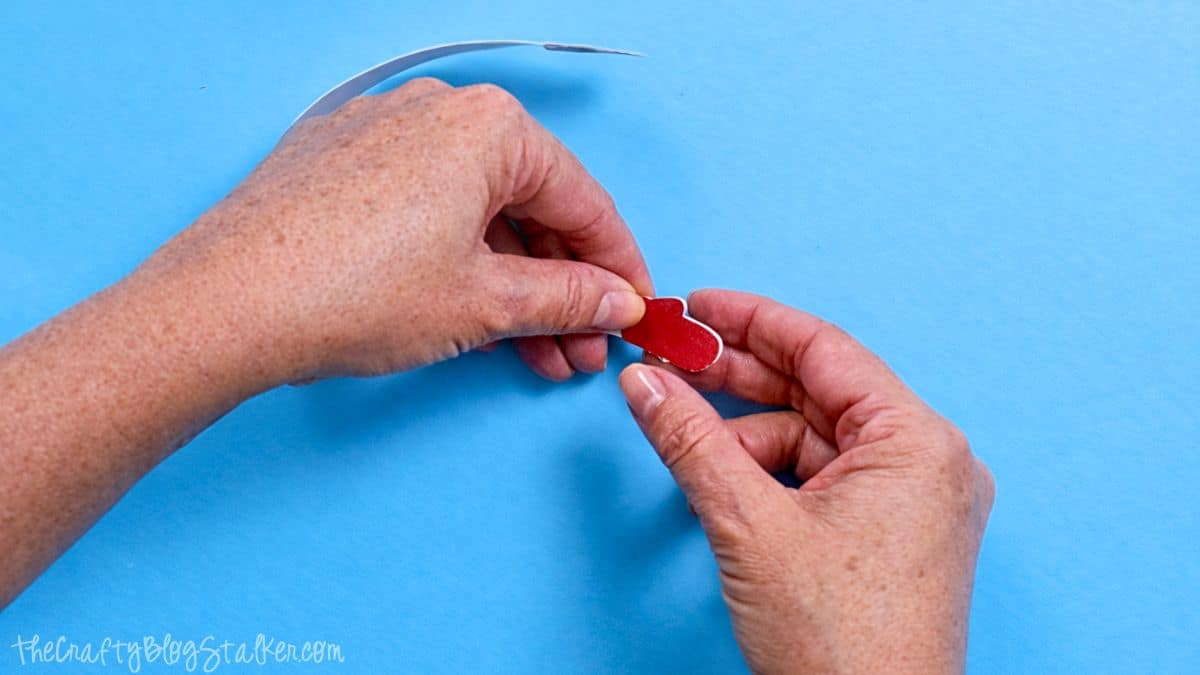
Glue a mitten to each end of the arm strip, making sure both thumbs point in the same direction.
These steps matter the most. The fastener direction doesn't matter, but the layer order does.
Put a paper fastener through one end of the long strip stack and open to secure.
Add a fastener through one end of the middle strip stack, then push it through the other end of the long strip stack, and open the brad.
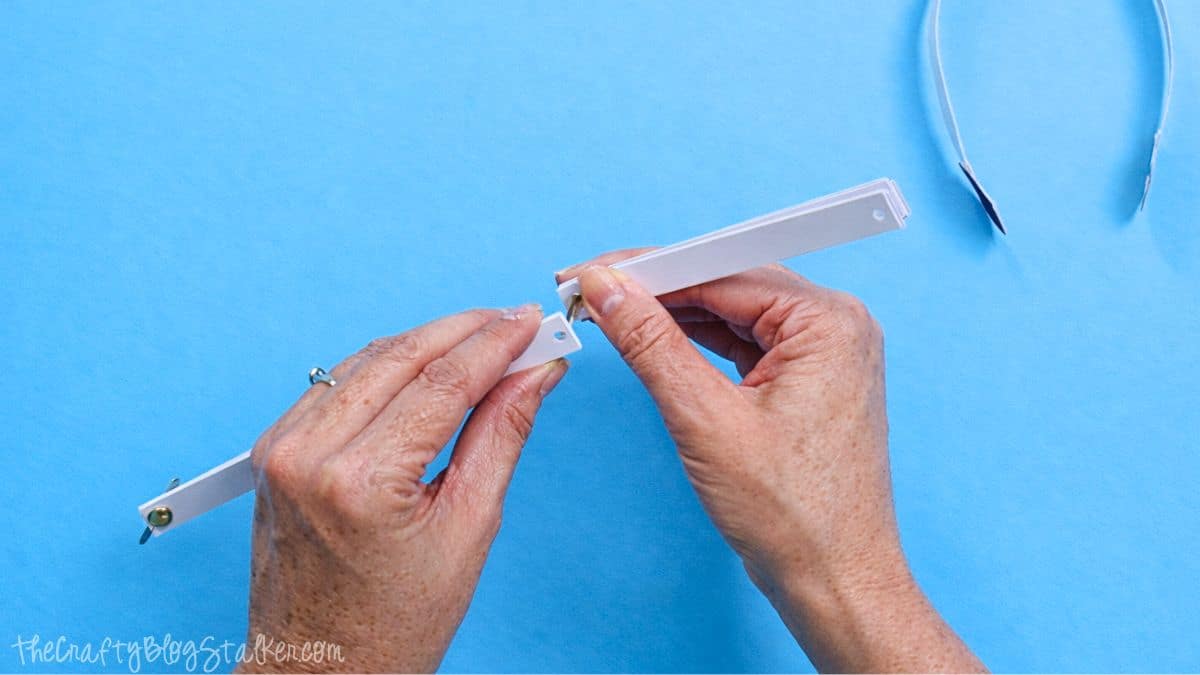
Insert a fastener through the small strip stack, then go through the center hole of the arm strip, then through the middle stack, and fasten it.
Last, insert a fastener through that last hole in the small strip stack.
Here is what the full strip should look like. Pay attention to how the strips are layered. The middle section should be underneath the long strip stack and the short strip stack.
If the strips aren't forming balls later, it usually means something was layered out of order. If that happens, don't panic-just back up to this step and check the stacks.
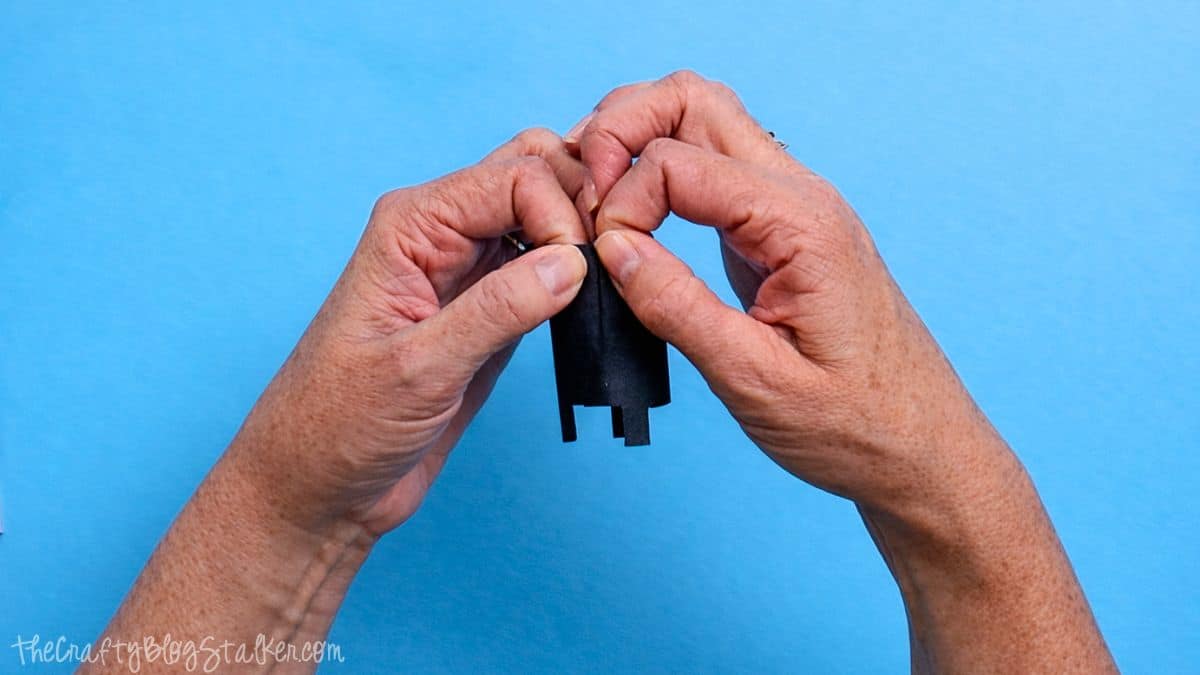
This next part is the "okay, wow, it's actually working!" moment.
Start with the bottom (the longest strip stack), divide the strips in half with your fingers, and spread the two sections apart.
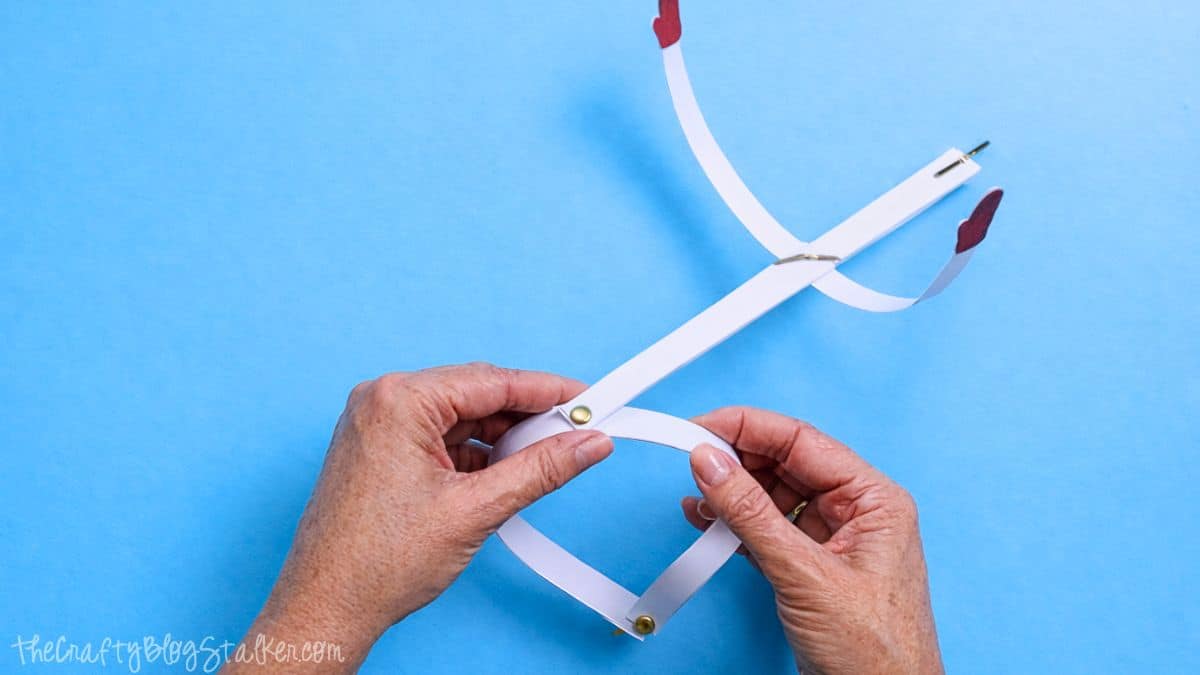
Then spread all of the strips apart to form a ball shape.

Repeat for the middle stack, then the smallest stack on top.
The top ball is the trickiest because it's so small. Kids might need a little help separating those strips.

Finish the Snowman
Now add the details that make him cute.
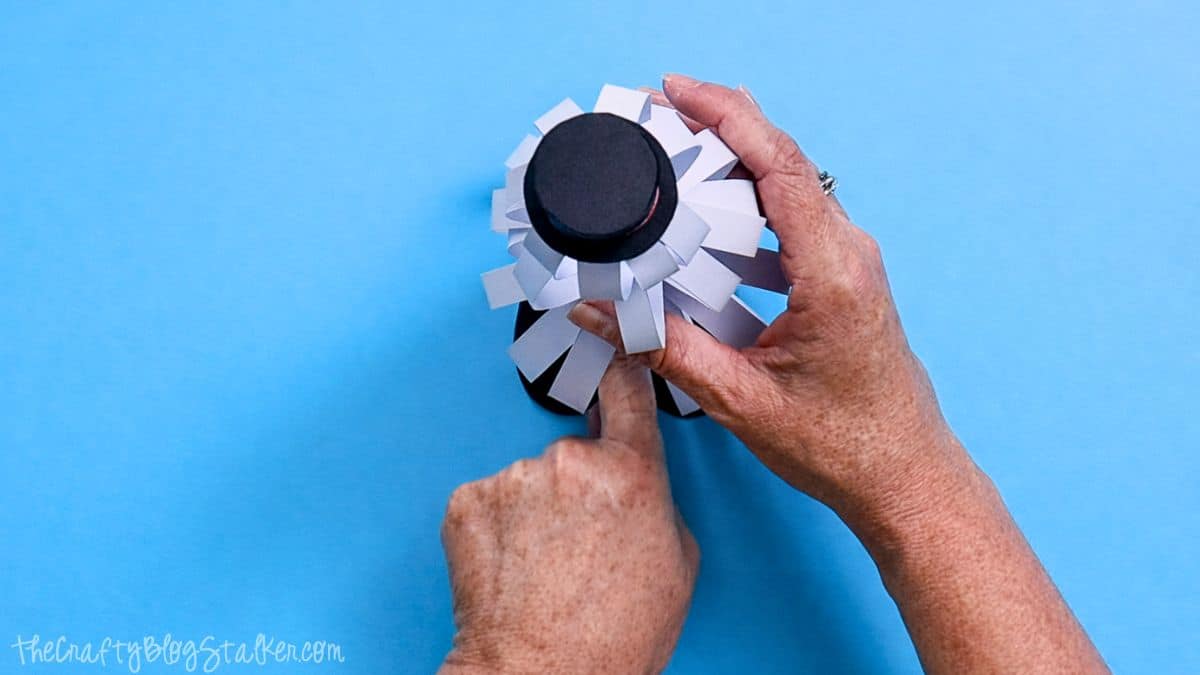
Add glue dots to the top of the head and press the hat into place.

Attach the boots with glue dots so he can stand up.
If he's wobbly, add an extra glue dot or gently adjust the strips until he balances.
Use a black marker to draw the face and buttons.
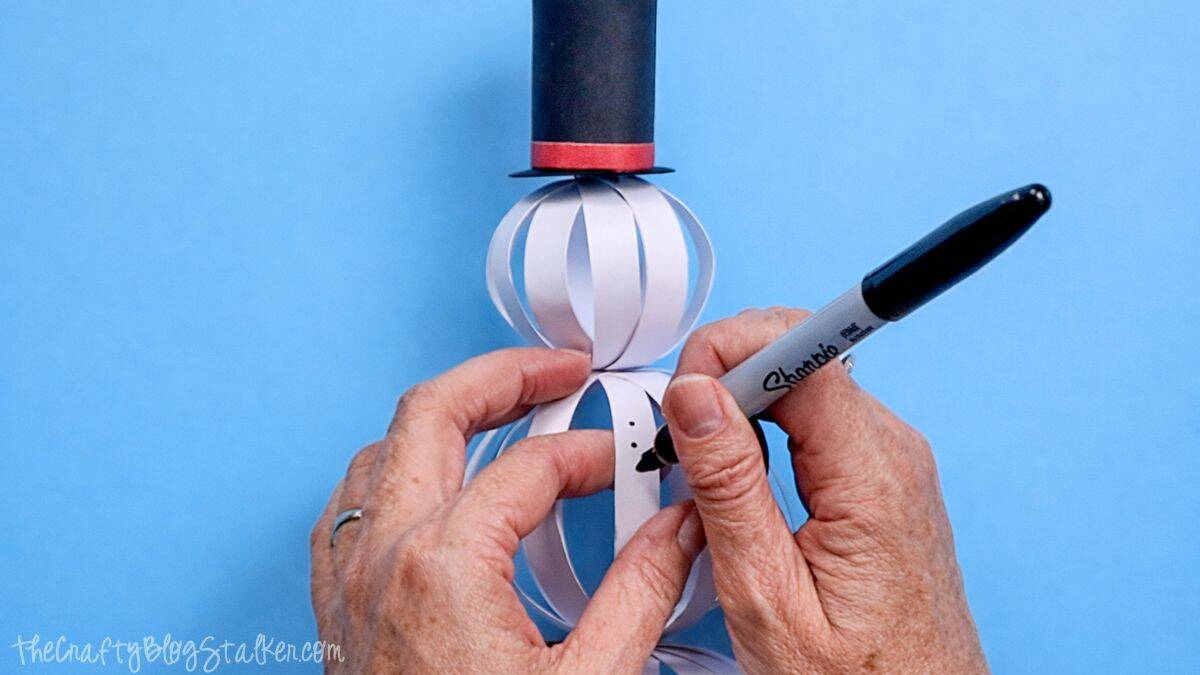
Cut a tiny carrot nose from orange paper and glue it on.
And that's it-your paper strip snowman is ready to hang out on a shelf, mantel, or kids' craft table.
I'm not saying you need an army of these… but I'm also not saying you don't. ⛄️
More Paper Strip Crafts
Crafting with paper strips is simple, quick, and really fun for kids. Here are a few more ideas to try next!

Hi, I'm Katie!
I'm so glad you're here. Want to make something fabulous? I'm here to help!
Mary-the boondocks blog
This is such a great idea, a perfetc craft to do with the kids. and keep them occupied. Who can resist the cute little hat and the pop pom scarf. Just adorable.
Tracy Snyder
This snowman is adorable!!! Thank you for sharing at Welcome Home Wednesdays!
Jamie
That is so cute!! What a fun project for the kids! 🙂
Heidi
Cute craft to do with the kids. Thanks for sharing it on Funtastic Friday!
Katie
Thank you Heidi! I am so glad you like this project. It would be a lot of fun to make with the kids!
Christine
Great DIY to do with children. I'll have to try this one out. Stopping by from the Let's be Friends party.
Sarah bell
Such a cute little decoration...love it! Thanks for sharing 🙂
Sarah Bell
Katie
Thank you Sarah! I am so glad that you like it!
Antonella | White House Crafts
It's sooo cute! Thank you so much for sharing it at The Crafty Corner! I hope to see you again at the next party (beginning tomorrow).
Katie
Thank you Antonella! I am glad that you like this little snowman. It's a fun craft!