



Try this wreath tutorial to make a beautiful hexagon wooden fall wreath. It's an easy way to add warm, rustic style to your autumn decor.
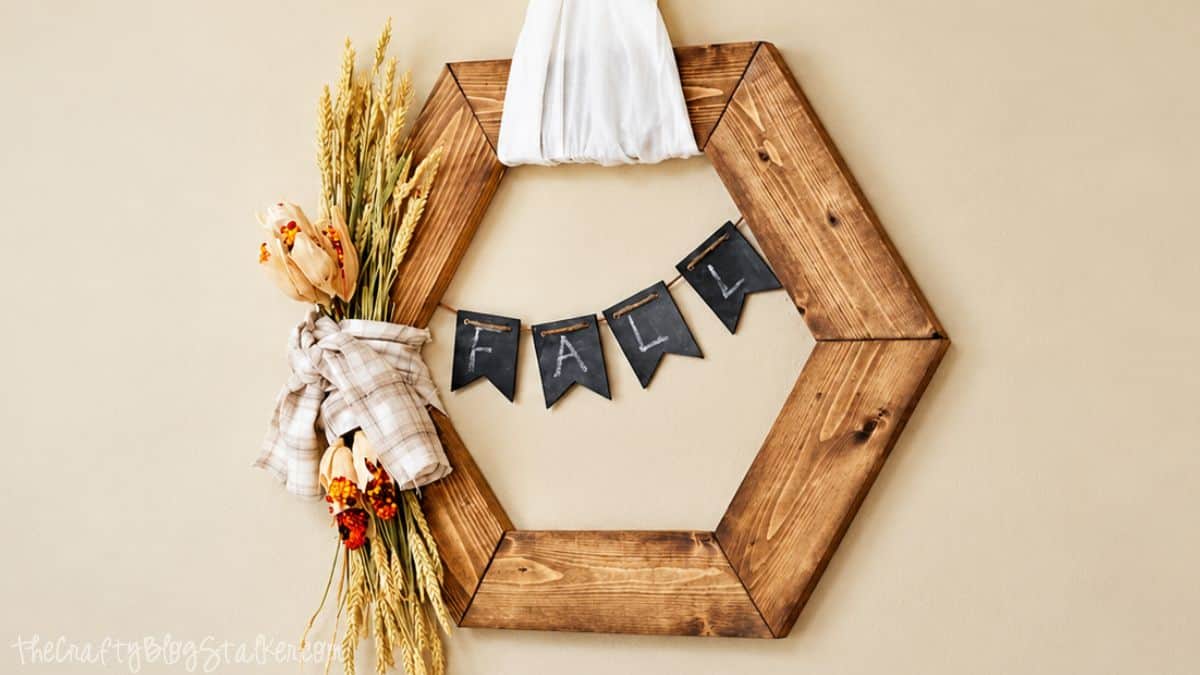
A cold front rolled in over the weekend, and the cooler weather immediately put me in the mood for coffee, baking, and pulling out the fall decorations.
After randomly bringing home a few 1x4s from Home Depot, because apparently that's something I do, I decided to put them to good use with this hexagon wooden fall wreath.
I originally planned to hang it on our front door, but the lines didn't look quite right with the door paneling, so I found the perfect spot on an empty living room wall instead.
If you love warm wood tones, simple fall decor, and wood wreath projects that are a little different from the traditional round wreath, this is such a fun one to make!
Jump to:
Skill Level: Intermediate
Estimated Cost: $20-$30
Total Time: 2 hours
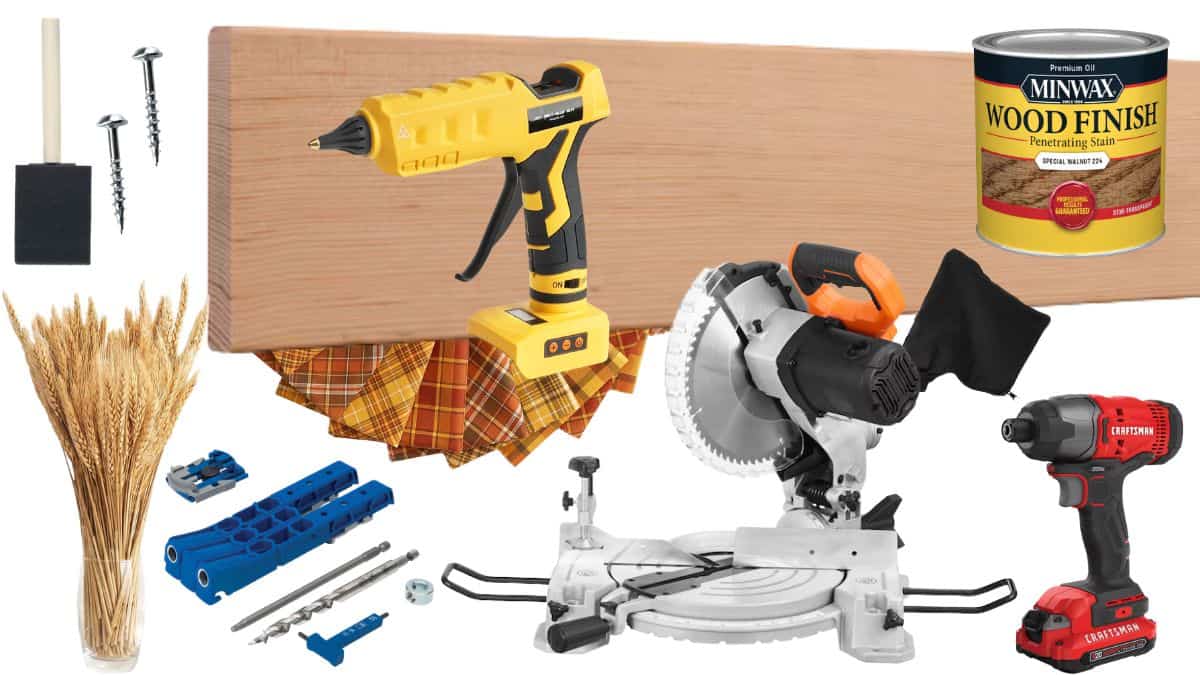
Supply List
- 1x4 Wood Board
- Kreg Pocket Hole Jig
- Miter Saw
- Screws
- Impact Driver
- Minwax Special Walnut Wood Stain
- Foam Brush
- Wheat Grass
- Fabric
- Hot Glue Gun
- Chalkboard Banner (optional)
- Twine for Hanging Banner (optional)

Before You Make Your Wooden Wreath
First, decide how large you want your wreath to be. Mine is pretty big, with each 1x4 piece measuring about 11 inches along the longest side.
The exact size matters less than consistency. All six pieces need to be the same length so they can come together evenly and create that clean hexagon shape.
And now we get to use that geometry we all swore we'd never need after high school. I was actually a nerd who liked geometry, so apparently I've been preparing for this wooden wreath DIY for years. 😆
A hexagon has six interior corners, and the wood pieces meet to form them. To create the shape with mitered joints, cut the ends of each board at 30-degree angles.
Accuracy matters because even a small difference between pieces becomes much more noticeable once you start joining everything together.
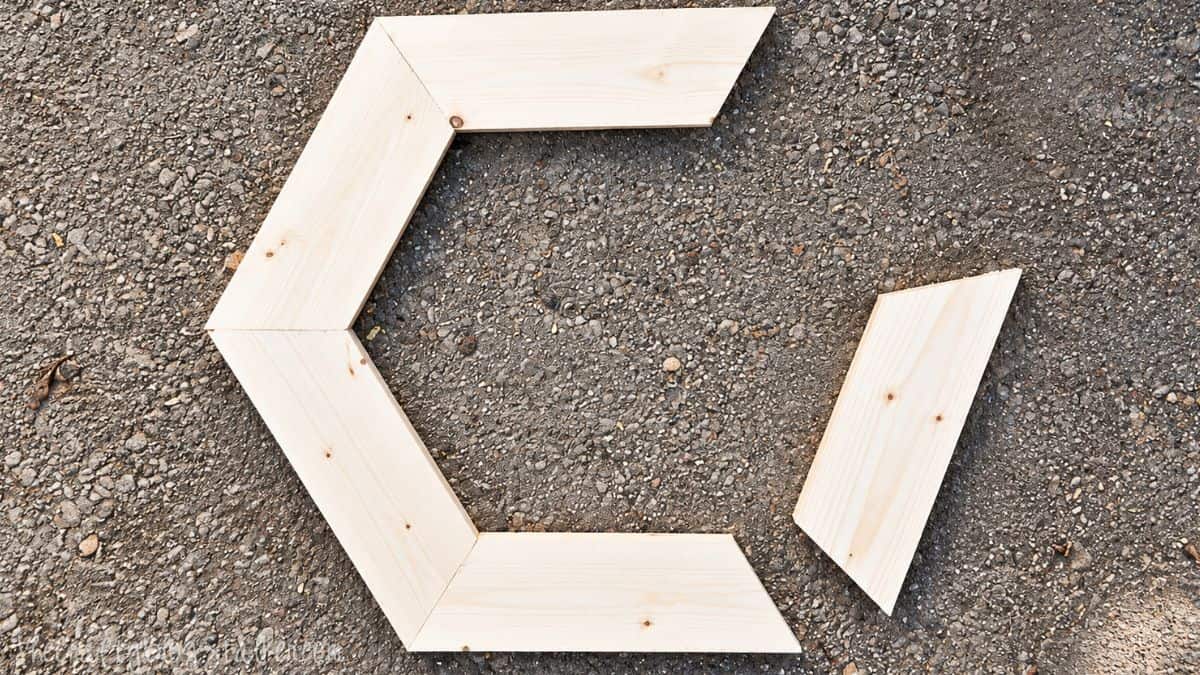
Don't be surprised if you need to make a tiny adjustment as you fit the final pieces together. I had to change the angle on my last piece by about half a degree to get everything to cooperate.
And just to keep it real, mine still isn't absolutely perfect. The top and bottom aren't completely level, and I'm pretty sure I'm the only person who's ever noticed. Handmade doesn't have to mean mathematically flawless!
Building and Decorating the Wreath
Once the wood pieces are cut, the Kreg Pocket Hole Jig makes it much easier to create strong joints without having screws showing across the front of the wreath.
Pocket holes pull the pieces together tightly, which is another reason those miter cuts need to line up as closely as possible.
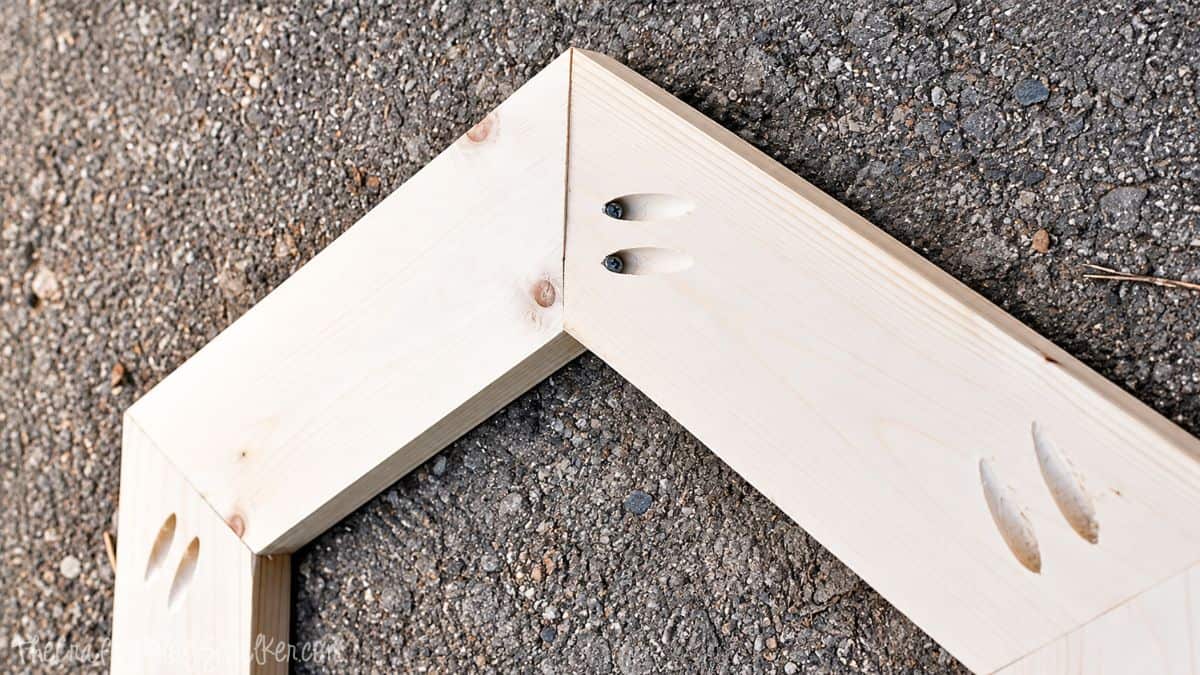
Gosh, I love pocket holes! They give the back a nice, clean connection while leaving the front ready for stain and all of the pretty fall decorations.
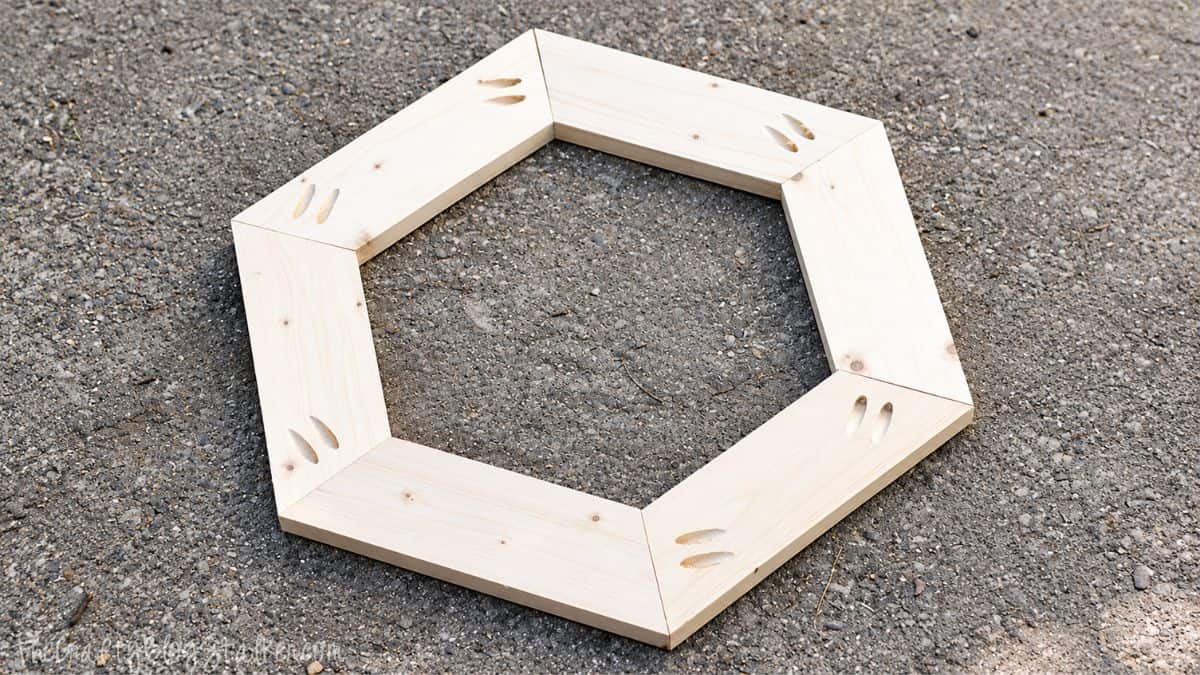
For the finish, I used two coats of Minwax Special Walnut Wood Stain. The darker stain brings out the wood grain and gives the wreath that warm, rustic look I wanted for my fall decor.
I didn't seal mine because, well, we all know how impatient I am. I was ready to decorate it and get it on the wall! If you plan to display yours outdoors, consider using a finish appropriate for your wood and the conditions where the wreath will hang.
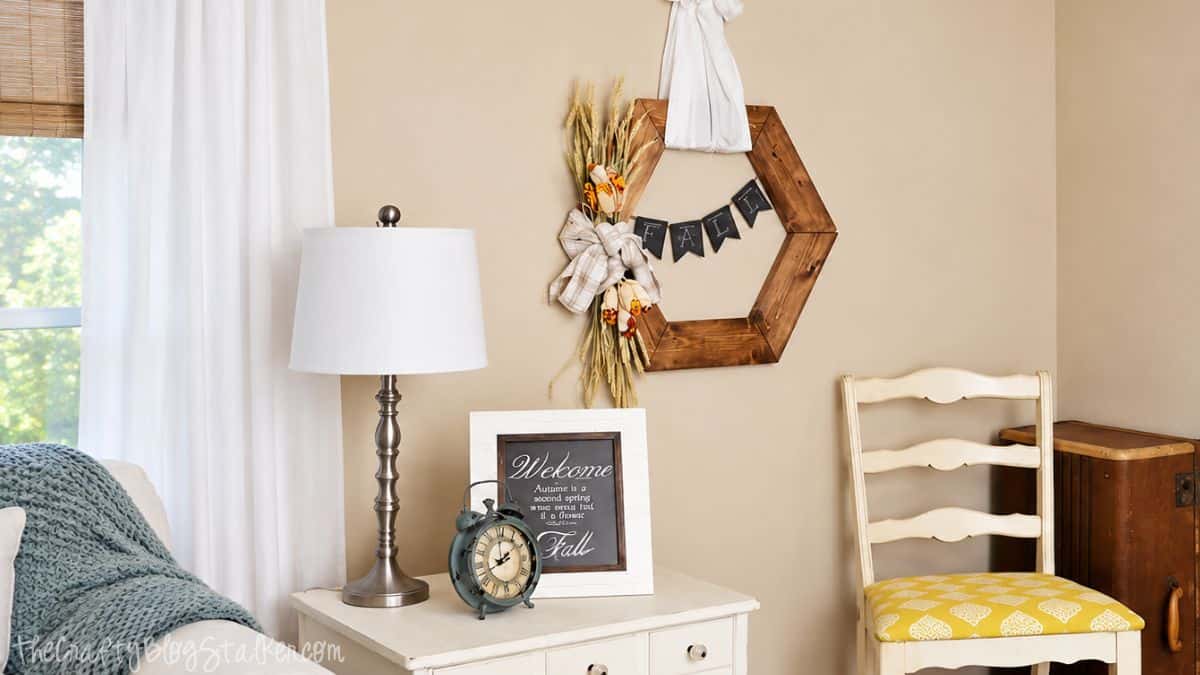
The decorations are where you can really make this fall wreath your own. I used wheat grass and fall floral stems, then added flannel fabric around the arrangement to bring in more texture and, conveniently, hide the hot glue holding everything together.
I hung mine on the wall with white muslin and added a little chalkboard banner made with wooden pendants and twine. You could easily change the flowers, fabric, ribbon, or banner to coordinate with your own fall decor.
That's one of my favorite things about wreath making. Once you have the wooden hexagon base, you can decorate it differently each year or even switch it up for another season.
Frequently Asked Questions
For this six-sided wooden wreath, cut the ends of the wood pieces at 30-degree angles. Keeping the cuts consistent is important so all six pieces fit together properly.
The size will depend on the length of your wood pieces. For mine, each 1x4 measures approximately 11 inches along the longest side, which creates a fairly large statement wreath.
As close as possible. Small differences in length or angle can add up as you work around the hexagon and may leave a gap at the final joint.
I used a Kreg Pocket Hole Jig because it creates strong joints while keeping the screws on the back of the project. If you use a different joinery method, make sure it suits the wood and provides a secure connection.
I didn't seal mine because I displayed it indoors. If you're making your wreath for an exterior door or another area exposed to moisture and changing temperatures, choose a finish suitable for your wood and its intended location.
Absolutely! Wheat and fall florals give mine a rustic autumn look, but you can customize the greenery, flowers, fabric, ribbon, or banner. You could even keep the wooden base and update the decorations for different seasons.
Need help with this project?
Click a button below to ask AI what screws to use with the Kreg Pocket Hole Jig.
More Fall Wreaths
I love finding new ways to decorate a front door or an empty wall for fall, especially when I can make the decor myself.
Here are a few more wreath-making tutorials and fall wreath ideas to inspire your next project.


Hi, I'm Katie!
I'm so glad you're here. Want to make something fabulous? I'm here to help!
chris aka monkey
i love this so much...way different...and gorgeous...appleton is a great place if you can stand the winters lol downtown is so rustic... the college has so many events and the Christmas parade is awesome of course you are frozen by the time it is over lol fox river is so scenic also...i have often pined for appleton just wish it wasn't in wi ha ha xx
Katie
Thank you!! Yes, we love Appleton.... the winters are definitely brutal though, especially after this last one!
Crystal
So different and so beautiful!! I love, love, love it!!
Katie
You are so sweet Crystal! Thank you so much :):) I am loving it!
JaneEllen
Yes I do remember geometry. Not my best subject but it was interesting. All those angles. Sometimes I wonder how I really made it thru high school. Must have finally realized boys weren't going to get me graduated, lol. I'm pinning this wreath, would really like to make it. I won't be cutting out, hubs will. I'm not allowed to use his dangerous tools he tells me often. Pinning this so he can see about the angles and degrees. Not his best subject either but together we muddle thru. His saw table tells him what degree saw is at. Like that this is different, great job. Happy week
Christie
I absolutely love this wreath! It is an eye catcher. Great job!
Katie
Thank you so much Christie! : ) It was so fun to build!
Megan
Love the shape! Can't wait to see the rest of your fall decor!
the cape on the corner
that is just gorgeous. i love the shape and the wheat.
Lauren @ Bless'er House
Woah! This is so unique! I was an English teacher, and even I can appreciate the cool geometry going on here. 😉 Very out of the box...er...hexagon. Har har
Ashley@Biggerthanthethreeofus
Love this! Seriously so cute! Pinning!
Steph @ Crafting in the Rain
I pretty much love everything about this--nice job!
Paula@SweetPea
I love this idea and definitely want to make my own version. My mom has a bunch of stained molding from an old school that will be perfect for this project. Thanks so much for the inspiration! (Pinned and shared on my FB page!)
Bethany
I LOVE this!!!
Rebecca Lopez
Love this girls. Unique and so pretty.
Vanessa
I absolutely adore this wreath!!! So minimal and warm at the same time. Thanks for linking up at Friday Finds!
Kristen Forgione
SO VERY ORIGINAL! I just posted my $3 DIY Mantel on the link party and one of these would go perfectly! Great work!
Erica
I absolutely ADORE this so much! I actually shared the pin of this with my FB followers the other day. It rocks that much! I'm going to have to make me one of these 🙂
Megan @ Our Pinteresting Family
Absolutely beautiful! 🙂 That is one of my husband's favorite tools.
Katie
Thanks Megan! : ) It is a pretty awesome tool! He has good taste ; )
Aki @ Minted Strawberry
I love this so much! I'm betting I'll be doing this soon. Featured you on the Friday Finds Link Party! 🙂
Katie
Thank you so much! I would love to see it when you are done! : ) xoxox
Nancy
I like this so much that I finally bought the Kreg jig that's been on my wish list forever and made a wreath this morning! Boy was THAT fun! Right now the (oil based) stain is drying. Will embellish and hang tomorrow. Thanks for the great inspiration!
Katie
Yay! That's so exciting Nancy! I'd LOVE to see a picture of it : ) Thanks so much for stopping by! It's always so exciting to know that people use our tutorials 🙂 🙂
Natalie
I love this so much! What a unique idea. And I love the idea of hanging wreaths on empty walls.
Katie
Thanks! : ) I know... I made it because I had the idea and then I realized it wasn't going to work where my wreaths normally go. I honestly never thought to hang a wreath on a wall... I might have to do that more often : ) Have a great night!
Theresa @DearCreatives
Such a pretty fall wreath. Thanks for sharing your tutorial.
Katie
Thank you very much Theresa!
Bethany
Made and assembled (and stained) the hexagon already. I LOVE IT!
Any ideas of how to adapt this to winter/Christmas without just changing the fabric and phrase? I want to do a Christmas wreath. Maybe like a little snowy village resting in the center bottom area? Any thoughts, ideas?
Katie
So glad you like it!! : ) I would love to see pictures! Hmm... as far as what to do, maybe you could add some eye hooks into the top and hang some ornaments down (they'd have to be flat though). And of course adding Christmas greenary would be beautiful against the wood tones!! Hope that helps some : ) Thanks so much for stopping by!!
Jamie
What is the overall width of this when assembled? Very pretty.
Jamie
Beautiful! Reminds me of the hexagon shelves I see all over pinterest.
Jordan
This is so pretty!! I love your creative take on a fall wreath! I featured this as part of a fall wreath diy round-up on my blog- if you'd like to check it out. Thanks so much the inspiration!
Printable Calendar
Love the shape! Can’t wait to see the rest of your fall decor!