
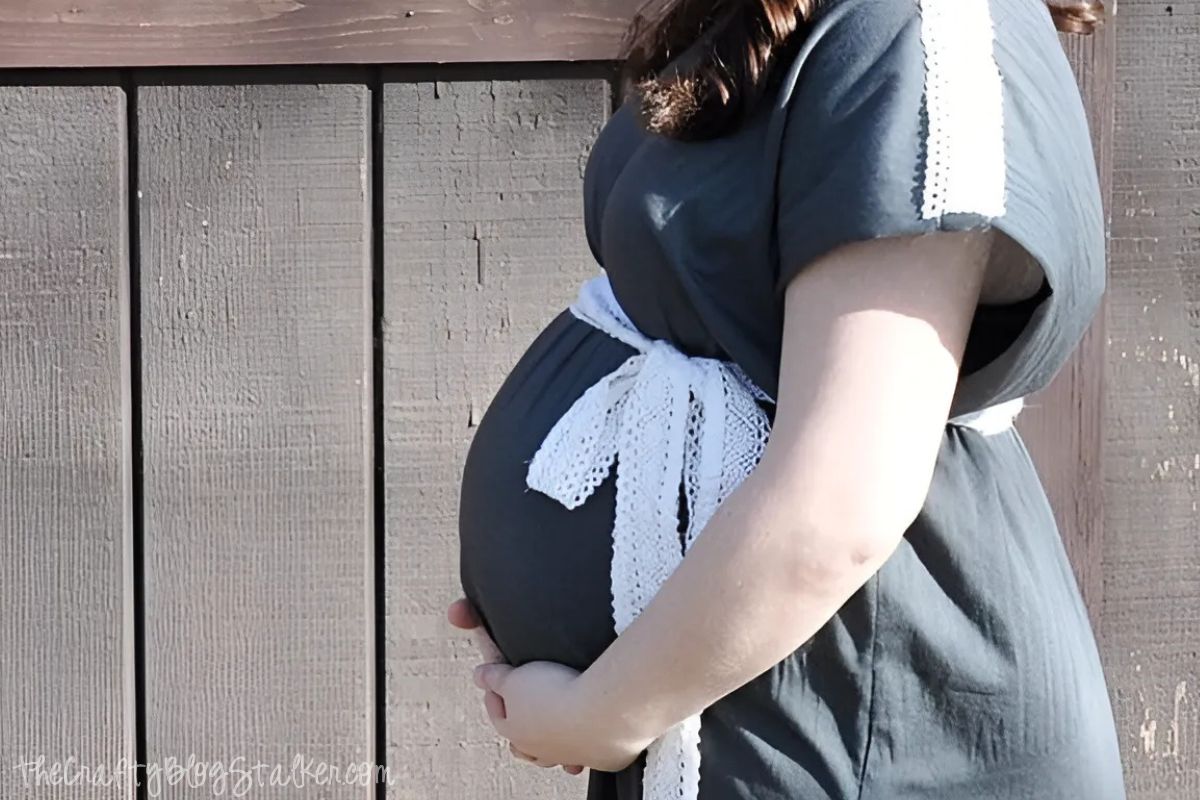
No pattern? No problem! This easy maternity dress tutorial shows you how to sew a flattering, bump-friendly dress without the fuss or extra cost.
I hardly ever sew for myself-especially not when I'm pregnant!
But this week, I decided it was time to make something just for me, and honestly, I might need to do this more often.
This maternity dress only cost me less than $10 to make, and it turned out cuter (and comfier) than most of the pricey ones I've seen in stores.
My favorite part? The lace detail on the shoulders.
I scored the lace at a thrift shop for just 75 cents and have saved it for the perfect project. This dress finally gave it a moment to shine!

Skill Level: Beginner
Total Time: 1 hour
Supply List
- Jersey Knit Fabric - see step 1 below on how I figured out my measurements
- Lace Trim - enough to wrap around your waist and trim for shoulders
- Sewing Machine
- Sewing Needle for Knit Fabrics
- Thread
- Scissors
IF YOU AREN'T PREGNANT - this totally would work for you too! See my note at the the bottom of the instructions on how to help compensate for your bump!
How to Sew a Maxi Dress
Please note: This is not an exact pattern but instructions for creating the basic shape of the dress. Every person will be different based on size. Determining the size of the fabric will be up to you and your measurements.
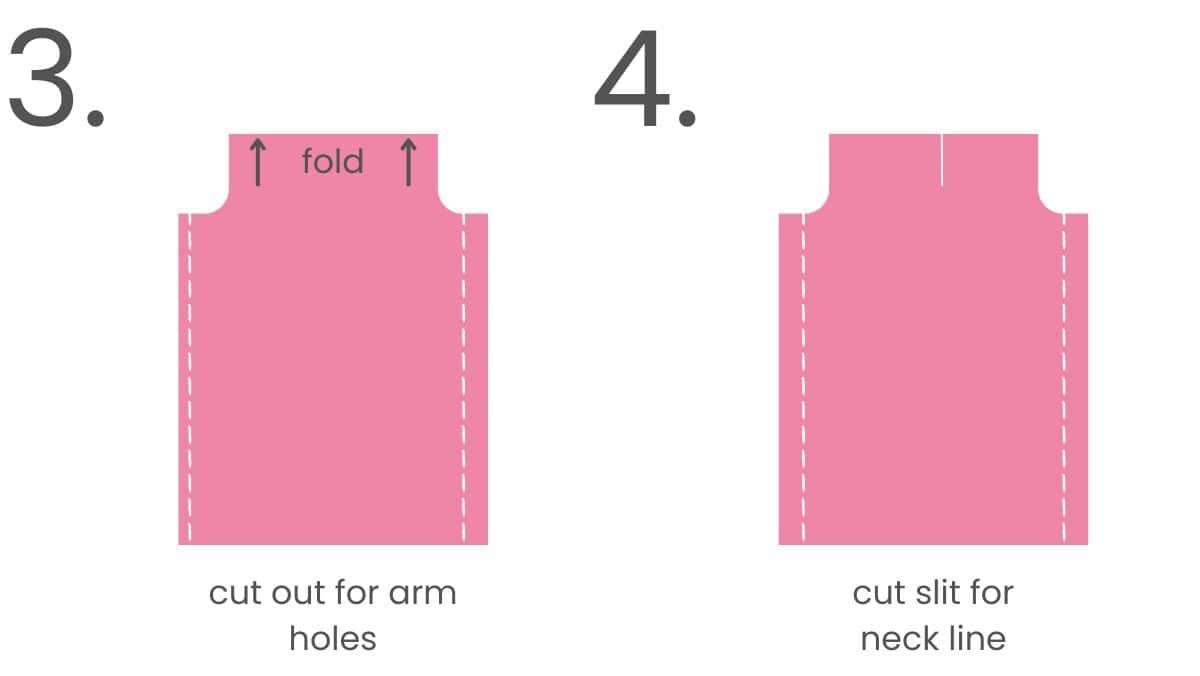
I didn't take pictures of the process, but the diagram below should help you understand.
STEP 1. Start with approximately 2 ½ yards of fabric (you may need to adjust according to your size).
I could use the fabric's width and fold it in half long ways. You might need to increase your yardage if you need more to go around you.
I basically just held this up to me when I was measuring. It should be wider than you since we will tie a belt around it to cinch it up.
To measure the length, ensure it comes up to at least your shoulder when folded in half.
So, if the distance from your shoulder to the floor is 5 feet, you would want your fabric to be 10 feet long. If you are shorter, you will need less; taller, more.
To begin, you should have a long rectangle twice the height you want your dress and big enough to fit around you loosely.
STEP 2. Fold the fabric in half, right sides together, and sew along both the long sides of the fabric using either a stretch stitch or a zig zag stitch.

STEP 3. Next, cut out the armholes. Measure from the top of your shoulder to where you want the bottom of the armhole to stop.
Mine was about 10 inches, but yours may be different.
STEP 4. For the neckline find the center of your fold and cut one straight slit however far do you want it to go. Mine ended up being about 7 - 8 inches.
It's better to cut it shorter, try it on, and determine precisely where it will fit.
I used a jersey knit fabric, so I left the raw edges. However, if you use a different fabric type, those edges may need to be hemmed.
NOTE (for maternity dress): I didn't have problems with my dress hiking up in the front from my pregnant belly, but I'm only about 25 weeks here.
If you are further along with a more prominent bump, you can cut a rounded bottom on the front panel of the dress. This will help it be a little longer in the front than the back.
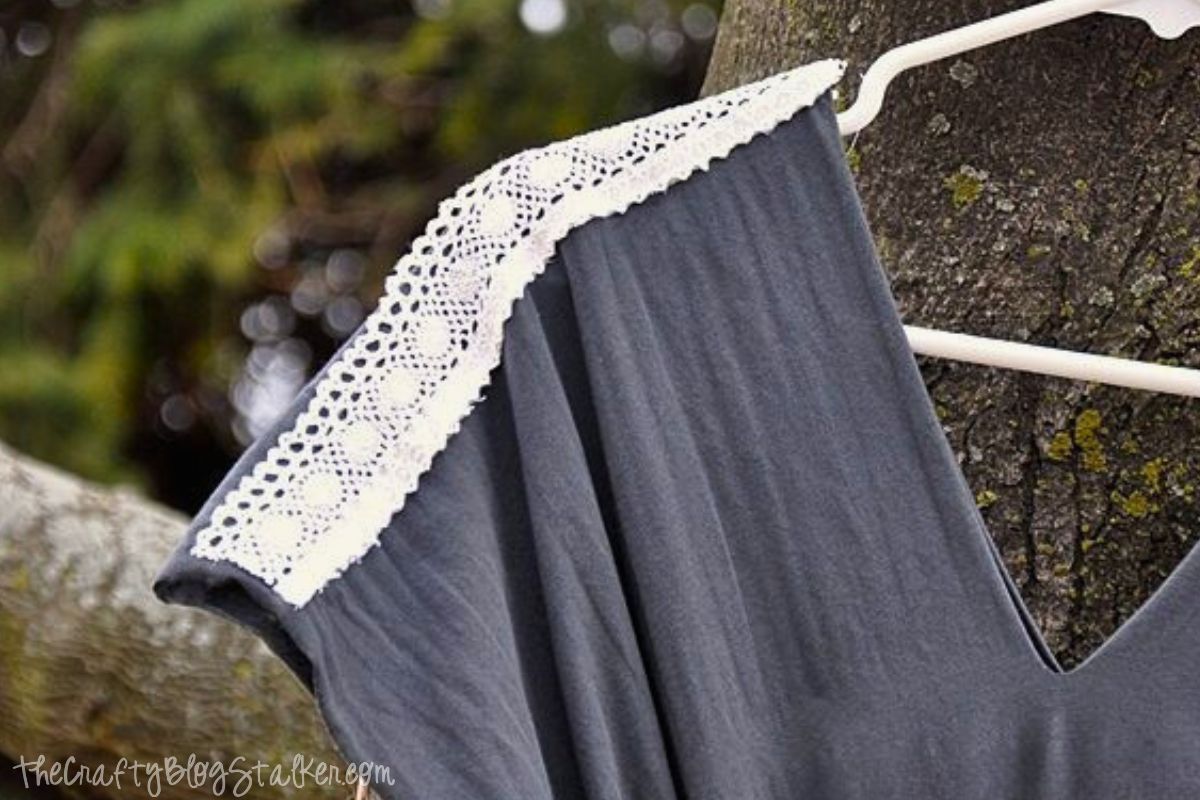
Adding Lace Details
To add the lace details, top-stitch the lace onto the top of the dress's shoulder area. It's super simple!
Last, cut a piece of ribbon long enough to tie around the top of your bump.
My lace was cotton crochet, but you could use ribbon or make a sash-it's up to you!

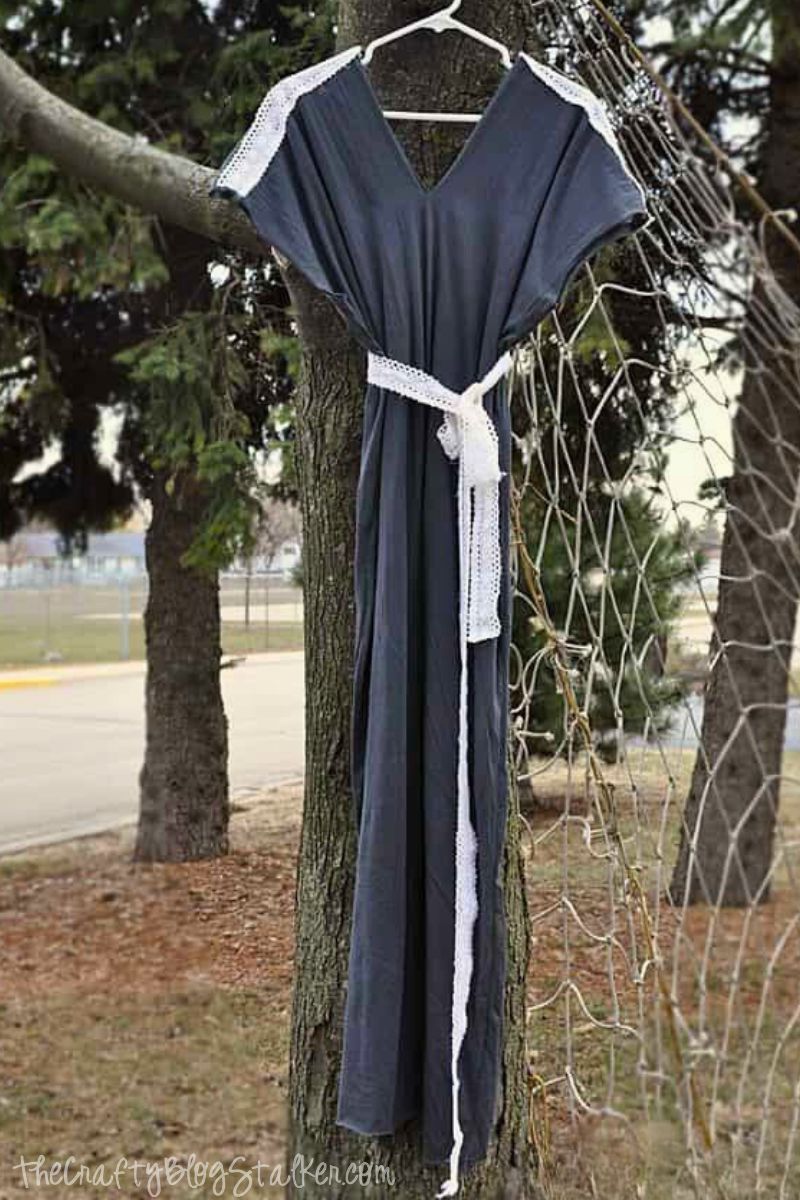
So, there you have it. A simple maternity maxi dress that you can make in an afternoon!
More Sewing Ideas
Don't put that sewing machine away yet! Here are a few more fun ideas.

Marcy @ day2day SuperMom
So fun, and easy! I'm preggo with twins & just can't find anything to fit now (30 weeks measuring 38!) Thanks for sharing at the Create & Inspire Party =) Congrats!
Debi
Very cute. I need to make one for Charly.
Amy
Hi, great dress! What maternial did you use?
Angelina
This is such a lifesaver! It’s so hard to find comfy and cute maternity wear, and the fact that this dress doesn’t even need a pattern makes it perfect for beginners like me. Thank you for breaking it down so clearly—I can’t wait to try this out and feel stylish while staying comfortable!
Katie Adams
You are so welcome Angelina!