



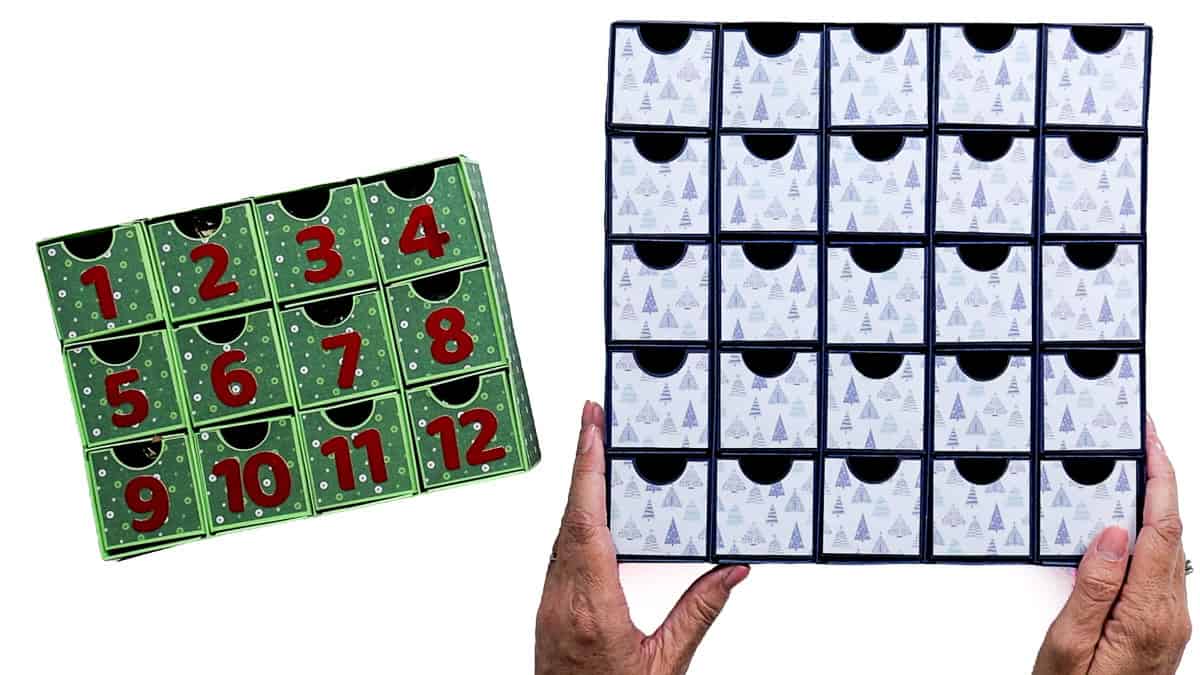
Let's make a 12 Days of Christmas Advent Calendar with Cricut together. Make 12 little drawers you can fill with treats or tiny gifts. It's such a fun project!
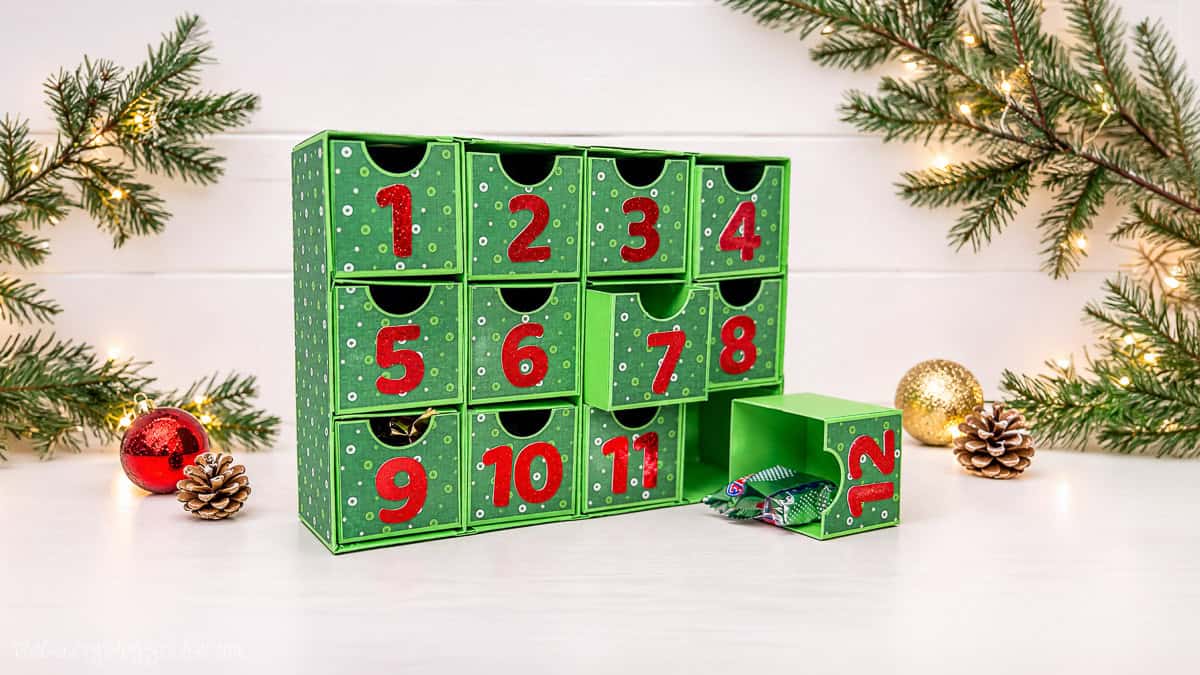
Counting down to Christmas is even more fun when you get a little surprise each day!
I made this 12-box advent calendar SVG so you can make your own with cardstock and your Cricut. It's easy to use and helps the project go smoothly.
This is a great way to make something special for your kids, grandkids, or anyone who loves Christmas. Or make one just for you!
There are a few pieces to put together, but I'll walk you through each step. You can do it!
Jump to:
Skill Level: Intermediate
Estimated Cost: $20
Total Time: 90 minutes
Craft Tutorial Video
If videos are your thing, you're in luck-I've got a full tutorial ready for you!
Subscribe to my YouTube channel and stay inspired with every new project.
Supply List
Some links may lead to similar items when the exact item is unavailable.
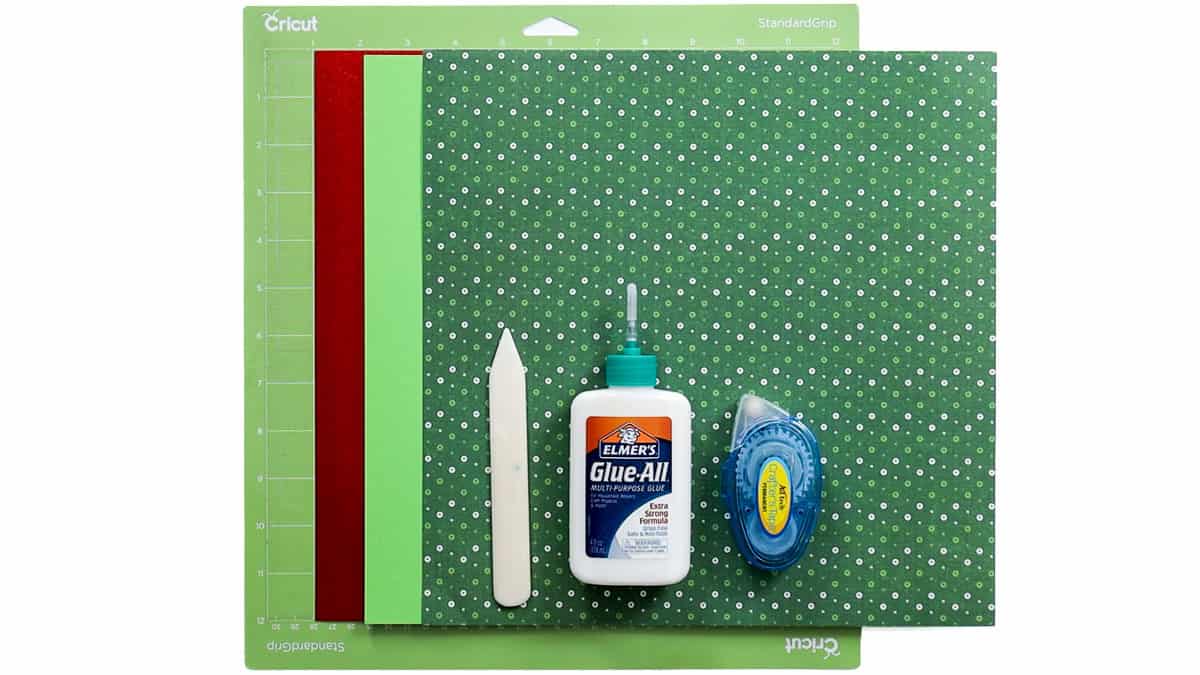
- Cricut Cutting Machine
- StandardGrip Mat
- 12 Days of Christmas Advent Calendar SVG
- Scoring Stylus or Scoring Wheel
- Patterned Cardstock
- Metallic Cardstock
- Brayer
- Bone Folder
- Liquid Craft Glue
- Double-Sided Adhesive Tape
- Candy or Small Gifts (to fill the drawers)
Grab the SVG
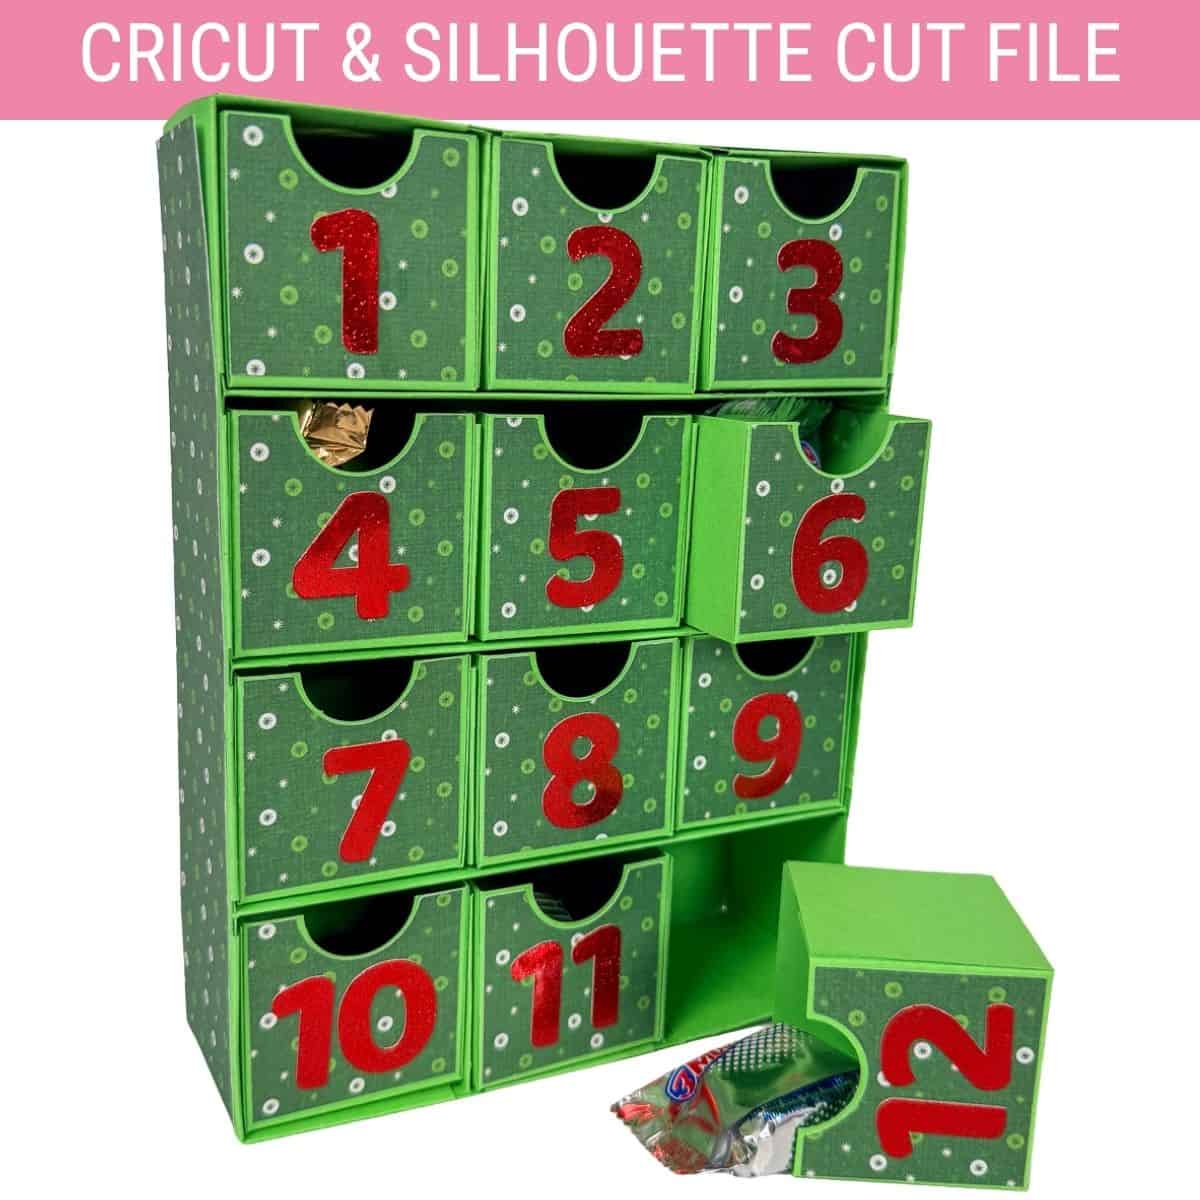
I made this SVG to help you cut and put everything together easily. The file has all the pieces you need: drawer boxes, numbers, frame pieces, and dividers.
How to Make a 12 Days of Christmas Advent Calendar
This DIY advent calendar is made from cardstock. It has 12 small drawers, set up in three rows of four.
The outside frame holds all the drawers in place. You get to pick the paper, so you can make it look as festive as you want.
You can use the colors and patterns I picked, or choose your own favorites. That's one of the best things about paper crafts!
Upload the Advent Calendar SVG
Open Cricut Design Space and start a new project with a blank canvas.
Click Upload, then Upload Image. Drag the advent calendar SVG file into the upload window.
Select Continue, then Upload to add the file to your uploaded images.
Add the design to your canvas and click Ungroup.
You should now see all the pieces in the Layers panel.
You'll notice red text next to some of the shapes that says things like "Cut 12" or "Cut 2."
These remind you how many copies you need. They are not part of the finished design.
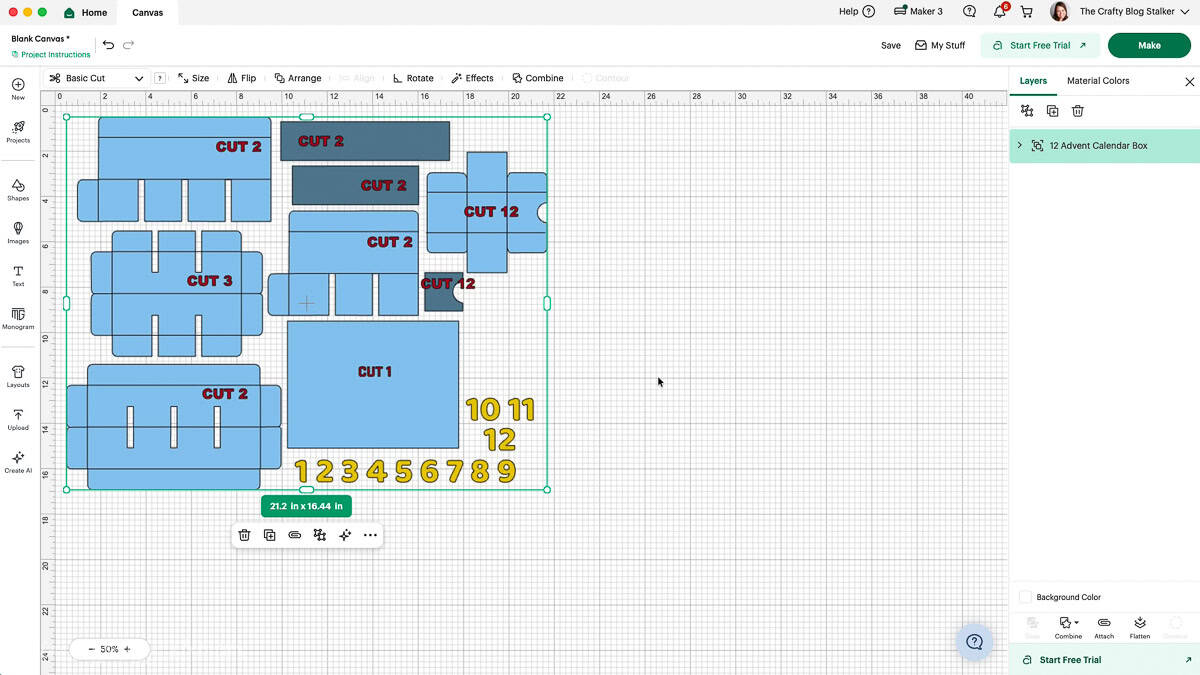
I set up the file this way so you only have to set up each shape once, then make as many copies as you need. This way, you don't have to change the same score lines again and again.
The colors in the SVG help you plan your cuts. Light blue is for solid cardstock, dark blue is for patterned paper, and yellow numbers are for metallic cardstock.
You can change these colors to match your own Christmas theme. Make it your own!
Change Cut Lines to Score Lines
Before we cut the cardstock, we need to set up the score lines.
Since I made this SVG outside of Cricut Design Space, the score lines are set to cut when the file is first uploaded.
We need to change them so the Cricut knows where to fold the paper instead of cutting through it.
Start at the top of the Layers panel and work your way down.
Select the first set of score lines.
Under Operation, change Basic Cut to Score.
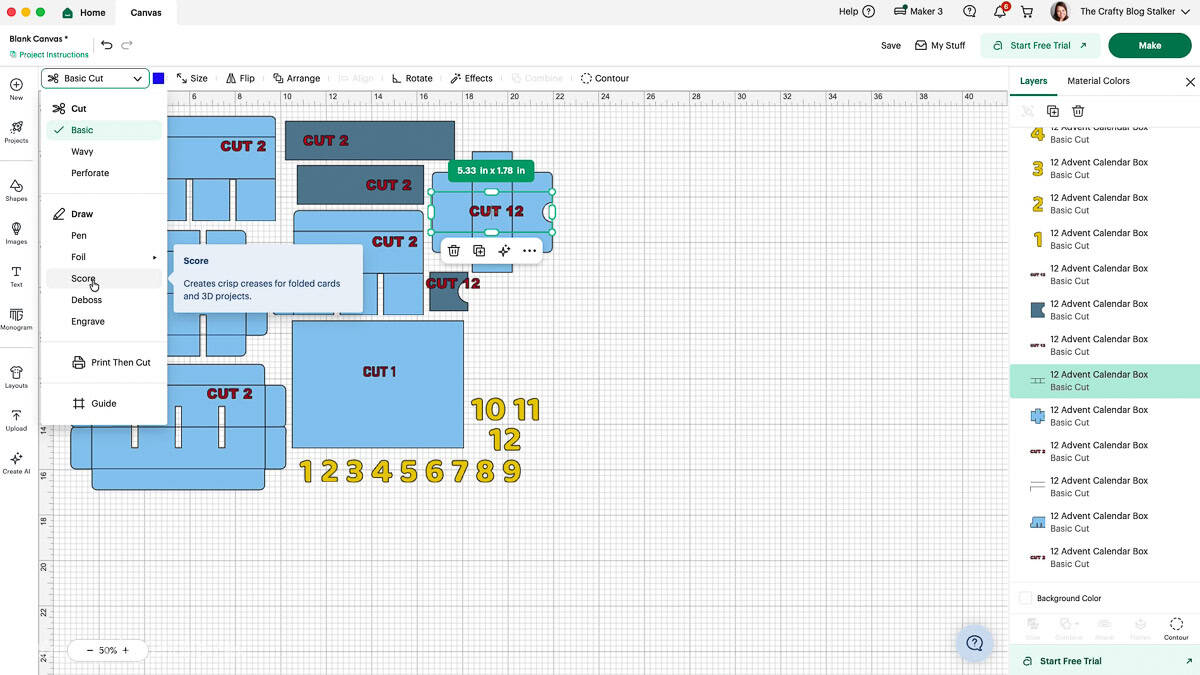
The solid lines will change to dashed lines on your canvas.
Next, select the score lines and the shape they belong to. Click Attach.
This step is very important!
Attaching keeps the score lines in the right place when your Cricut cuts and scores the paper. If you skip it, the lines may move to a new spot on the cutting mat.
Once the first drawer box is ready, select the attached shape and duplicate it until you have 12 boxes.
You can now delete the red "Cut 12" reminder.
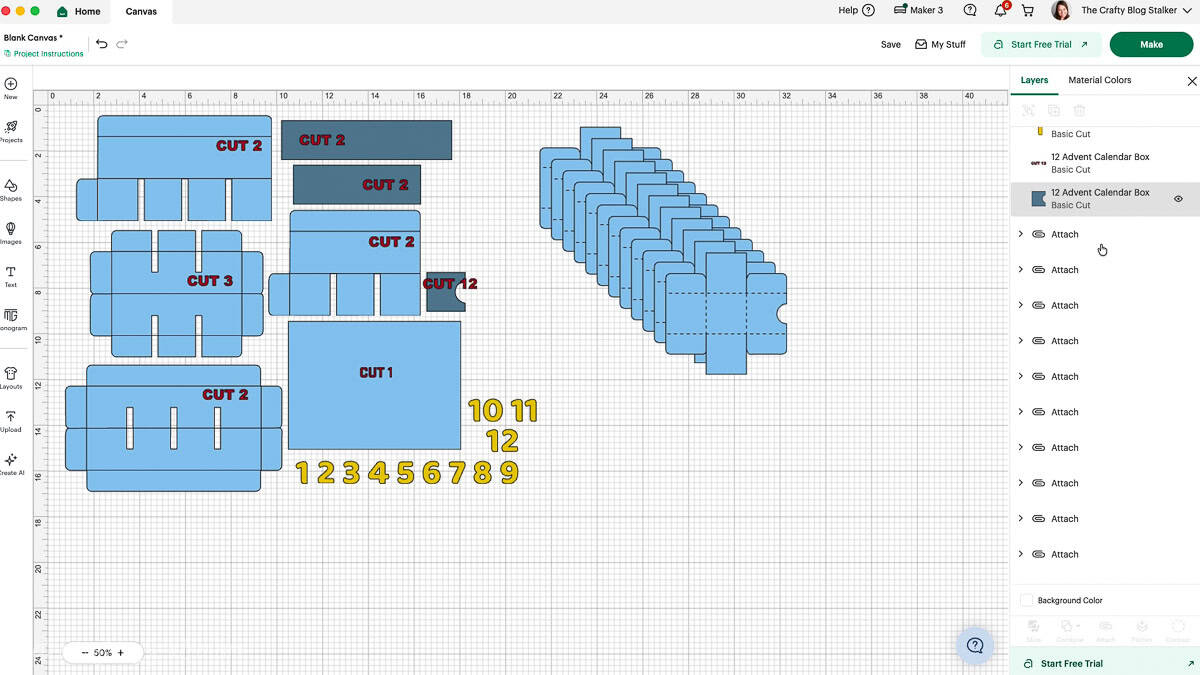
Next, find the dark blue shape used for the front of each drawer. Make 12 copies of that piece, too.
Continue working down the Layers panel.
Change each set of fold lines to Score, attach them to the right shape, and make the number of copies shown in red.
Some pieces need two copies, while others need three.
Be sure to change and attach the score lines before you make copies. That way, you only have to do it once for each shape.
When all the pieces are ready, delete the red reminders and save your project.
Now we're ready to cut!
Cut the Cardstock with Your Cricut
Click Make to open the mat preview.
Look through the mats to make sure all the pieces are in the right place.
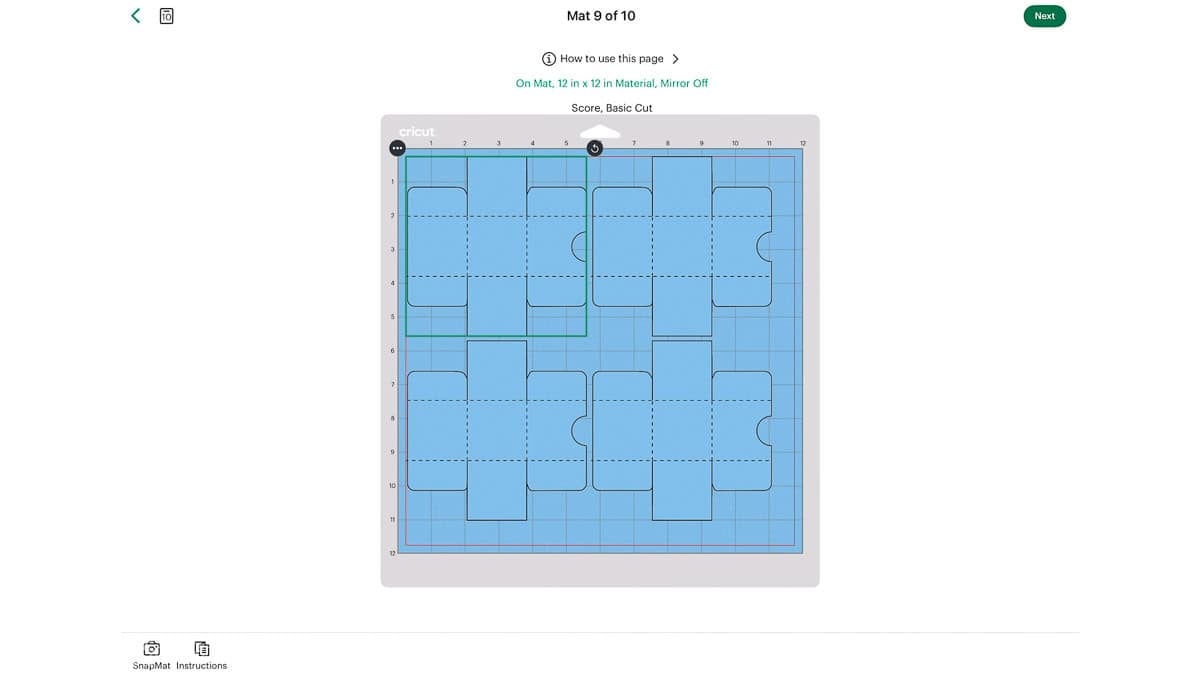
Load the mat into your Cricut and start the cut.
Follow the prompts in Cricut Design Space. It will tell you when to switch between the Scoring Tool and Fine-Point Blade.
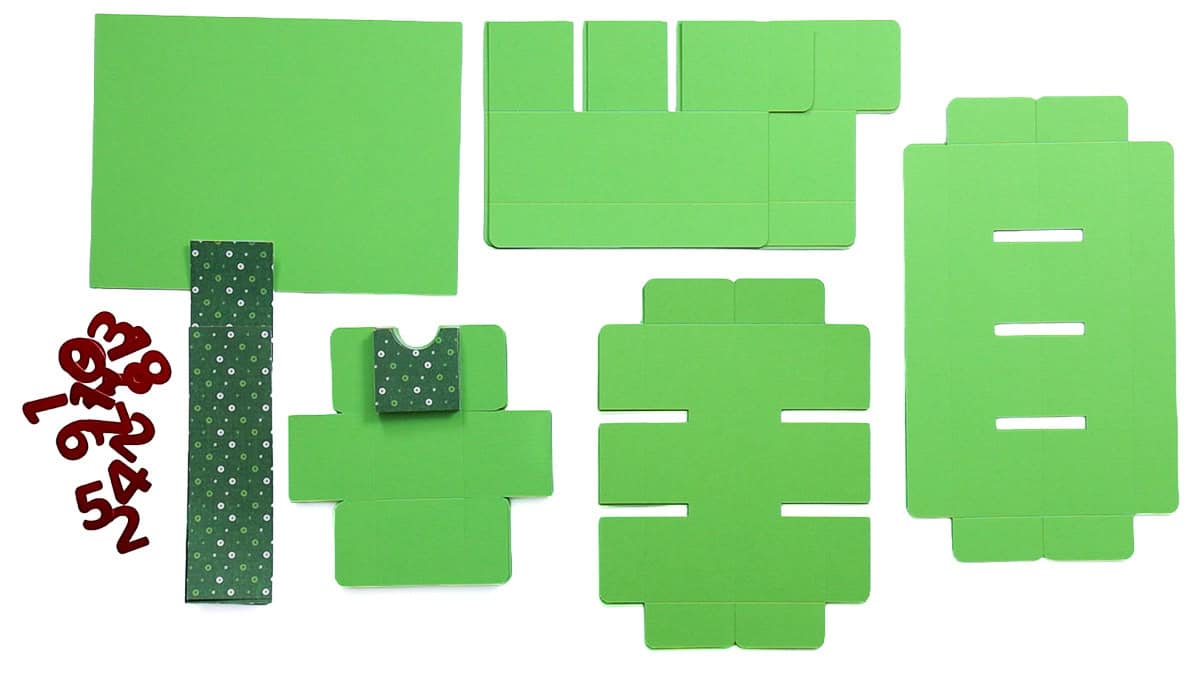
Once the cut is done, unload the mat.
Tip: Turn the mat over and peel the mat away from the cardstock. Don't pull the paper straight up. This helps keep your cut pieces flat instead of curled.
Repeat until all the cardstock pieces are cut and scored.
Assemble the Advent Calendar Drawers
Now that all our paper is cut, we can start putting the calendar together!
I like to start with the 12 drawers so they are ready when it's time to build the frame.
Add Numbers to the Drawer Fronts
Lay out the 12 decorative drawer fronts and the numbers from 1 to 12.
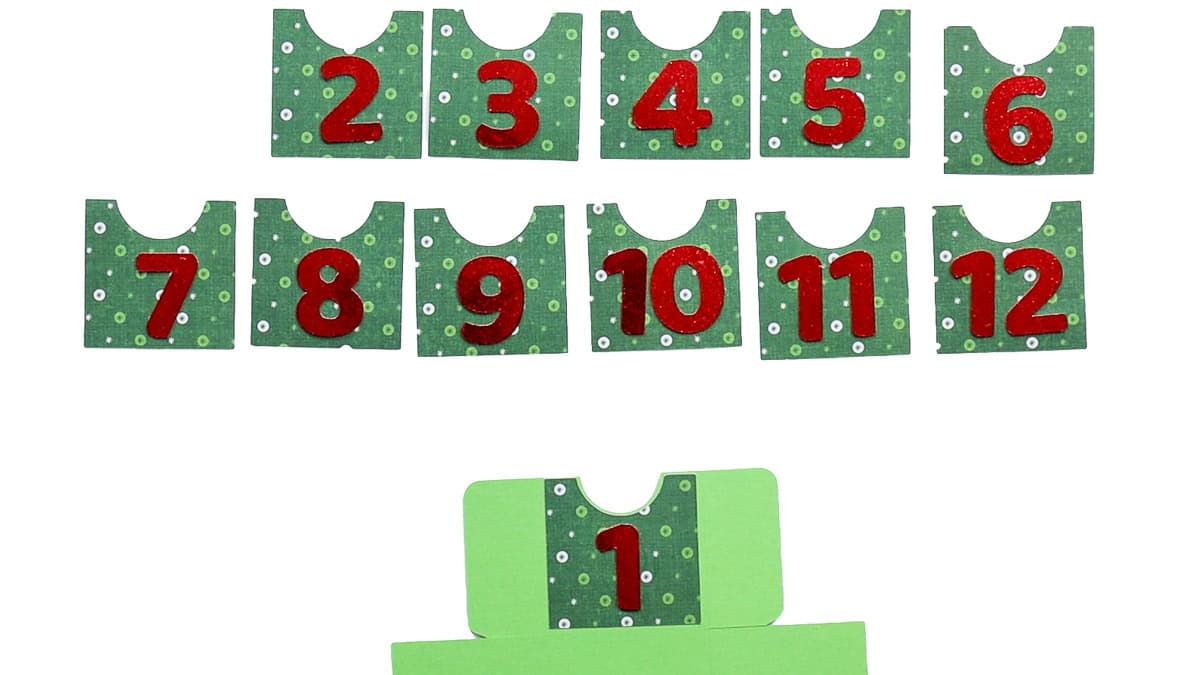
I'm using two kinds of adhesive for this project: liquid craft glue and double-sided adhesive tape.
Liquid glue takes a little longer to dry, but it gives me time to move a piece if it isn't lined up just right.
I like using it for the numbers because I want them to stay in place.
Add a small amount of glue to the back of the first number and center it on the front panel.
Press it down and repeat with the rest of the numbers.
Make sure your glue dries clear. A little glue may squeeze out around the edges, and you don't want it to leave a mark.
Next, glue each numbered panel to the front of a drawer box piece.
Line up the panel, press it into place, and let the glue set.
If you'd like, you can add small paper shapes or other fun details to the drawer fronts.
Fold and Glue the Drawers
Take one drawer box piece and fold along all the score lines, using a bone folder to press each fold and create nice, crisp edges.
Apply liquid glue to the small side flaps.
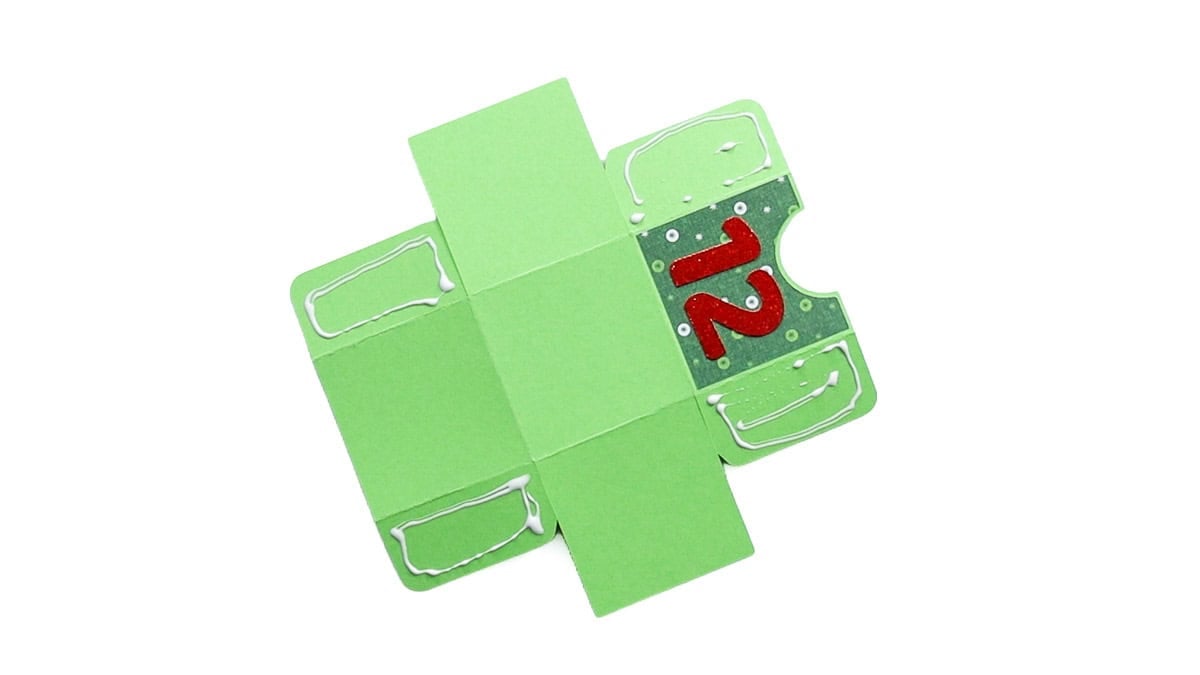
Fold the flaps inward so they sit behind the adjoining side panels, and hold each corner in place.
Repeat these steps for all 12 boxes.
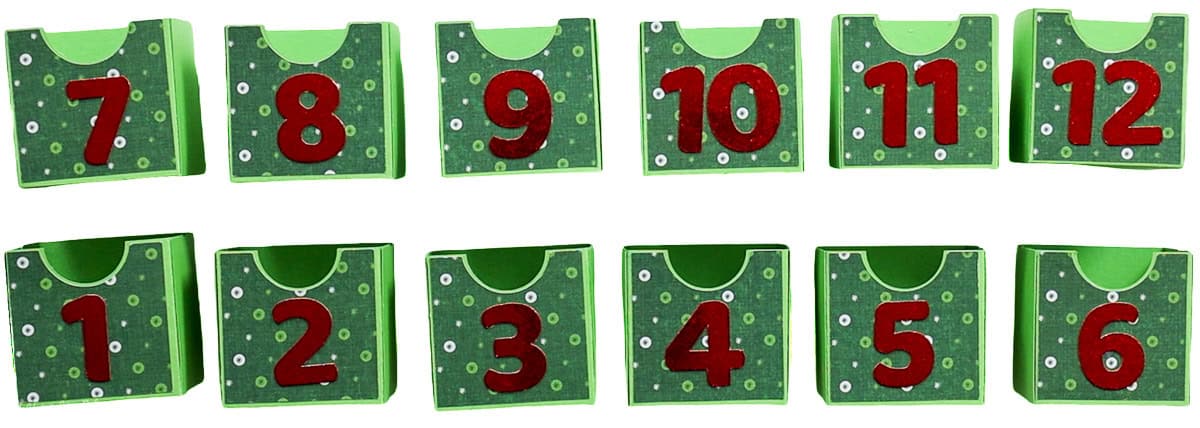
Take your time with the folds. The better the boxes hold their shape, the easier they will be to slide in and out of the finished frame.
Assemble the Advent Calendar Frame
The frame has more parts than the drawers, but we can make it one step at a time.
The finished frame has three rows and four columns. This gives us 12 spaces for our drawers.
It helps to lay out the pieces before you start gluing so you can see where everything goes.
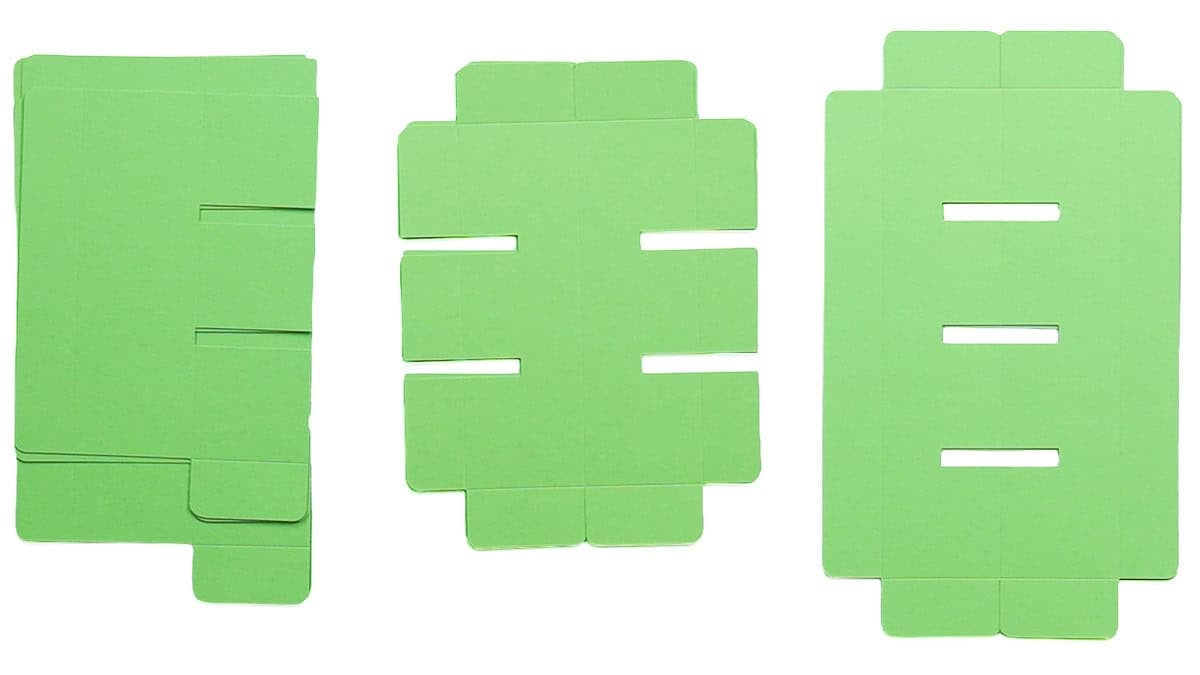
Fold the Outside Frame Pieces
Find the four pieces that will form the outside walls of the advent calendar.
Two pieces have three square sections, and two have four square sections.
Fold each piece inward along its score lines, using a bone folder to make crisp folds.
At the end with the connecting tab, fold the small rectangular section inward and then fold the tab in the opposite direction.
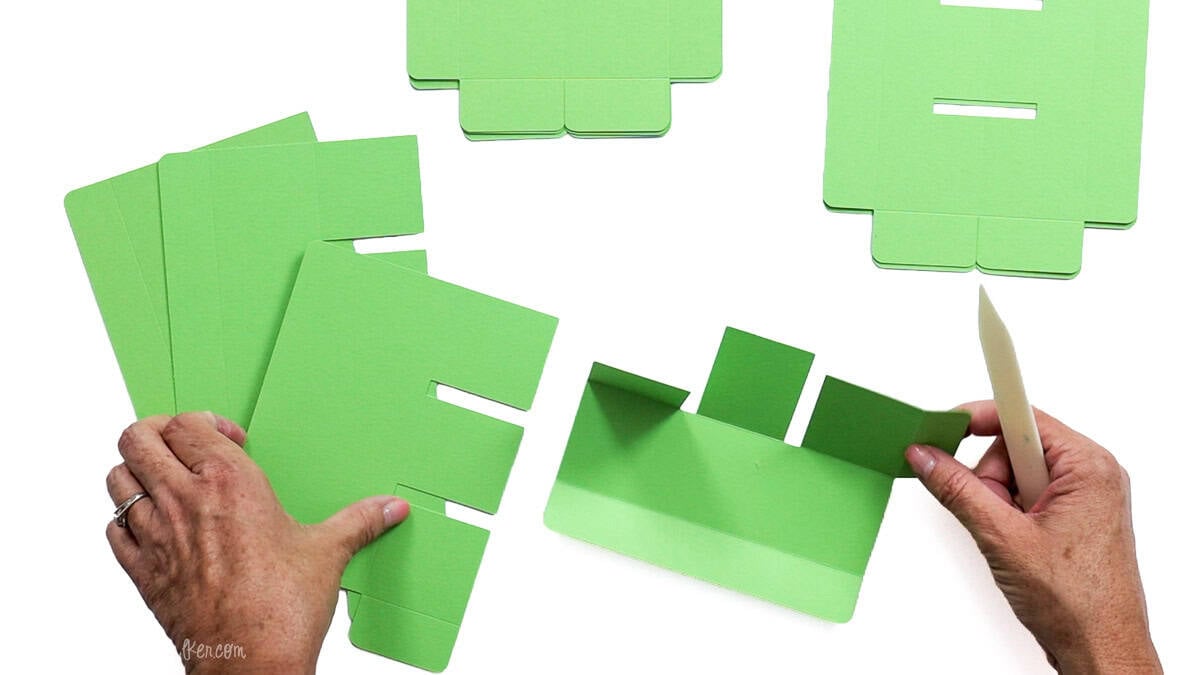
Repeat for all four outside pieces.
These folds will help us connect the walls and create the finished frame.
Prepare the Inside Dividers
Next, find the three divider pieces that fold down the center, fold each piece along its center score line, and then fold the small tabs on both sides outward in the opposite direction.
Apply double-sided adhesive tape along the center section, keeping the adhesive off the tabs.
Fold the center together and press firmly.
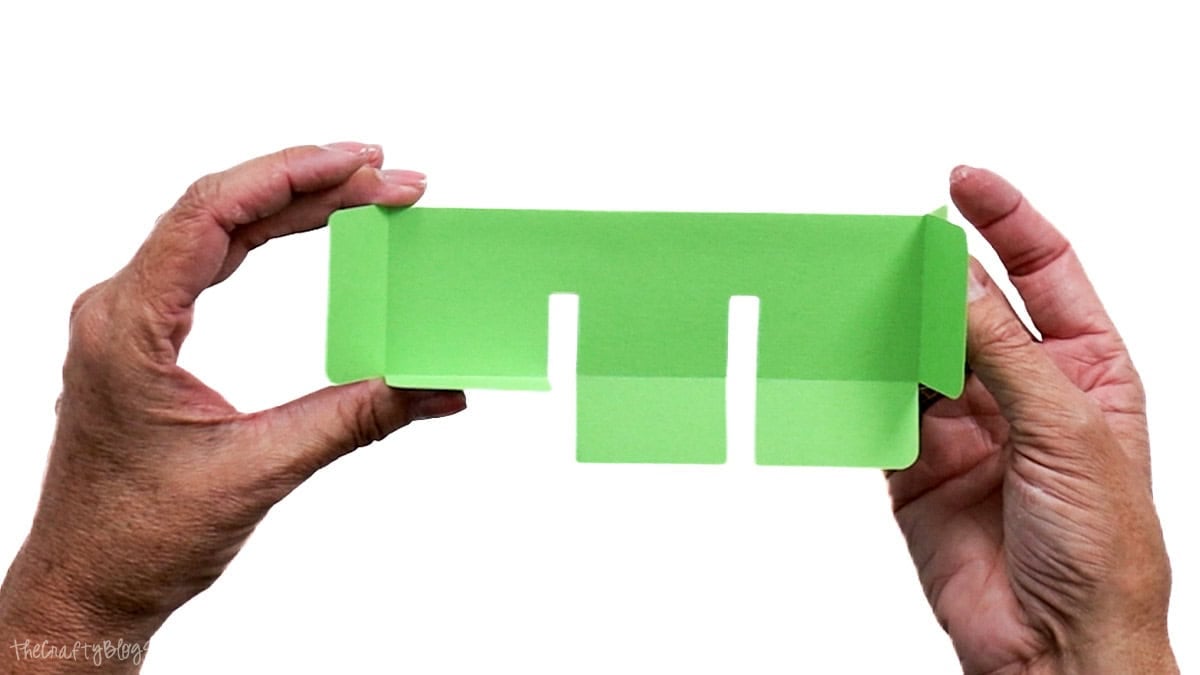
Repeat for all three pieces.
Now find the two remaining divider pieces with small rectangular sections in the center.
Fold each piece along the center score line and fold the tabs in the opposite direction.
Apply double-sided adhesive tape to the center and press the folded sections together.
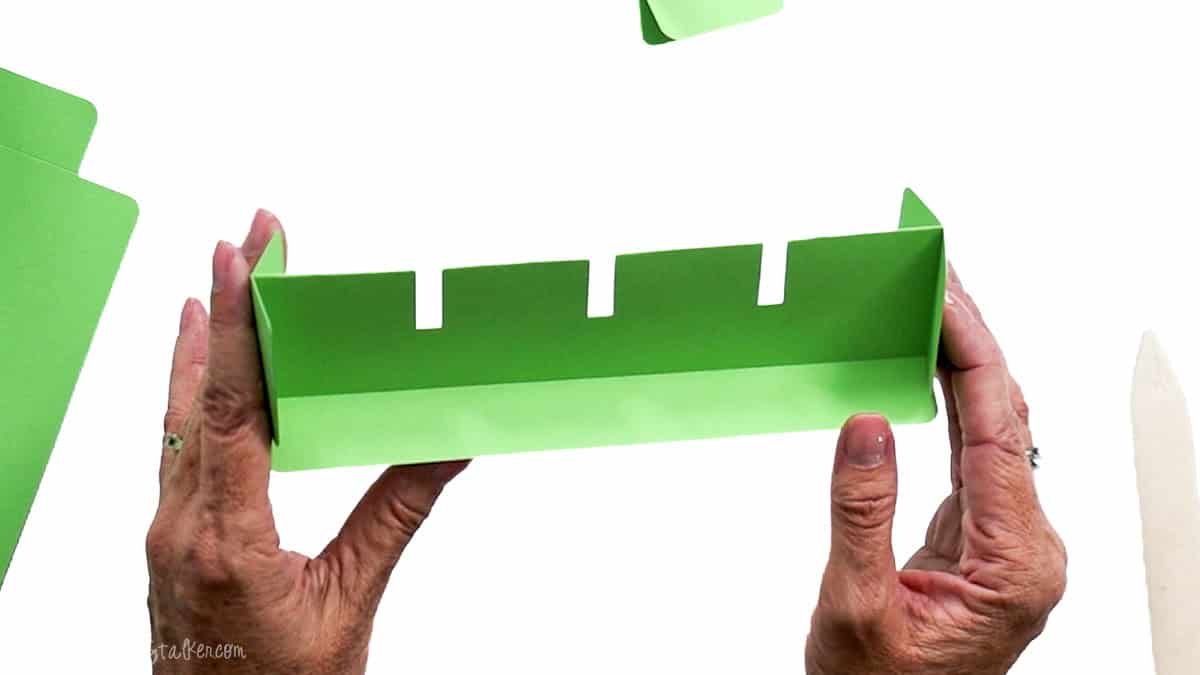
You should now have all five divider pieces prepared.
Connect the Outside Frame
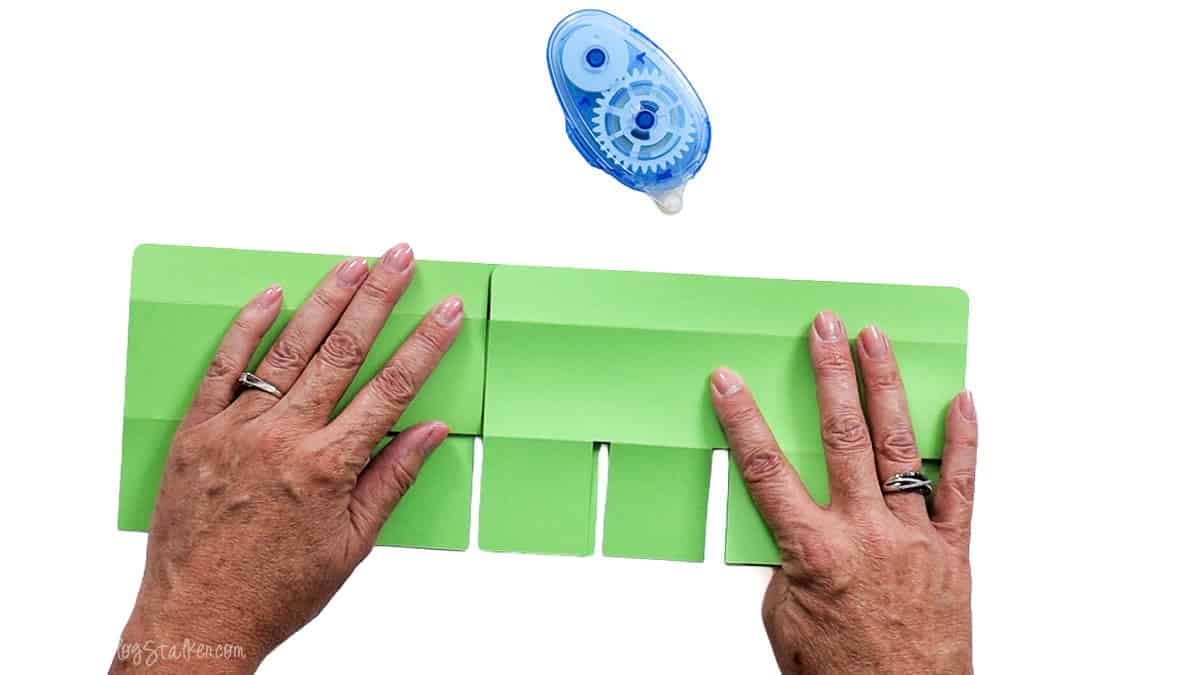
Arrange the four outside pieces in the following order: 3 sections, 4 sections, 3 sections, 4 sections.
This creates the rectangular frame needed to hold the 12 drawers.
Start with a three-section piece and a four-section piece.
Fold the connecting tab inward and apply double-sided adhesive tape.
Line up the two pieces so the score lines meet, then fold the tab over to secure them together.
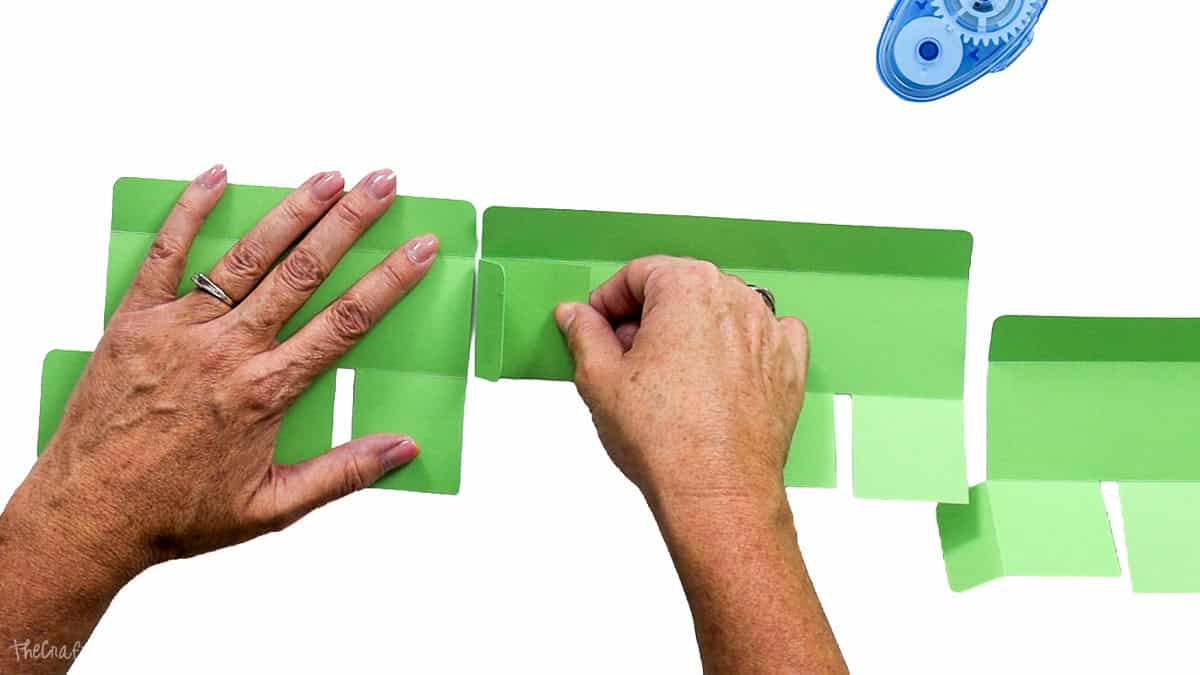
Continue attaching the remaining pieces in the same order.
Once all four sides are connected, bring the two open ends together.
Apply adhesive to the final connecting tab and press it into place.
You should now have a rectangular frame with space for three rows and four columns.
Add the Inside Dividers
Now we'll create the 12 individual spaces that hold the drawers.
Start with the two longer dividers that run lengthwise through the frame.
You may need to temporarily fold some of the outside flaps backward so you can see where the dividers will attach.
Apply liquid glue to the divider tabs.
At the corners, tuck the tabs underneath the folded sections of the outside frame.
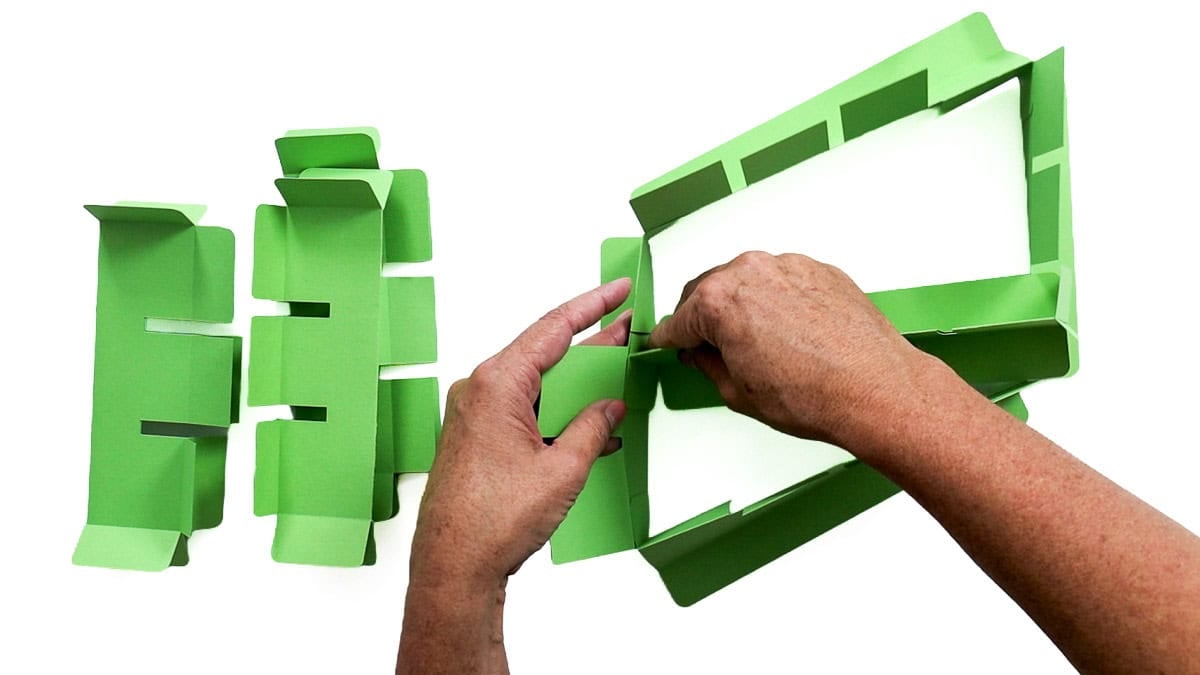
Press the glued tabs into place, making sure each divider is centered between the appropriate sections.
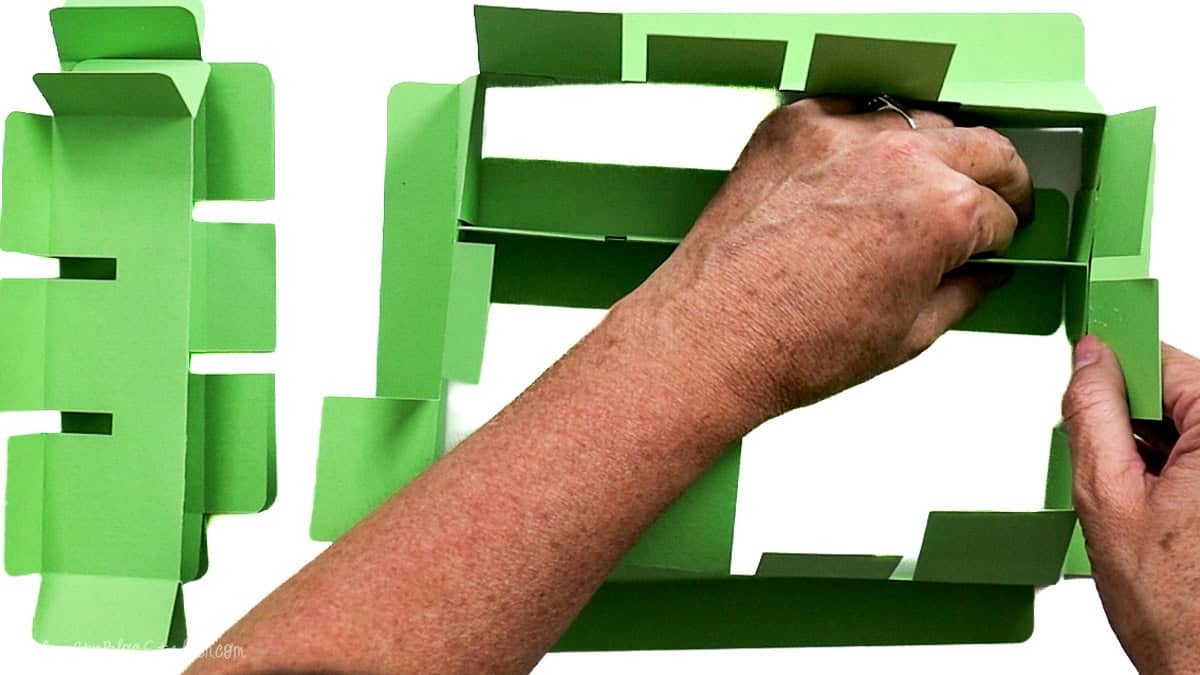
I prefer liquid glue for this step because it gives me a little time to adjust the placement.
Repeat with the second long divider.
Tip: Before the glue dries completely, slide a couple of your finished drawers into the openings. This is an easy way to check that the dividers are spaced correctly.
Once the two longer dividers are attached, add the three shorter dividers across the frame.
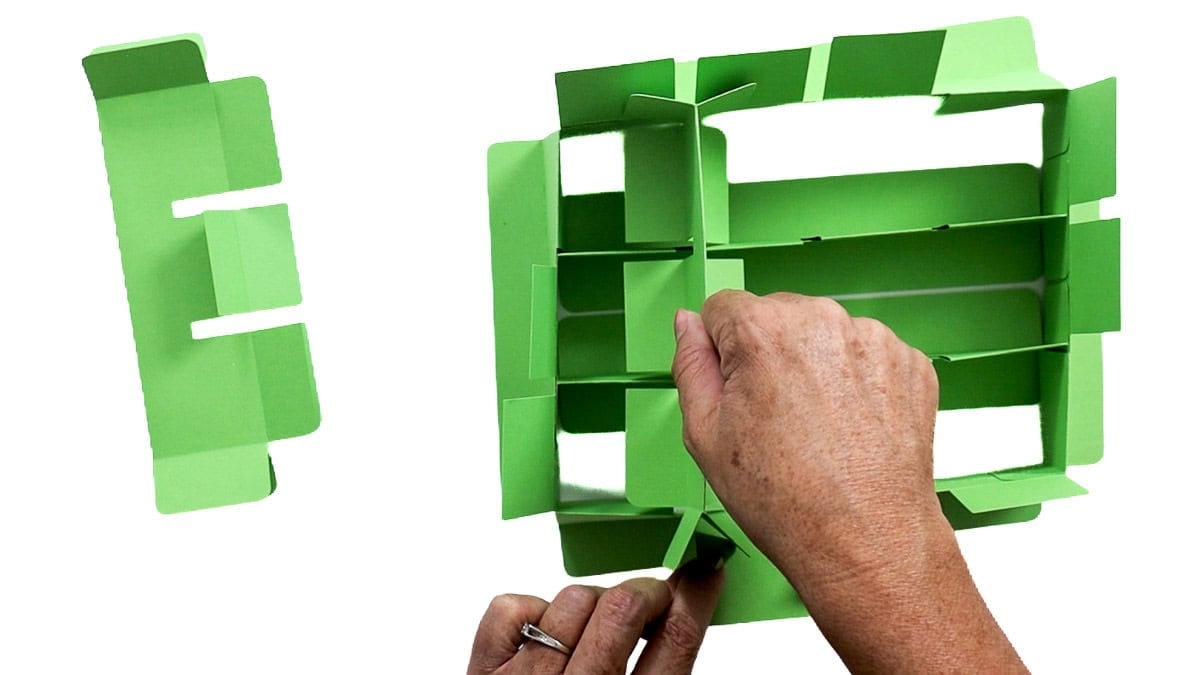
Apply glue to the tabs and secure them to the inside walls.
Some tabs tuck underneath folded sections at the corners, while the center tabs glue directly to the frame.
Keep each divider centered and press the tabs firmly into place.
Continue until all five dividers are attached.
You should now have 12 individual compartments!
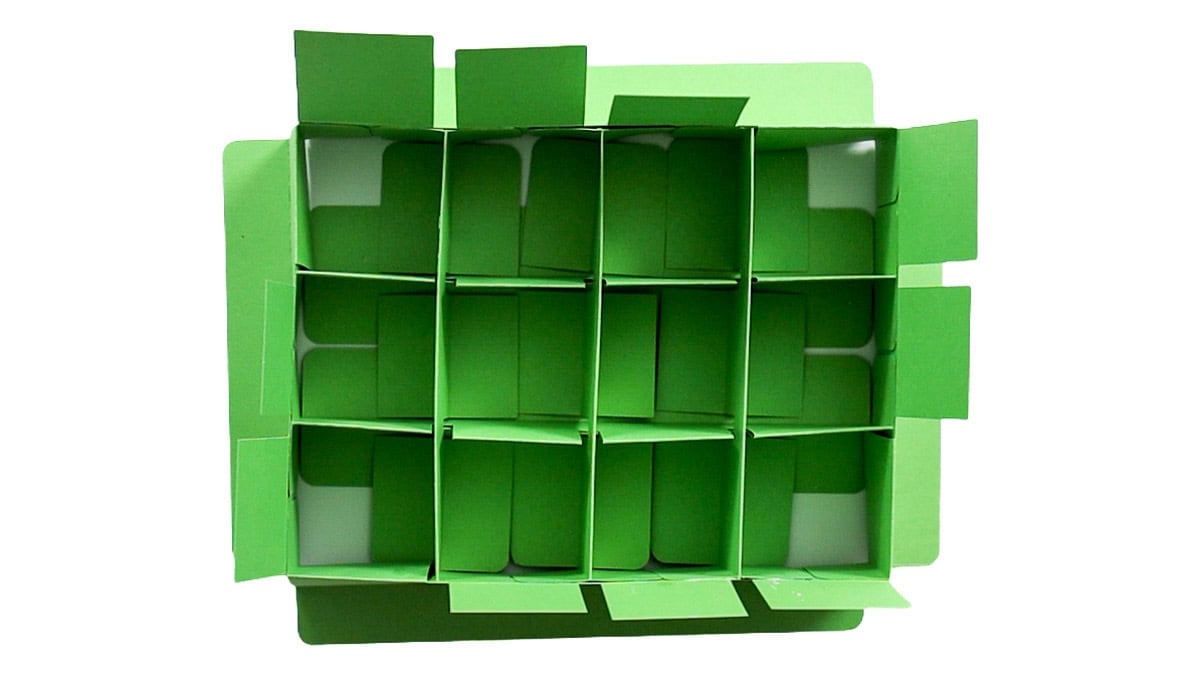
Finish the Frame and Attach the Back
With the dividers in place, we can finish securing the outside frame.
Apply glue to the remaining flaps around the outer edges and fold each flap inward to reinforce the frame.
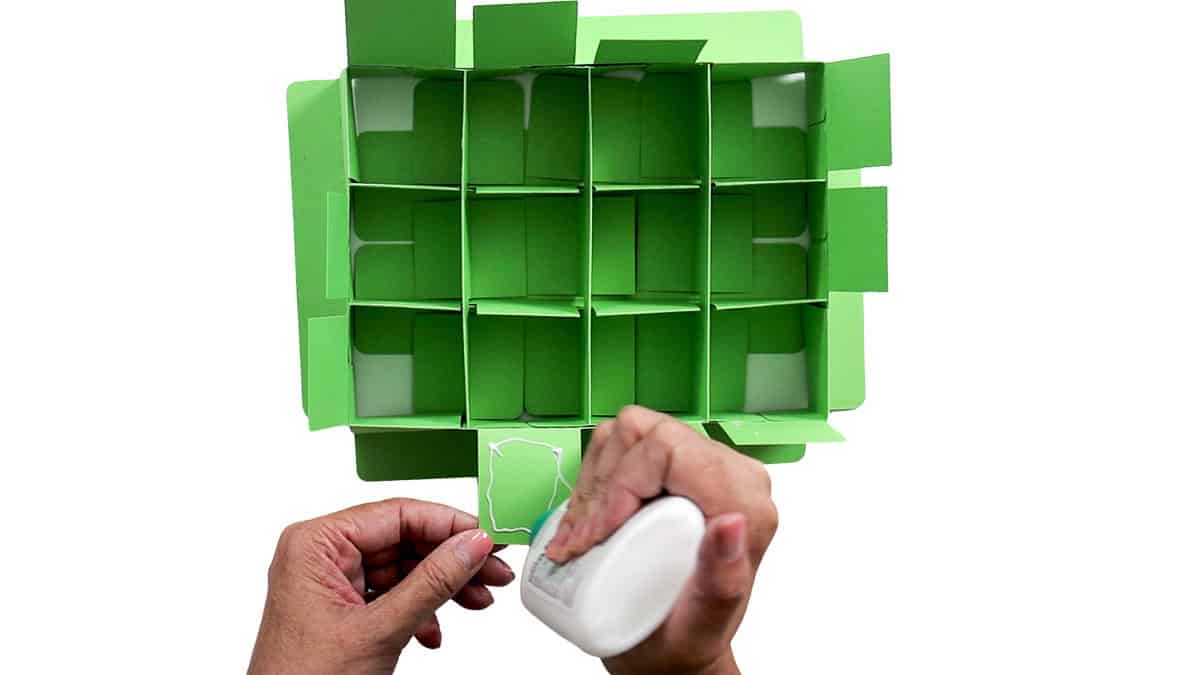
Use your bone folder to press the folded edges firmly into place.
Continue around the entire frame until all the outer flaps are glued down.
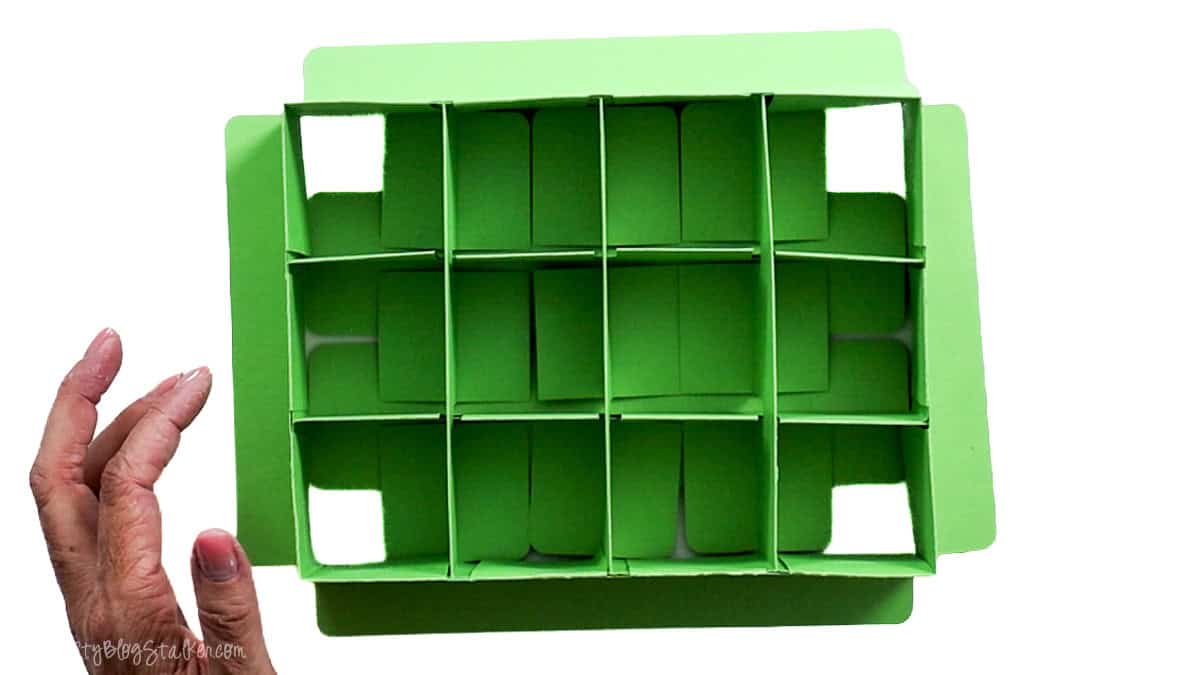
Next, turn the frame over to work on the back.
Fold the remaining back flaps into position.
Apply a small amount of glue to the corner flaps and secure them together.
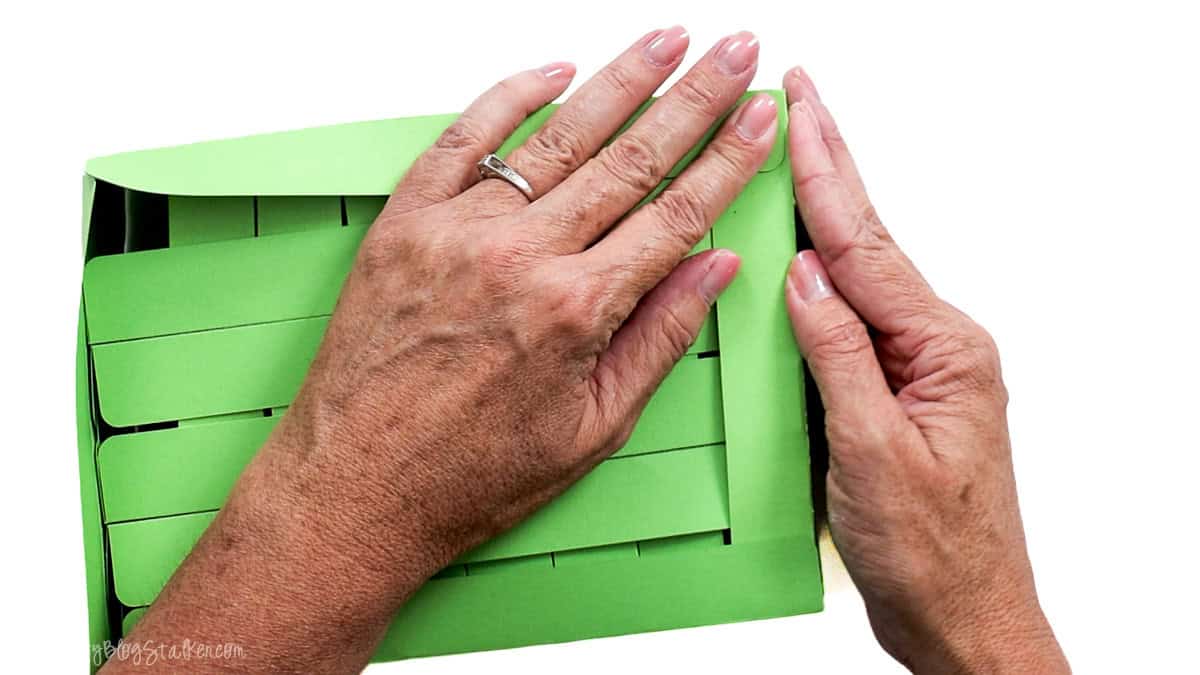
Try to keep the corners as square as possible while the glue dries.
Once the corners are attached, find the large rectangular cardstock piece that covers the back.
Apply glue to the back of the frame, including around the outer edges, and place the rectangular piece over the back and press firmly.
Turn the frame over and apply even pressure to help everything adhere.
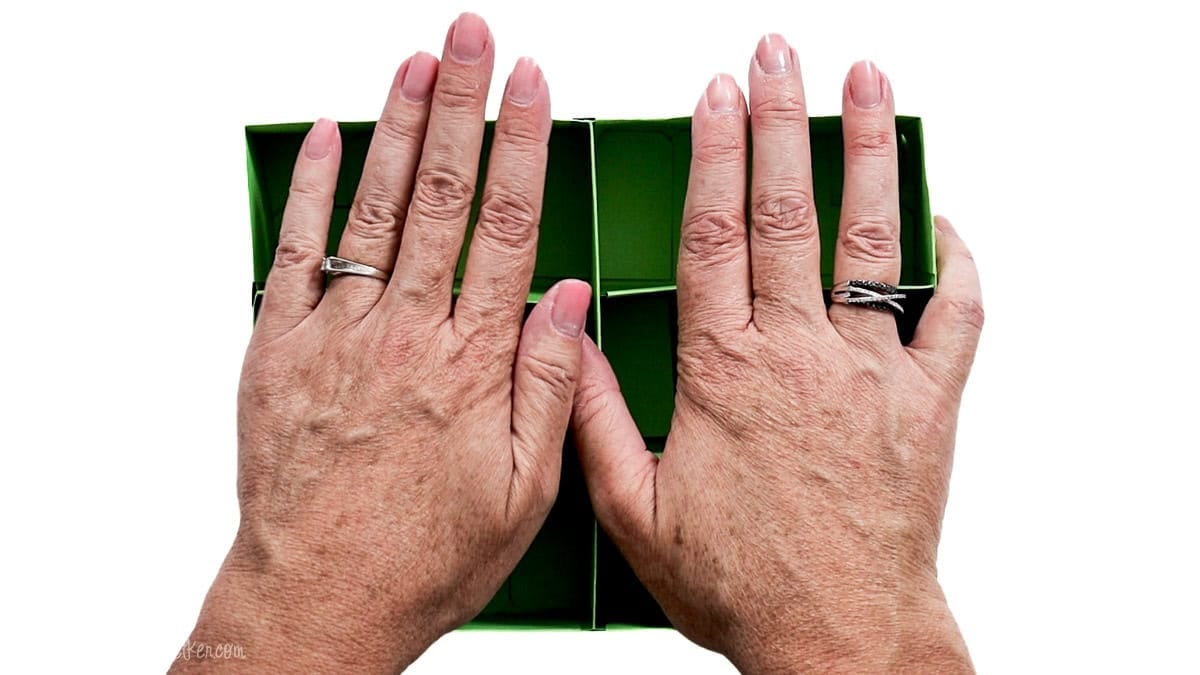
This gives the advent calendar a nice, clean back and hides all those little tabs.
Add the Decorative Strips
The last part of the frame is adding the decorative strips around the outside edges.
Apply double-sided adhesive tape to the back of each strip.
Line up the strips with the outside walls and press them into place.
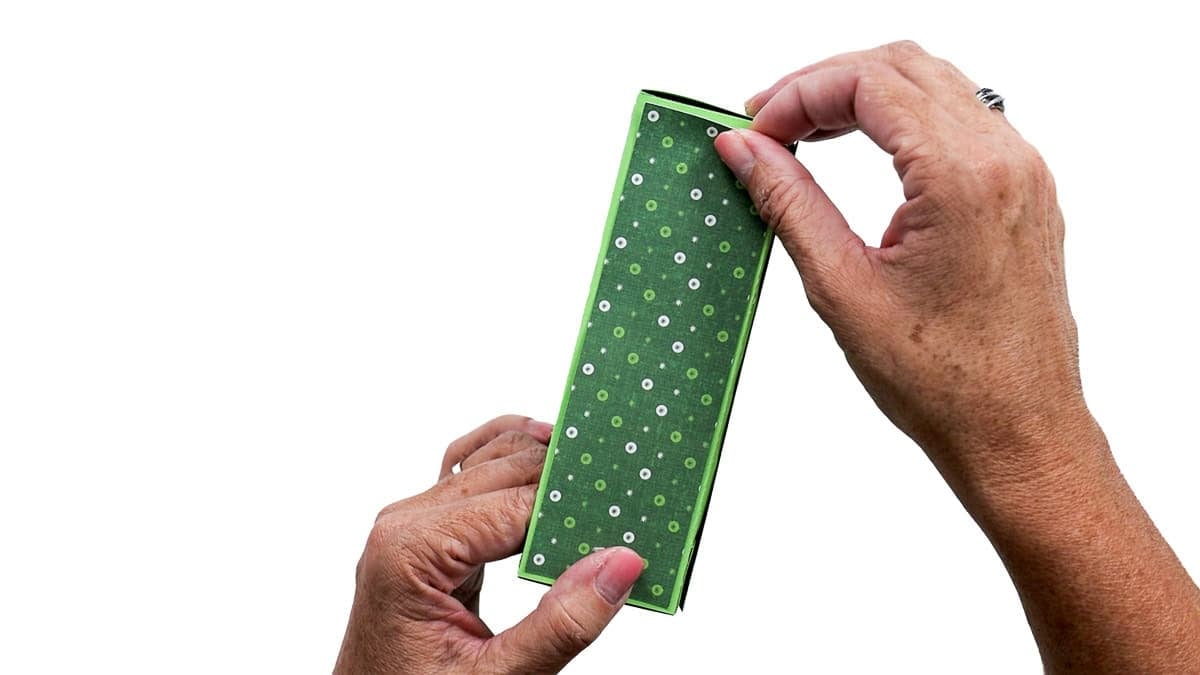
Continue until all four sides are covered.
These decorative pieces give the advent calendar a finished look and are a fun way to use coordinating Christmas paper.
Fill the Advent Calendar
Slide all 12 numbered drawers into the frame.
You can arrange the calendar horizontally or stand it vertically, depending on how you want to display it.
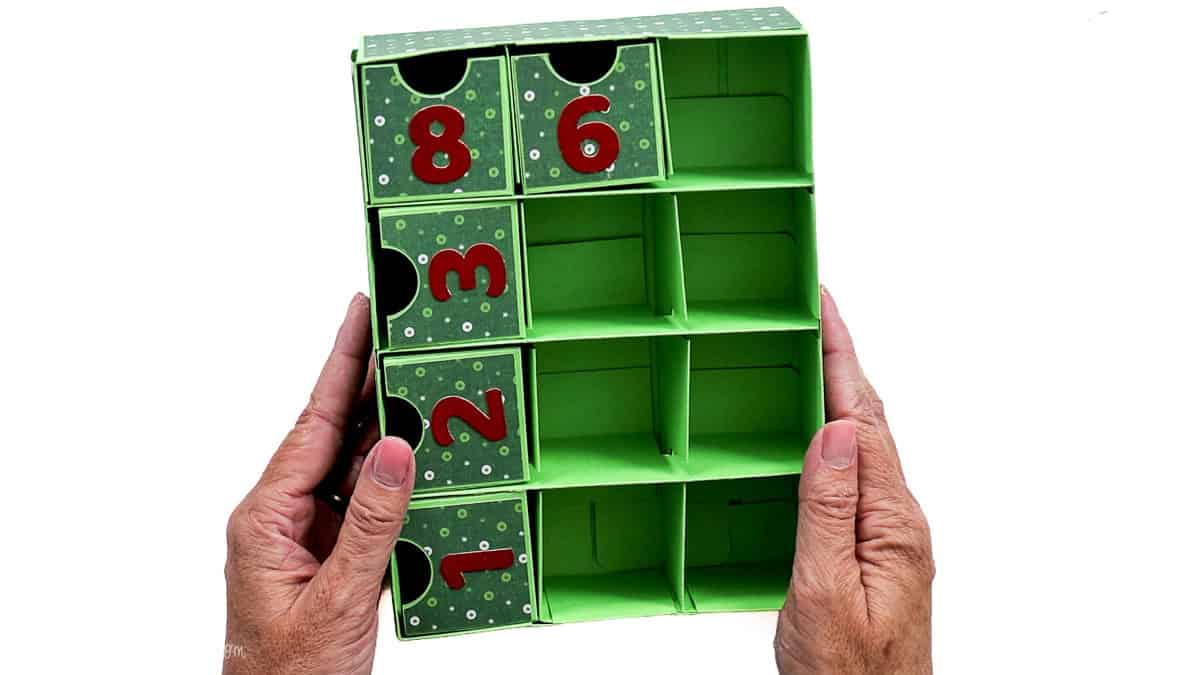
I'm filling my drawers with candy, but there are lots of other fun options!
You could add small gifts, handwritten notes, little sayings, or other tiny surprises.
The drawers are large enough to hold small treats, so you can get creative with what goes inside.
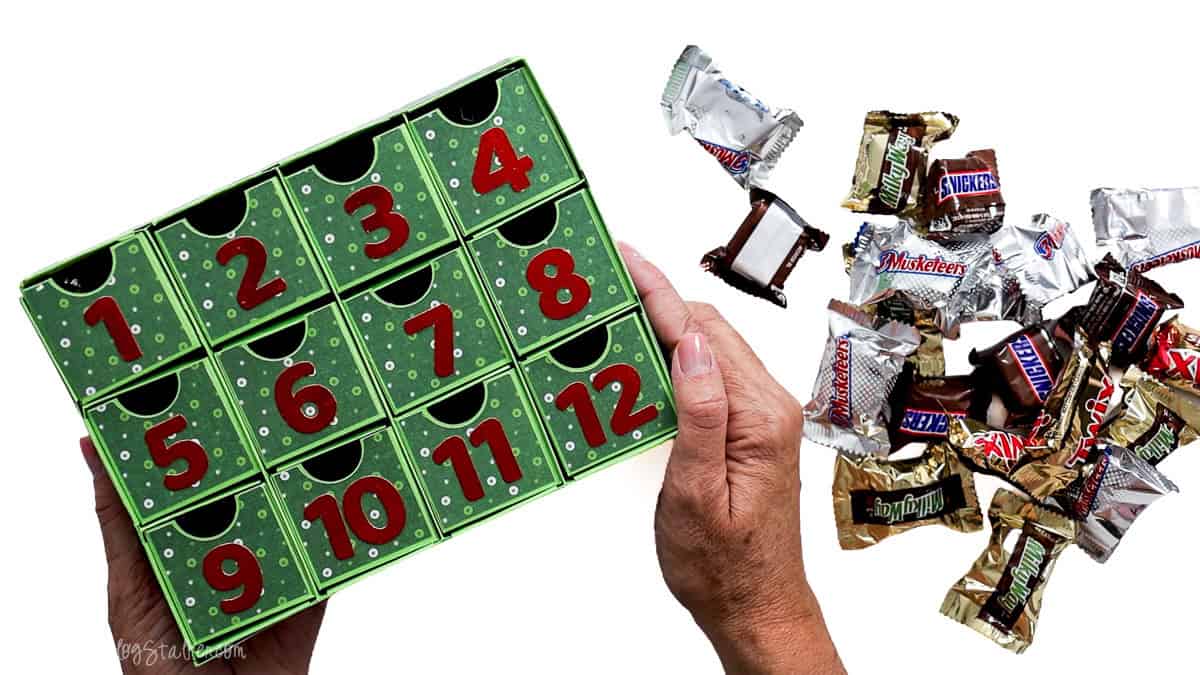
And that's it! Your handmade 12 Days of Christmas Advent Calendar is ready for the holiday countdown.
If you love this 12-day calendar but want one with 25 drawers, I've got you covered! I also have a 25-box advent calendar SVG.
Frequently Asked Questions
Yes! This project was designed for a Cricut cutting machine. You'll use Cricut Design Space to prepare the SVG file, then cut and score the cardstock pieces.
You'll need a scoring tool to create the fold lines. I used a Cricut Scoring Wheel, but a Scoring Stylus is another option if it's compatible with your machine.
I used metallic paper and patterned cardstock. Choose paper that is sturdy enough to hold its shape when folded into boxes.
Attaching keeps the score lines in the correct position on each cardstock shape. Without it, Cricut Design Space may place the lines on the mat separately from the pieces they belong to.
Candy, small gifts, handwritten notes, and little holiday surprises are all fun options. You can fill each drawer with something different!
Yes! I also have a 25-box advent calendar SVG available if you want a larger version with more drawers for your Christmas countdown.
Need help with this project?
Click a button below to ask AI what to put inside an advent calendar besides candy.
More Christmas Crafts
Here are a few more holiday craft ideas, handmade decorations, and DIY gifts to help you get creative this season.



Hi, I'm Katie!
I'm so glad you're here. Want to make something fabulous? I'm here to help!
Bonnie and Trish @ Uncommon
Adorable!!!!
Katie
Thanks ladies!
Vivienne @ The V Spot
This is adorable!!!
Katie
Thanks Viv! I had sooo much fun with this one! : ) Can't wait to do it with the kids!
Vivienne @ The V Spot
This is adorable!!!
Leslie @ Violet Imperfection
I am loving the colors you are using for your holiday projects!
Crystal
Seriously? How stinkin' cute! I think I love the washi tape ornaments the most, it might be due to my washi tape obsession. 🙂
Emily
Love it!! So so cute!
I'm revealing my advent next week and I'm SO excited to start doing the activities. Like, way more excited than my 20 month old 🙂
(ps. watching Charlie Brown Christmas is on my list too) 🙂
Katie
haha! I know, I think I secretly made the advent for me! Charlie Brown is on ours too... of course I'm sure we'll watch it every.single.night anyways! At least I won't forget : )
Holly and Nat @ My Sister's Suitcase
THis is SO cute!!! I love that you used mason jar lids... never would have thought of that! Love the colors too 🙂 Darling!
Rachel (Lines Across)
Cute! I love the little messages on the back 🙂
Katie
Thanks Rachel! My sister called and said she loves the one that says "drive to Houston" I figure I won't forget to do that one with the kids! lol
Sara
This is absolutely ADORABLE!!! LOVE LOVE LOVE!! 🙂
Katie
Aww thanks Sara! You're too sweet : ) SO glad you like it! Have a fantastic weekend!
K Coake
What a great idea! So cute.
Katie
Thank you so much!
Angela
Very cute! I'm trying to decide what kind of advent calendar to make this year...I've never made one before either!
Katie
Thanks Angela! I'm so excited to start it this year! I think 12 days is more realistic.. at least for us. We are always so busy around Christmas, I figured this way I would have to tell my kids, "I know I wrote it down, but I just don't have time" lol!
Michele @ Better Organized Living
Love the design! It looks great. What a wonderful idea.
Katie
Thank you Michele! I'm so excited to get started on it!
Debra @ September Acres
That is adorable! I love advent calendars. We have them in many forms - too many really but I can't help myself. I am really tempted to try this one!
Katie
Thanks so much Debra! Its our first and everyone is so excited... my son is having a countdown til the advent starts...lol
Debra @ September Acres
That is adorable! I love advent calendars. We have them in many forms - too many really but I can't help myself. I am really tempted to try this one!
Katie
I love it, adorable! Pinning 🙂
Rita
What a fun idea! Thanks for sharing.
Jaime from Crafty Scrappy Happy
Seriously, this is the cutest Advent Calender EVER!!! I am in love! You are SO creative and crafty! Come visit and rub some of that off on me 🙂
Happy Friday!
Jaime
Katie
Thank you so much Jaime! I'll get there sooner or later, lol! : ) I'm dying to see your beautiful house, and lake!!
Katie
Thanks ladies! I had sooo much fun with this! Maybe my favorite project to date! Yay for mason jars! lol
Katie
Thanks! haha... Yes, washi tape is kinda awesome!! : )
Katie
Thanks so much Leslie!
Katie
You're so sweet : ) Thank you!!
eva scott
cute, cute, cute, cute, cute!
eva scott
cute, cute, cute, cute, cute!
Mel
Oh this is cute I love any and everything Christmas
Mel
Oh this is cute I love any and everything Christmas
katie
This is awesome! What a creative and unique idea!!!
Vanessa Barker
This is so fun!! Makes me so excited for Christmas
Niki
So cute!! I like the idea of doing fun things, rather than just food treats.
Laura / The Shed blog by Pet Scribbles
I love this idea - especially sticking to 12 days instead of almost a month! 🙂 (And...I'm a blogger who has yet to make an advent calendar too. LOL)
Megan
What a clever advent calendar!
Janel@nelliebellie
What a great idea!!! So cute. And ps...your pictures are great!
Christina at I Gotta Create!
This is very cute!
<3 Christina at I Gotta Create!
NH
You do know that Advent is 24 days long, right? And that the 12 Days of Christmas are Dec 25-Jan 6?
This is cute, but Advent and the 12 Days of Christmas are two different seasons on the liturgical calendar.
Karen Cline
Thanks for the printable! I love this! It’s really cute.
Betina Jessen
It sounds like you have put a lot of thought into creating a fun and realistic Christmas Advent Calendar for your family. I'm sure your kids will love counting down the days until Christmas with these special activities and tasks. It's great that you have included your husband in the calendar as well, it will be a great way for your family to bond and spend quality time together during the holiday season. I hope your Advent Calendar is a success and brings joy and excitement to your family throughout the holiday season!