

Make your video studio more functional with a ceiling mount for a camera. Below is the tutorial to make a ceiling sliding camera mount.
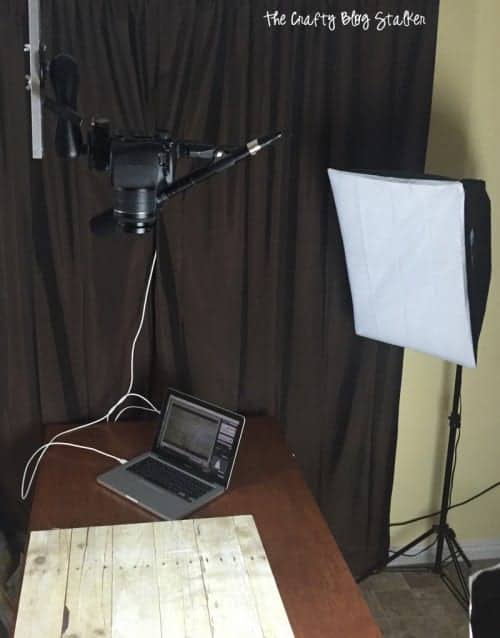
Along with my blog, I also have a YouTube channel that I have been working on growing my audience, and this ceiling mount has made the camera set up such a breeze! If you are in the video world you totally need to make your own!
I have been using this ceiling camera mount for 5 years and I absolutely love it. I use it almost every week.
I feel like I should preface with, this is not one of my typical tutorials. I try to keep my tutorials pretty basic to where even the newest crafter would feel comfortable tackling the project. This tutorial is more difficult and one that requires some pretty heavy-duty tools.
But I have received a lot of questions about my video setup so I figured this would be the best way to explain how it all works.
Supplies You'll Need to Create this Project:
This post contains affiliate links.
- 1" Aluminum T-Slotted Framing Extrusion
- 2, 1" Aluminum T-Slotted Framing Extrusion Plugs (not necessary, just a finishing piece)
- Linear Bearing for T-Slotted Framing, for 1"width rail
- Brake Kit for Linear Bearing
- Aluminum Bar ½" Thickness, 1 ½" Width
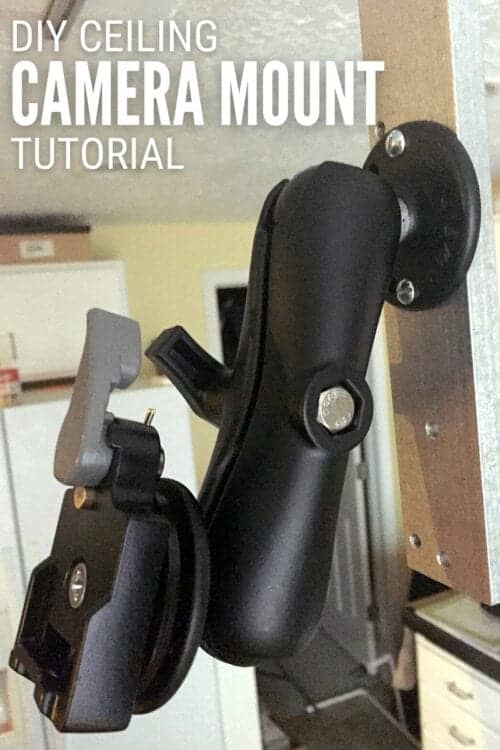
- RAM Mount 1.5" Ball Double Socket Arm
- Quick Release Camera Mount
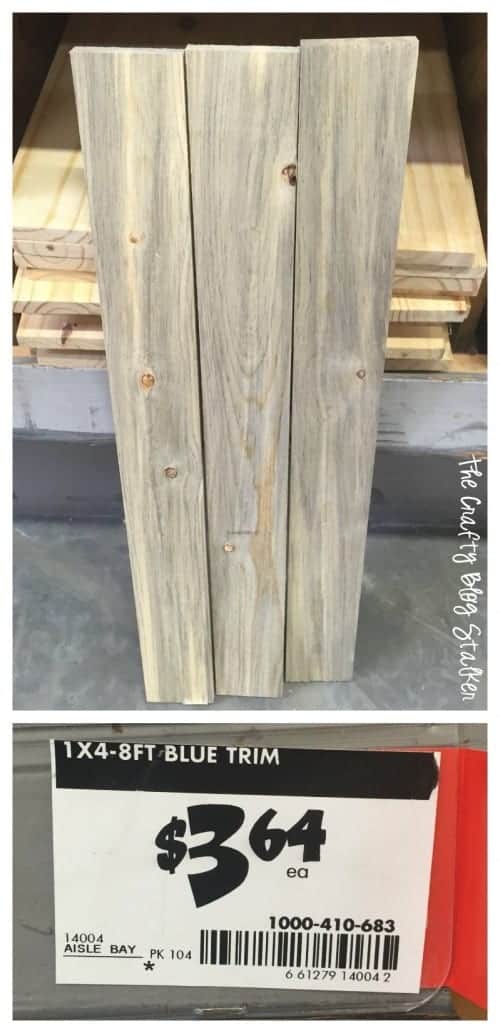
- 1x4x8 wood trim
Camera Mount:
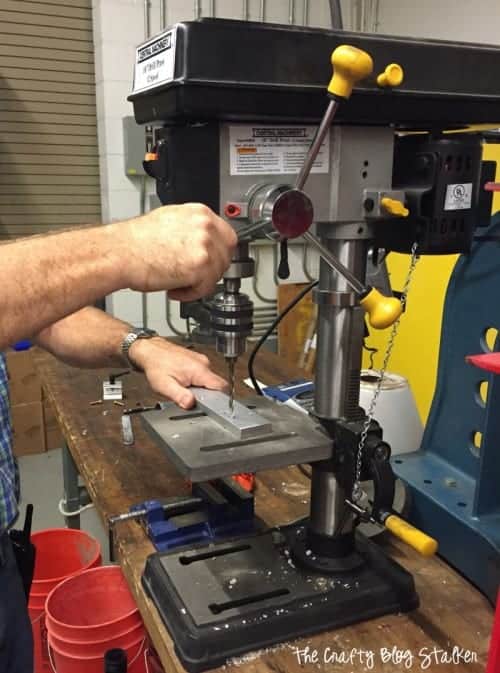
A drill press is super helpful, but holes can be drilled with a regular drill too.
The first and most important step to the Ceiling Mounted Sliding Camera Mount is to measure. Measure the space that you want to mount to cover, and specifically where you want it to screw into the ceiling.
You will need to drill holes into the framing extrusion, so you'll need to know where you are screwing it into the ceiling.
My mount was going over my craft table which is 6 feet long and I wanted to be able to put my camera over any part of that table. So my piece of 1" Aluminum T-Slotted Framing Extrusion needed to be 6-ft long. I also noted and measured in between the ceiling studs so I knew where to drill my holes in the framing extrusion.
Tip: Sketch out how you want the ceiling mount to look with measurements. This comes in handy as you are cutting and drilling holes, and prepping the pieces. It is nice to have something to reference.
Prepping the Ceiling Camera Mount Pieces
To make sure the pieces slide up and down the bar, there needs to be a little bit of space between the bar and the ceiling. Since my piece of framing extrusion is so long, we used three pieces as the base, one on each end and one in the middle. Depending on the length of yours, you may only need two. We cut a 2x4x8 into three pieces and painted them the same color as the ceiling to blend in.
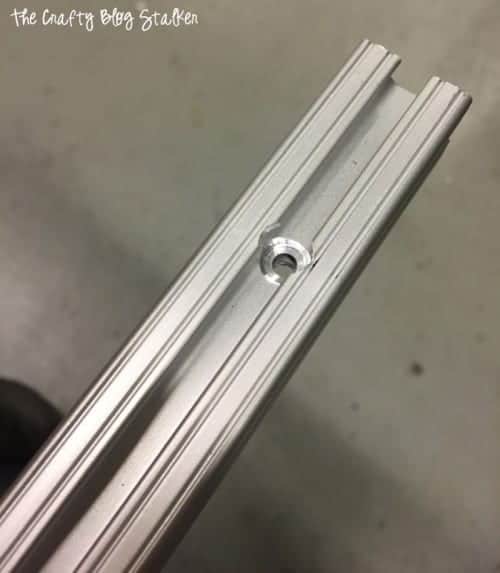
1" Aluminum T-Slotted Framing Extrusion
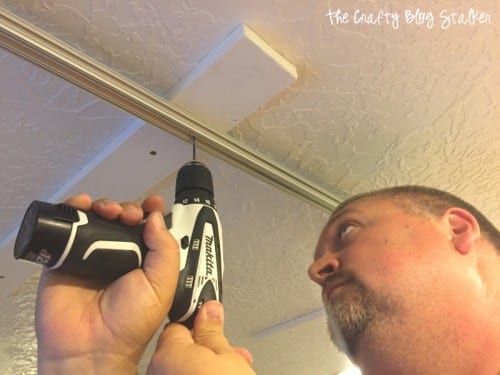
You can purchase the 1" Aluminum T-Slotted Framing Extrusion in many different lengths. We went for a 6-foot piece since the bar is going over my 6-foot-long craft table. Using a drill press, we pre-drilled three holes. one in the very center at the 36-in mark, and one on each end, 1 ¾ inches in. This will also allow us to drill into the studs in our ceiling making sure that everything is nice and secure.
Camera Arm:
Several pieces go into the arm construction. The aluminum bar, the double socket arm, the linear bearing with brake, and the quick-release camera mount.
The aluminum bar is the main part of the camera arm and determines the distance that the camera hangs below the ceiling. My bar is 17 inches long, but you may prefer a different length for your area. Several holes will need to be drilled into the bar using the drill press.
The bearing is what slides the arm along the Framing Extrusion. Attach the bearing brake to the top of the aluminum bar using bolts. You will need to drill holes into the aluminum bar to attach the two pieces.
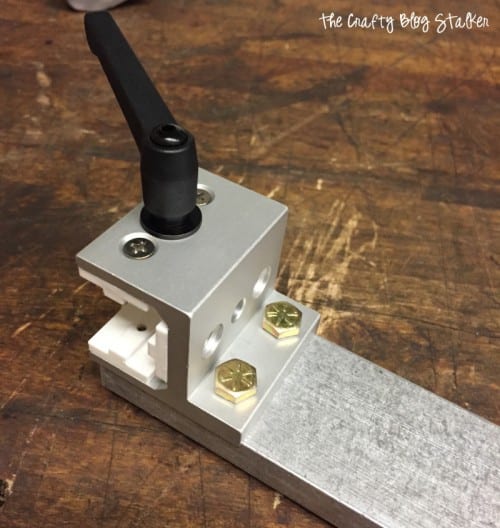
The Double Socket arm is a really cool piece that gives more motion to the arm so there are more camera position options. In the picture below I removed one of the ball joints to find where the holes needed to be drilled to attach this piece of the arm. I actually drilled several holes to accommodate this piece so it can be move if needed.
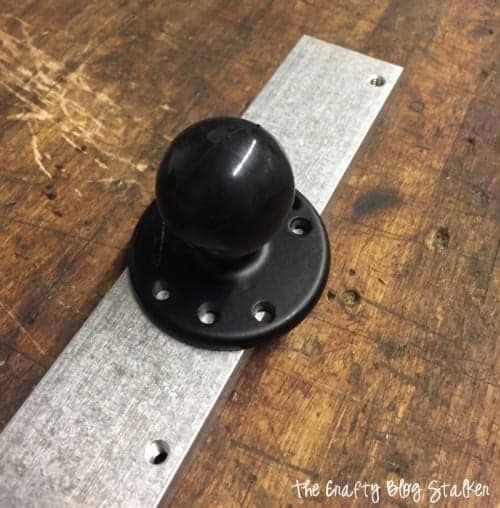
Make sure to use a quick-release plate that is compatible with any other tripods or mounts that you already use, and attach the base onto the flat side of one of the ball joints.
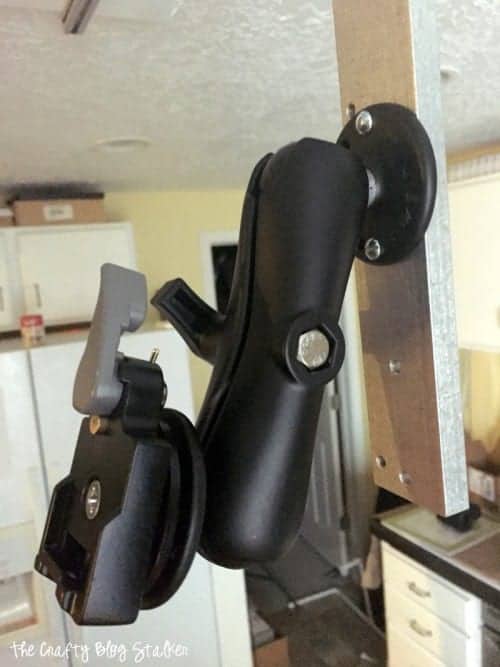
This is what the arm looks like when it is assembled.
Installing the Camera Mount:
When it comes time to install, all of the pieces should be pre-drilled and all prep work complete. The first thing to go up is the wood pieces that are the frame to the ceiling mount. Make sure to screw them into the studs in your ceiling. We used 3-inch screws.
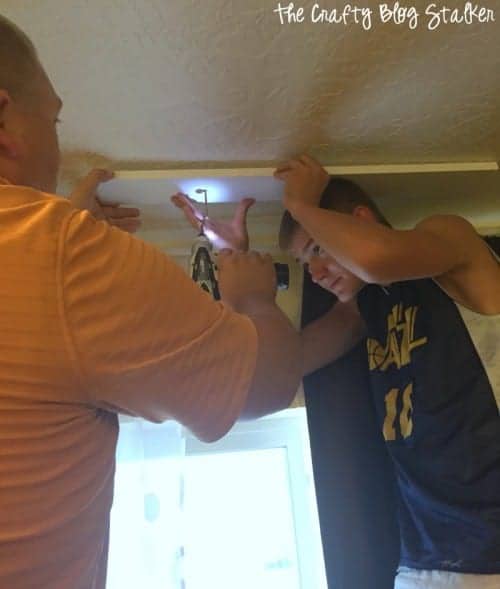
The Aluminum Framing Extrusion bar can then be hung and drilled into place.
Slide the arm onto the bar with the bearing and then finish off the ends of the Framing Extrusion bars with the end caps. You can now slide the arm up and down the bar and to hold it securely in place, turn the brake lever and the arm isn't going to move at all. All that's left is to try out the new Ceiling Mounted Sliding Camera Mount and make a video!

I know this tutorial is a bit more difficult than what I usually do so if you have any questions please let me know by leaving a comment below so it can help everybody!
If you love this tutorial, please help me share it on Facebook and Pinterest!
Crafting Essentials
- The Cricut Cutting Machine is easily my favorite crafting tool. We use it in so many of our tutorials!
- These MakerX Crafting Tools are perfect for keeping in the craft room and are always ready when needed!
- This Fiskars Paper Trimmer is easy to use and cuts nicely without frayed edges.
- These Scotch Precision Scissors cut like a dream, and you get multiple pairs in a pack!
condo blues
I absolutely need this for my videos and tutorial photos. Thanks for the tutorial!
Christine
I think your tutorial is great! You left nothing out and explained it beautifully. Doing tutorials always scares me thinking Id skim through to fast or forget to add a pivotal point. Plus the cost for this is much lower than anything you'd find online.
Great job!
Katie
Thank you so much, Christine. This tutorial made me nervous because it is much larger than I usually do and I didn't want to leave anything out.
Jonni - Minnie's Milestones
Come make me one! 😉
Kim~madeinaday
Great tutorial and ideas! Thanks for linking up to Merry Monday! Sharing on FB! Have a great week!
Kim
Katie
Thank you Kim!
Life Loving
Wow some serious work has gone into both the camera mount and the tutorial. Great stuff for putting it together.
Sally @ Life Loving
#LifeLovingLinkie
Katie
Thank you for noticing - this project was a big undertaking.
Katie
Thank you so much!
sue
Thanks for the tutorial. I have been procrastinating about trying a DIY video but now you've inspired me. Thanks for sharing this with us at Over the Moon Link UP.
Katie
You totally should! Video is so much fun! Drop me a link when you do and I'll totally check it out.