
Add comfort and style to your home with DIY floor pillows! Follow this easy sewing tutorial to create cozy, versatile seating perfect for any room.

It's 107 degrees here in Texas, so I've let my usually outdoor dog, Stewart, inside to escape the heat.
I'm vacuuming nonstop with all his shedding, and my kids playing on his bed only worsens the dog hair problem.
To solve this, I decided to sew them their own "dog" beds-cozy floor pillows just for them!
This easy pillow project is perfect for keeping everyone comfy and hair-free.
Jump to:
Supply List
- 2 yards Home Decor Fabric
- 2 yards Muslin - for pillow form
- Coordinating Thread
- 5 yards Piping
- Poly Fil
- 18-inch Zipper
- Scissors
- Sewing Machine
Cut out all your fabric pieces.
- 2 - 19x19-inch squares (top and bottom)
- 3 - 19x7-inch rectangles (3 sides)
- 2 - 19x44-inch rectangles (zipper side)
- 4 - 3x9-inch rectangles (handles)

A cutting mat and rotary cutter make cutting the fabric quick and easy, but these pieces can be cut with scissors as well.
Handles
Use the standard ⅝ inch seam allowance unless otherwise stated.
This cushion will have two handles, so all of steps will be done twice.
Pin the raw piping edges to the right side of the one of the 3 x 9 inch rectangles. Do this on both long edges.
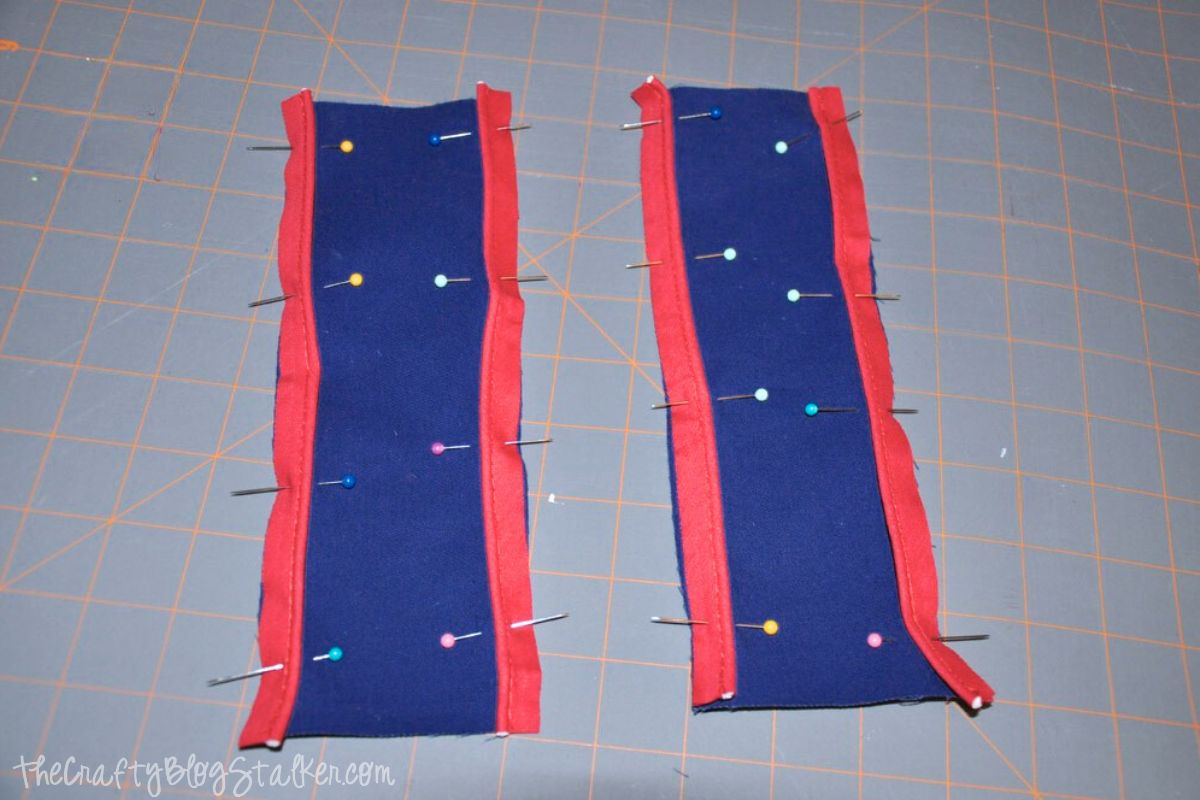
Using the zipper foot, sew along the piping.
Place another 3 x 9 rectangle on top with righ sides together and pin.
Turn the pieces over so you are sewing on the back of the piece with the piping.
Sew along the seam from the piping.

Turn the tube right side out, fold in the edges, and stitch closed.

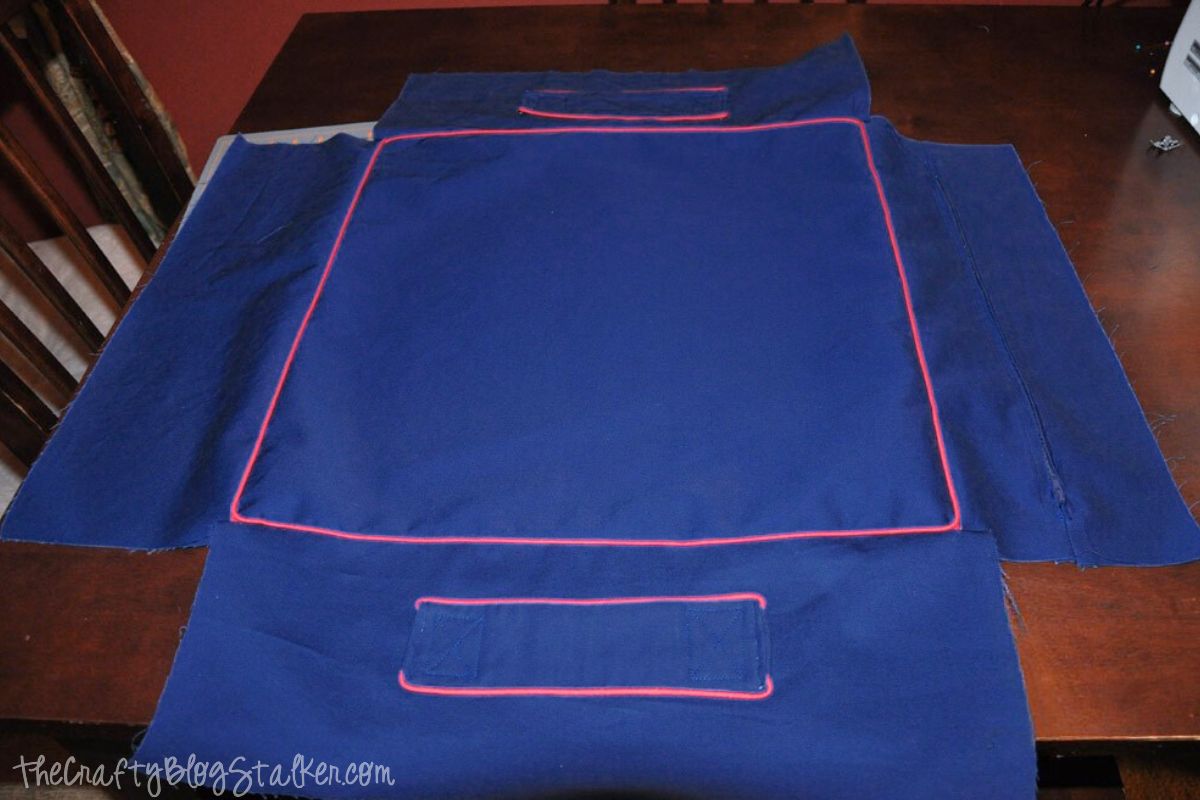
Next, attach the handles to the sides of the floor pillow.
Center, the handle on one of the 19x7-inch pieces. Stitch a box with and X in it, double stitch to make sure it is sturdy

Do this again on another side piece and set those aside.
Zipper
On the two 19x4-inch pieces, attach the zipper.
Here is an excellent tutorial on installing a Basic Zipper.
Piping
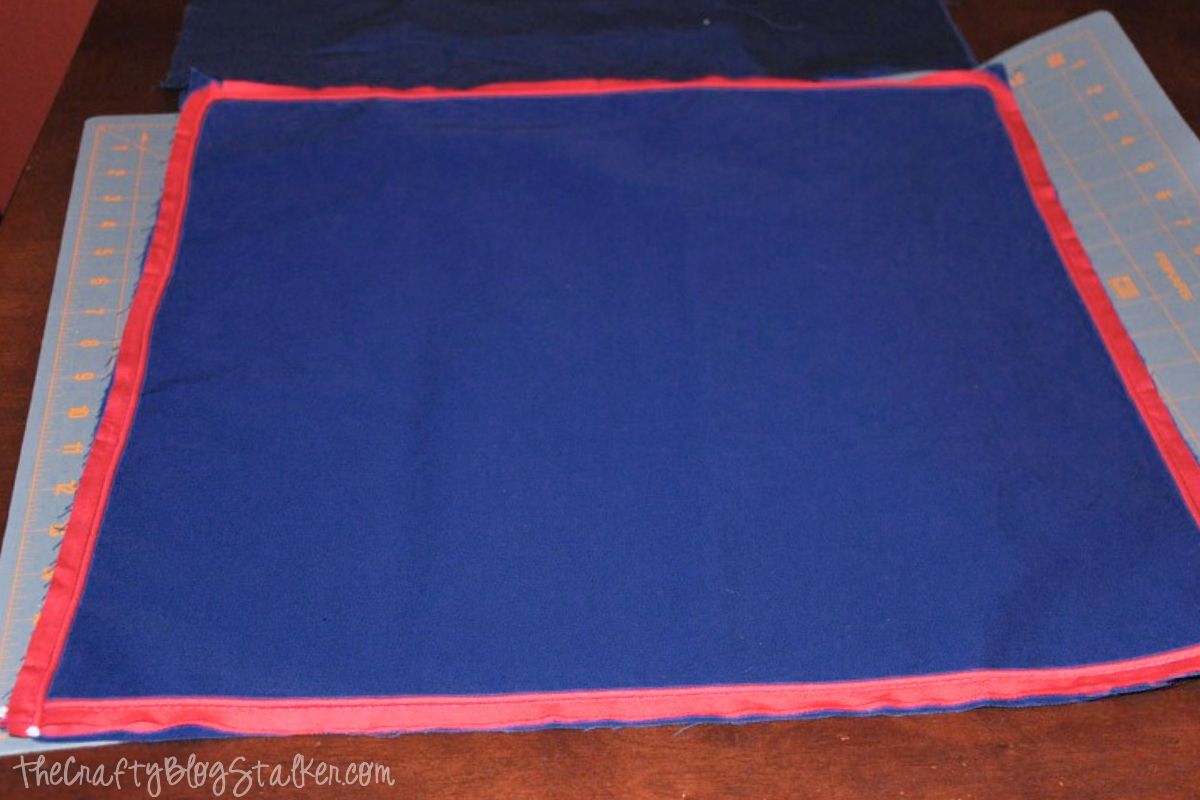
To add the piping around the edges, pin it all the way around both 19x19-inch squares on the right side of the fabric.
Match the raw edges of the fabric, just as you did with the handles. Then sew it down using the zipper foot.
Do this to both the top and bottom pieces
Sides
Attach the side panels to the top panel.
Ensure the two sides with handles are opposite each other.
Line up the side panel, right sides together with the square, and sew along the stitching where you attached the piping.
This ensures that your piping has a very clean edge.

Once all of the sides have been sewn it should look like this.
Corners
Match up the short sides and sew them up.
Don't sew onto the top panel, but get close enough to close it up.
This is what it looks like.

Bottom
Unzip the side with the zipper.
Take the 19 x 19 bottom side, line up the edges, and sew along the stitch line from the piping.
When you are done, you will have a box!

Pillow Form
To make the pillow insert, cut all of the same pieces, except I did four identical side panels since I didn't need a zipper.
Follow the same instructions as above, just no need to worry about piping.
Don't forget to leave one edge up to turn and stuff.
The sew up your hole and now you have a pillow insert.

Insert the Pillow and Enjoy!
These pillows are perfect for sitting and playing.
Kids can sit on them, fly on them, drive them, drag them, and likely throw them!
My son already loves his and drags it all over the house.

More Sewing Tutorials
Have more fabric than you know what to do with? Here are some ideas!


sstone
That looks so fun! I had a quick look at all your tutorials, and they look like they are going to be very helpful.:) I'm a new follower from Woot Woot Wed.:)
Johanson Family
Looks fun-- if I could sew, so for now I just admire from afar and clap for you b/c you always come up with great ideas!
sweetybird09
Great job on the dog beds, looks so professional, I used to have my golden retrievers in all the time :)Hair all over but now that they are gone I would take the hair just to have them back 🙁
door hanger template
Looks really nice! My kids loves sitting on floor than on chairs, so this would be great to have. Its good that I have some fabrics left it'll be nice to make one. It seems easy, thanks for sharing that on details!
BluBabesCreate
That little boy is a really cute prop! Thanks for the tute! Love these floor pillows.
Shelley
That is so funny to me because mine does the same thing! I'll see her making a move for it right as we're about to leave the house - I'm all "NOOOOOO!!!!!" in slow motion as she hurdles her body into the mess of dog hair. Egh!LOVE the floor pillow. I think I'll have to do this :DShelley
Nicole@Thrifty Decorating
Those turned out great! Thanks so much for linking it to Thrifty Thursday! 🙂
Brandi
sooo cute!! fantastic tutorial! thanks for sharing!
At The Picket Fence
That looks fantastic! Like something from Pottery Barn. Thanks so much for sharing it at Inspiration Friday this week!
Vanessa
Shona
This is really cute! and the little man seems to like it too! thanks for sharing!
beautiful swag store
great instructions! chck out my blog you are getting an award
MJ @ 517 Creations
I love this! It looks similar to pillows found at Land of Nod...but in custom colors and (I'm sure) much more budget-friendly! Great job!
- Laura
Perfect timing!! I saw your link over at A Law Student's Journey just now!! Just yesterday I was thinking about pillows like for our youth group's room but they're expensive. I wake up today and see your tutorial!!! Thank you so much!!
I'm going to be a new follower in about 10 seconds!! 🙂
Anne
I love it!!! I linked to your tutorial on Craft Gossip Sewing
April
great job! I've been wanting to do this but haven't had the time. Thanks for the great tutorial!
Heather
I love that pillow. I need to make some of these for our play room. Thanks for the tutorial and thanks for linking to the So Creative Party!
Heather
I featured your cute pillow at So Creative.
Blooming Sisters
These would be invaluable for camping too! Do you mind if I link to your bost in our Saturday Tutorial Round-Up?
Dianewr
You are doing a wonderful job with the tutorials! You might want to enter our contest at Blooming Sisters! We are on Wordpress.
Courtney McAulay
This is so awesome! I just love it!
Lisa
Thank you so much for your great tutorial! 🙂 Look what I published on my blog today! 🙂
Regards from Lisa
Katie
Thanks so much Lisa! Love how yours turned out! : ) SO glad you shared it with me!
Lory
Great idea...........great for bench sitters, too........at baseball games, etc.