
Make snowflake wood chargers from repurposed wood pallets. A simple DIY that adds rustic charm to your holiday table setting.

I've had this pallet sitting around forever, just waiting for the perfect pallet project, and I finally put it to use!
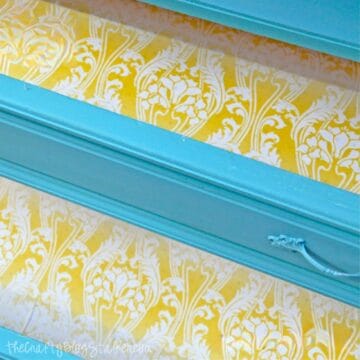
These snowflake wood chargers turned out better than I imagined and cost almost nothing to make.
They're perfect if you love rustic handmade decor and want something special for your holiday table.
Plus, it's such a fun way to decorate your table and give it a cozy, festive feel.
Skill Level: Beginner
Total Time: 45 minutes
Wood Charger Instructions
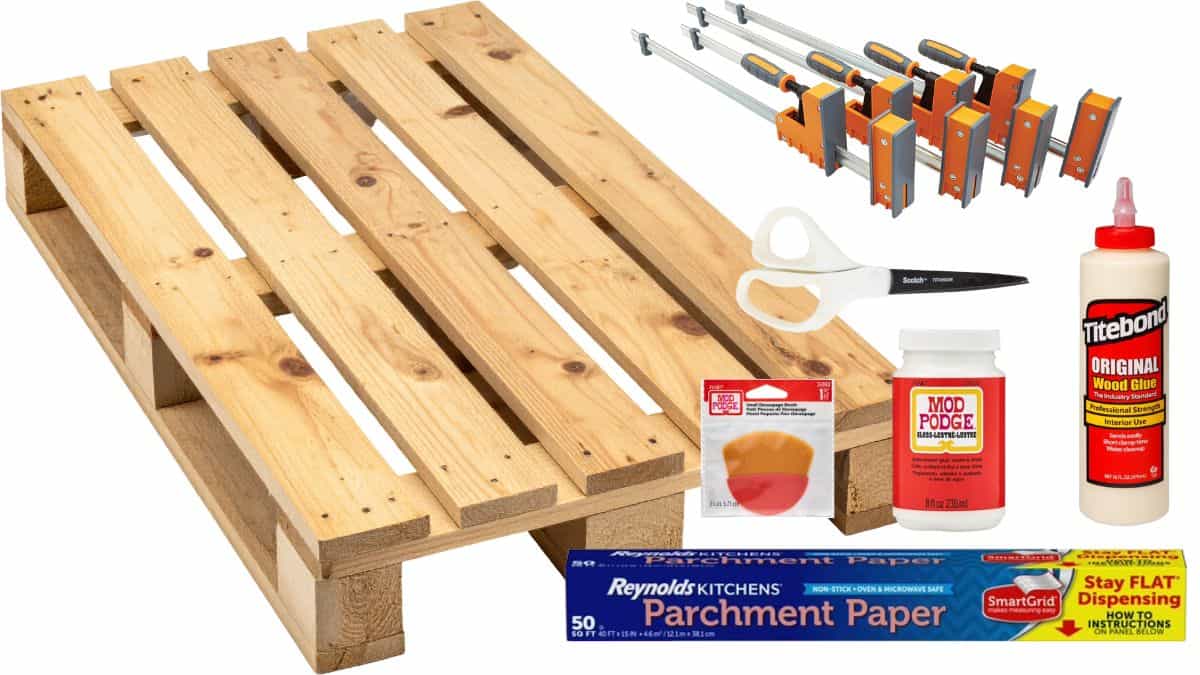
Start with your pallet and use a saw to cut the boards.
I cut 16 boards to make 4 chargers, each about 14 inches long.
My boards are about 3.5 inches wide, so I was able to make each charger almost perfectly square.
Apply a line of wood glue along the edge of two boards and then clamp them together.
Repeat until all boards have been glued, clamped, and dried in pairs.
Then take two pairs of boards and glue them together in the same fashion, so there are 4 boards together.
When the glue had dried and fully bonded the slabs together, you have rustic wood chargers!

Paper Snowflakes
While the wood pieces were drying, I cut out my snowflakes from white parchment paper.
I chose to use freezer paper because it's a duller white and thinner, so the folds won't show through after applying the Mod Podge.
I cut my freezer paper to 12" x12" and folded it in half three times.
I didn't use a template. I just eyeballed a pattern and cut with my scissors, but here are some free snowflake patterns if you'd rather go that route.

Apply Snowflakes
To adhere the paper snowflake to the wood charger, I used Mod Podge.
I applied a layer of Mod Podge to the area where I wanted my snowflake to go, laid it on top, and pressed it into the glue, smoothing with my fingers.
Then I applied a layer of Mod Podge on the top, starting in the center and working my way out. Be careful around the small edges, you don't want to tear them!
After the snowflake was adhered, I applied Mod Podge to the rest of the wood to match it.

When the Mod Podge is completely dry, trim the edges of the snowflake with an X-Acto knife, then apply another coat of Mod Podge.
Let it dry completely, and you are done!

Final Thoughts
I think my favorite thing about these chargers is their versatility! I hate making crafts specific to holidays, and then that's it!
You can flip these chargers over to use year-round, and they work great for centerpieces too!
If I had a long table, I would line them up down the center as a runner, so cute!

I thought about hanging them on my wall too!! What would you do with them?
More Mod Podge Crafts
Don't put that Mod Podge away yet. Here are a few more fun ideas!


Hi, I'm Katie!
I'm so glad you're here. Want to make something fabulous? I'm here to help!
Kerry @ Made For Real
So crafty and cute, cute, cute!!
Tiffany - vphonegirl
Adorable! I love the palet as a charger plate and the snowflake just makes them. You are so creative. This makes we wish I still had my wood tools.
Maria @ Inspiration Affirmation
LOVE these. I would have never guessed that the snowflake part was made out of freezer paper, either -- genius! Thanks so much for sharing the tutorial. I found your blog from Tatertots and Jello, and I'm so glad that I did! 🙂
Bonnie and Trish @ Uncommon
these are fabulous!! so worth carrying that pallet around!!!
Leslie Stewart
I just found your blog! Love it! These pallet chargers are too cute!
Have a Happy Thanksgiving!
Leslie
House on the Way
Leslie @ Violet Imperfection
They are beautiful! Wow, I am amazed.
Morena
Beautiful idea!!
Jaime @ Crafty Scrappy Happy
Seriously?!?! HOW CUTE!!!! I NEED to make these! I LOVE them!!!!!! You did such a great job with this project, so simple but looks like a million dollars! Thanks for the inspiration!
Jaime
Inspire Me Heather
Oo, I love your chargers - how fun is that?? I just have to Pin this, thanks!
Janette @ www.thejohansonjourney.com
These look great! Good job!! 🙂
Katie
Why thank you : ) You're too sweet!!!
Katie
These are AWESOME!!!! I love them, sooOoooOooo cute!
Vivienne @ The V Spot
Stop it!! Too cute!!!
Katie
HAHA! Thanks Viv! Your comment made me crack up : )
Kimberly @ A Night Owl
LOVE these!!
Kimberly @ A Night Owl
LOVE these!!
Mary Beth @ Cupcakes and Crinoline
So unique and awesome! : )
Mary Beth @ Cupcakes and Crinoline
So unique and awesome! : )
Carlee
These are just darling, I love the rustic look to them, perfect for the holidays!
Carrie@My Favorite Finds
Okay, so now I want to make some too! THese are so cool! Thanks for sharing at Take a Look Tuesday-I chose these as a Reader Feature. Congrats!
Jill @ Create.Craft.Love.
Those are amazing! I love the rustic look! You did a fantastic job!
Johnnie
What a great idea! I never would have thought of pallet chargers. I will have to add this to my pallet roundup.
Katie
Thanks so much Johnnie!! : ) I am finally able to pull out some tools and get back to some furniture projects! : )
Jo-Anna
These are so fantastic! What an amazing idea!
Julie, RN @ http:\\www.craftyimaginings.blogspot.com
I love these! Rustic but chic...and so cute for any table. I might make some smaller ones for trivets on my buffet!
Julie, RN @ http:\\www.craftyimaginings.blogspot.com
I love these! Rustic but chic...and so cute for any table. I might make some smaller ones for trivets on my buffet!
Julie, RN @ http:\\www.craftyimaginings.blogspot.com
I love these! Rustic but chic...and so cute for any table. I might make some smaller ones for trivets on my buffet!
Julie, RN @ http:\\www.craftyimaginings.blogspot.com
I love these! Rustic but chic...and so cute for any table. I might make some smaller ones for trivets on my buffet!
Julie, RN @ http:\\www.craftyimaginings.blogspot.com
I love these! Rustic but chic...and so cute for any table. I might make some smaller ones for trivets on my buffet!
Julie, RN @ http:\\www.craftyimaginings.blogspot.com
I love these! Rustic but chic...and so cute for any table. I might make some smaller ones for trivets on my buffet!
Julie, RN @ http:\\www.craftyimaginings.blogspot.com
I love these! Rustic but chic...and so cute for any table. I might make some smaller ones for trivets on my buffet!
Julie, RN @ http:\\www.craftyimaginings.blogspot.com
I love these! Rustic but chic...and so cute for any table. I might make some smaller ones for trivets on my buffet!
Julie, RN @ http:\\www.craftyimaginings.blogspot.com
I love these! Rustic but chic...and so cute for any table. I might make some smaller ones for trivets on my buffet!
Julie, RN @ http:\\www.craftyimaginings.blogspot.com
I love these! Rustic but chic...and so cute for any table. I might make some smaller ones for trivets on my buffet!
Julie, RN @ http:\\www.craftyimaginings.blogspot.com
I love these! Rustic but chic...and so cute for any table. I might make some smaller ones for trivets on my buffet!
Julie, RN @ http:\\www.craftyimaginings.blogspot.com
I love these! Rustic but chic...and so cute for any table. I might make some smaller ones for trivets on my buffet!
Texasholly
These are precious!
Aimee - It's Overflowing
Oh my goodness...way cute! I think about you and your move often. It seems dreamy from afar! 🙂
XO, Aimee
Katie
Aww.. thank you Aimee! You are too sweet : ) So happy we get to blog together! Have a a great weekend sweet friend!!
Michele
Great tutorial!!!! Pinning:) Shared a like on Facebook.
eva scott
love love love love these!!!!
Kimberly @ A Night Owl
I love them! Featuring YOU at the Create & Inspire party tonight – can’t wait to see what you have to link up this week! xo, Kimberly
Lisa
LOVE LOVE LOVE this idea. Very crafty, and super cute.
Dan
While I applaud your creativity, Please use caution when using old pallets, especially around food. Many pallets are treated with some pretty nasty chemical preservatives. You also have to use care when cutting, sanding or otherwise machining them to avoid inhaling toxic dust.
Patty
I LOVE your chargers!!! I do have a question though-Is there any concern about the wood scratching the table under them?
Thanks so much for the tutorial!!
Sabrina Quairoli
So cute! I love DIY placements. They are so much better than store-bought. Thanks for sharing. I found you on HomeTalk (I'm Sabrina from Sabrina's Organizing). "Hi"=) and started following you there.
Katie Adams
Hi Sabrina, Thank you so much! I am so glad that you like the project!