
Create layered reindeer ornaments with this easy laser-cut project that adds a warm, whimsical touch to your Christmas decorating.

If you love adding handmade touches to your holiday decor, these reindeer ornaments are a fun project to try.
They are great for anyone who enjoys simple crafting and wants decorations that feel personal and charming.
The 3D design gives each ornament a cozy look that fits right in with classic Christmas style.
Whether you hang them on your tree or share them as gifts, these reindeer ornaments bring a little extra cheer to the season.
Jump to:
Skill Level: Beginner
Total Time: 30 minutes
Craft Tutorial Video
If videos are your thing, you're in luck-I've got a full tutorial ready for you!
Subscribe to my YouTube channel and stay inspired with every new project.

Grab the Free Laser File
This file should not be resized and is designed for 1/16-inch material.
How to Stain Wood with Craft Paint
This step is entirely optional, but I wanted my wood pieces to have a mahogany look, even though they were a light-colored Baltic birch.
I didn't have any stain in the color I wanted, so I created my own stain using a few acrylic paints I already had.
Using a styrofoam plate as my paint palette, I added 3 colors of paint. A dark red, a dark grey, and a medium brown.

I stirred the mixture with a paintbrush and kept adding the paint until I got the shade I liked.
The paint-stain will dry lighter than it is wet, so make it a little bit darker than you want it.

Then add a generous amount of water to the paint to thin it. I don't have an exact measurement, but you want it very runny.
Paint the Wood Board
Since all of the wood pieces need to be the same color, I am going to stain the board before it goes into my laser cutter.
It is much easier to paint a board over a bunch of little pieces.
Take several squares of paper towel, wet them together, ring them out, but keep the cloth wet.
Then, I wiped the paint onto the board, applying 2-3 coats to get the depth of color I was going for.
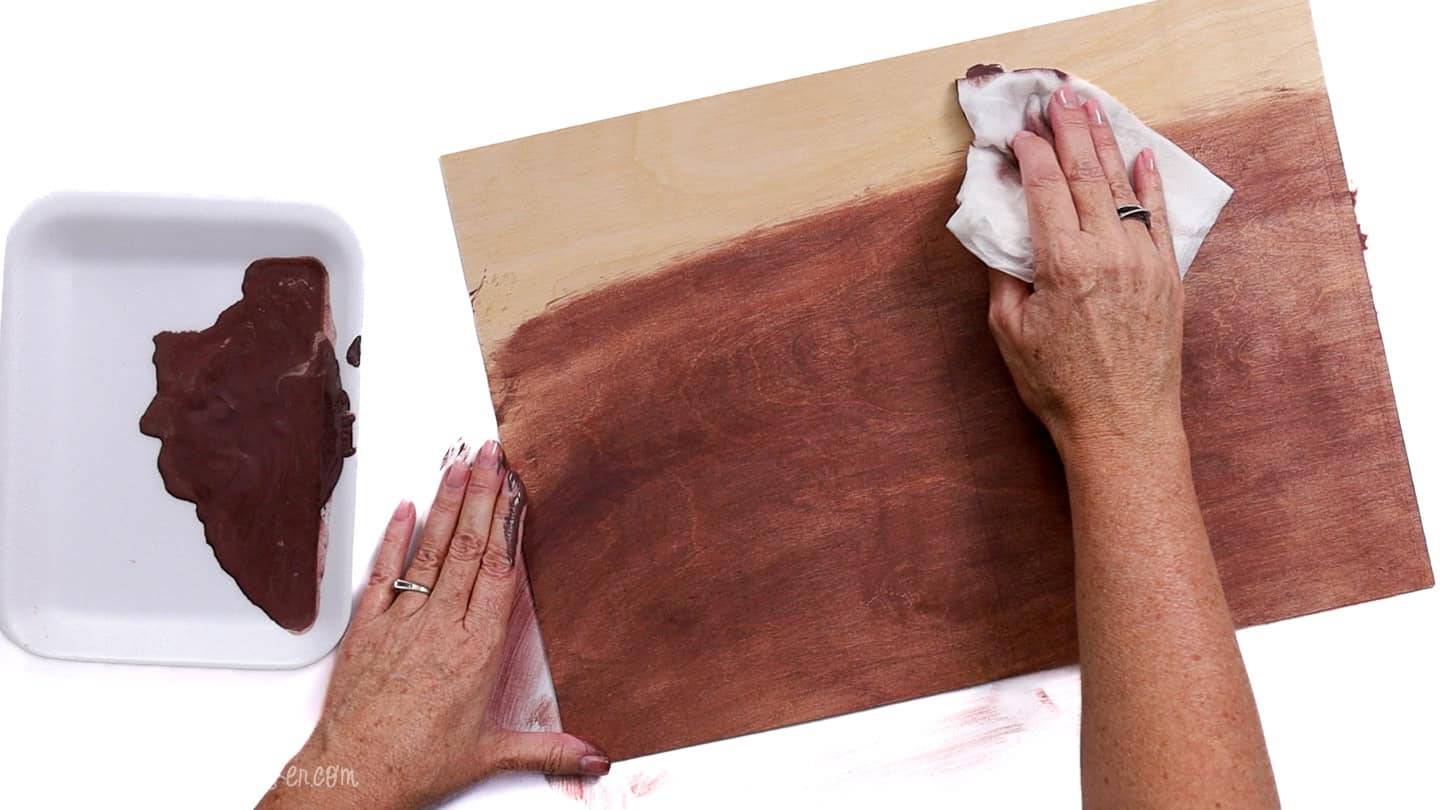
Using watered-down paint like this lets you add color while still seeing the wood grain, and is one of my favorite techniques.
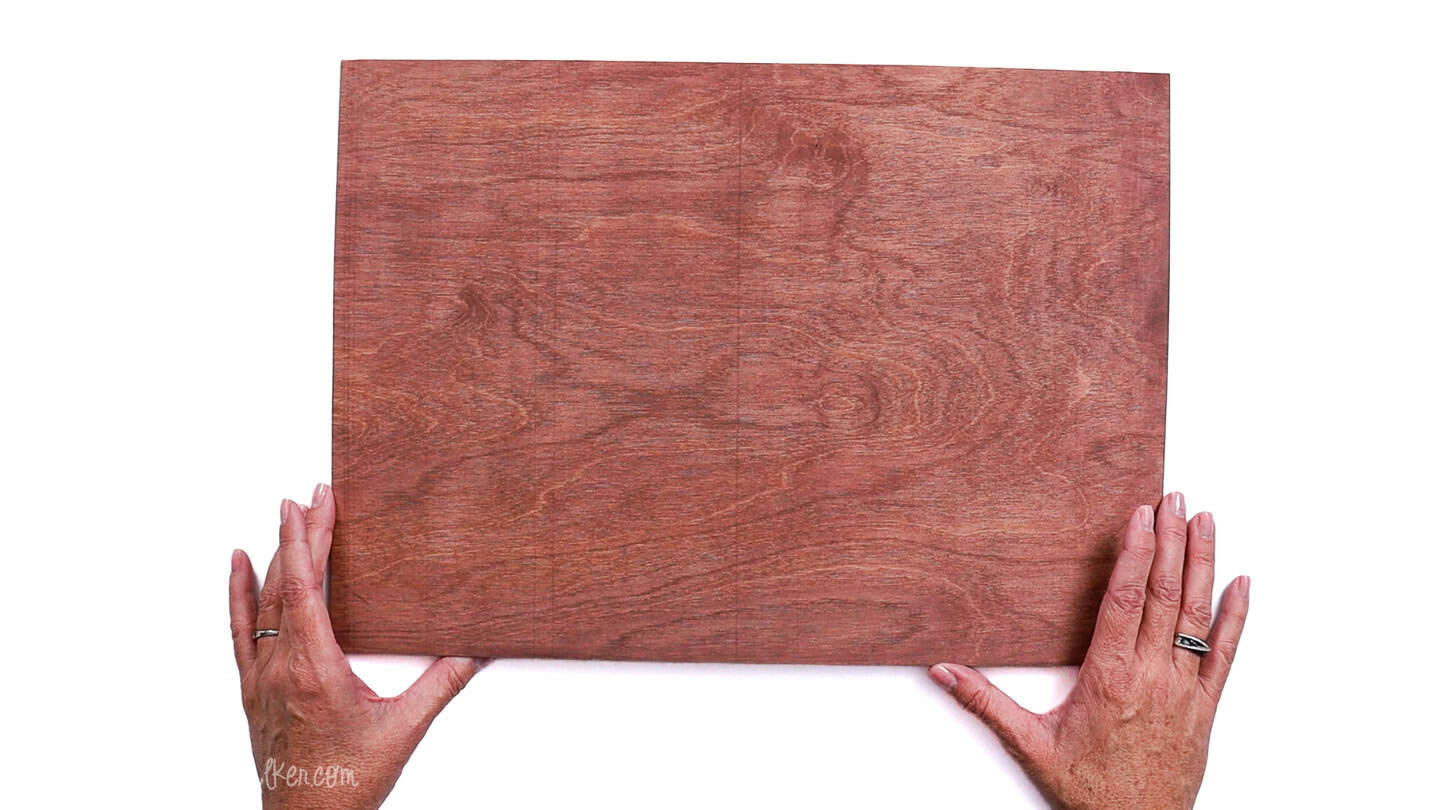
Although this method adds moisture to the board, it may cause it to warp slightly.
You can either rest the board on a stack of books (once dry) or use honeycomb clips in your laser to keep it flatter.
I used the honeycomb clips so I could move right along.
Laser Cut the Design
Do not resize the design, as it causes the pieces not to fit together correctly.
The file includes three different line colors. Black is cut, blue is score, and red is score fill.
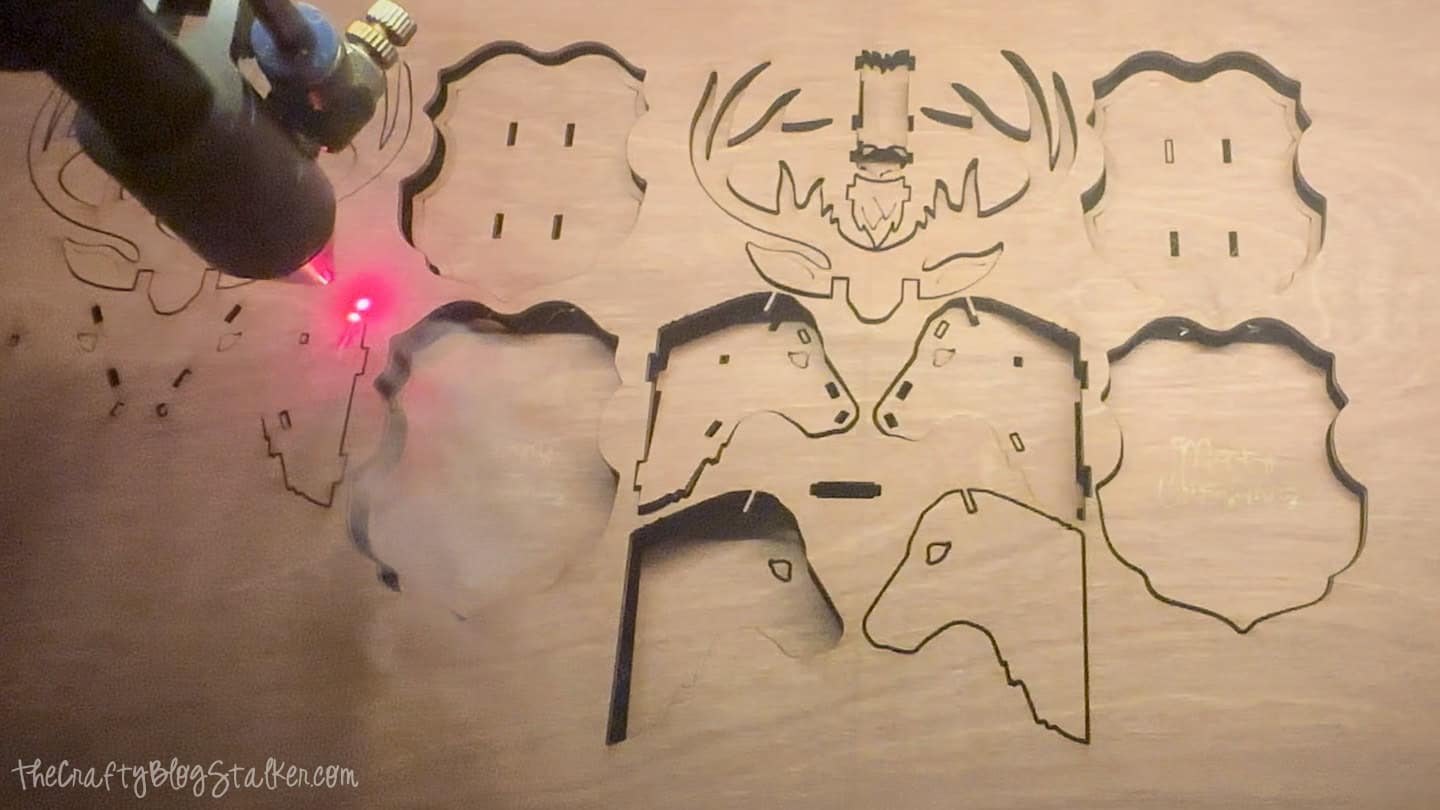
I cut out 2 sets of reindeer ornaments to show you 2 different ways they look.
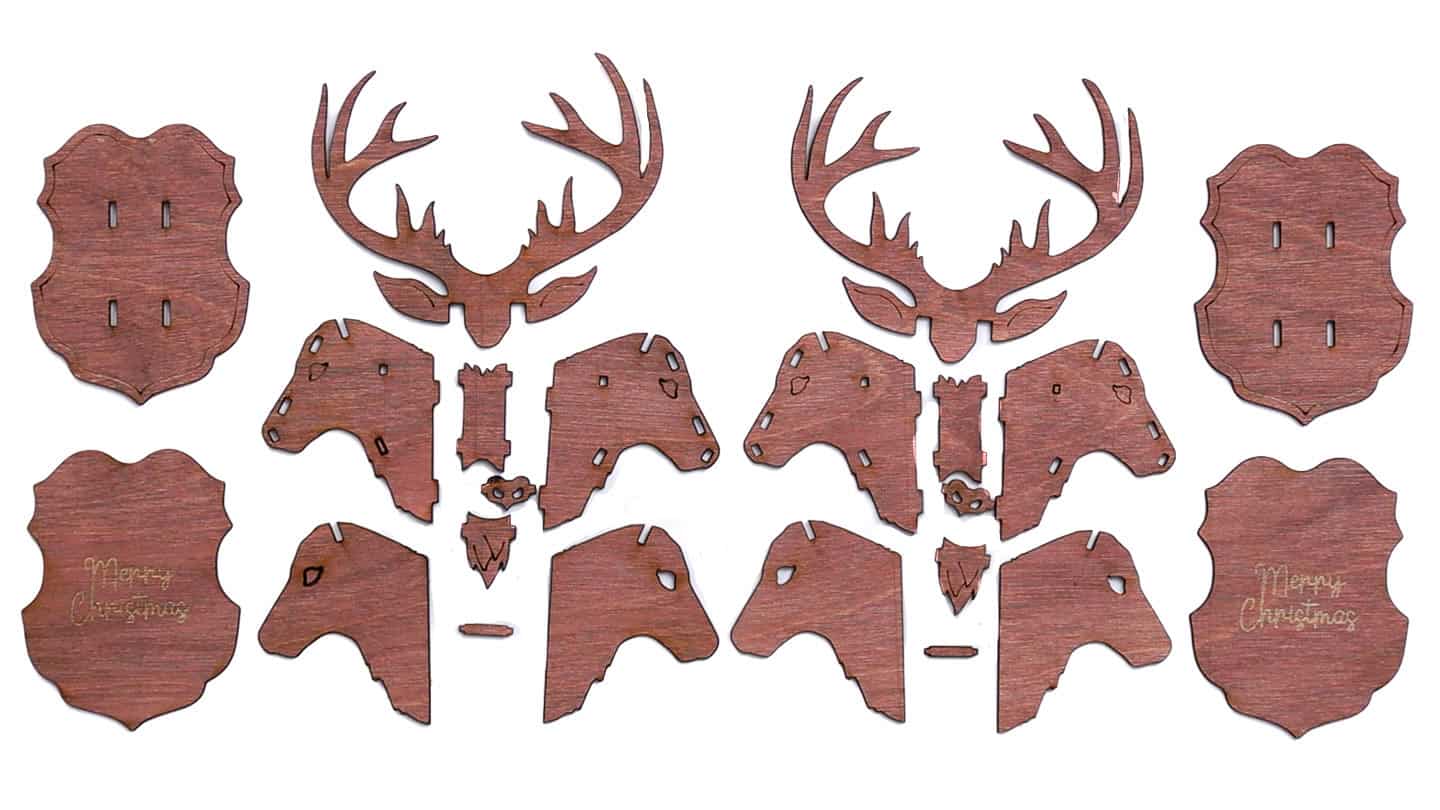
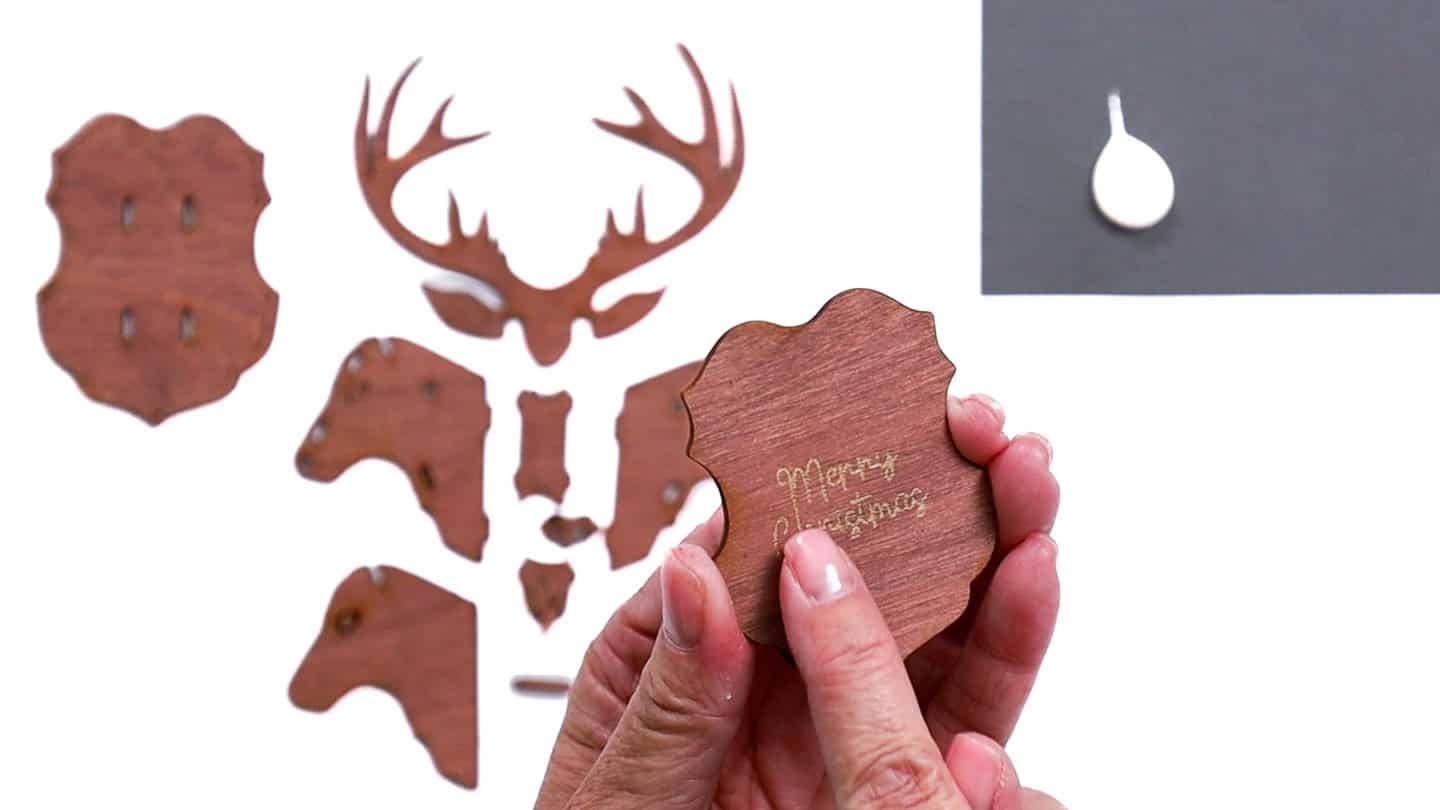
I wish I had engraved the "Merry Christmas" a little bit darker, but it is on the back, so it doesn't really matter.
Assembly
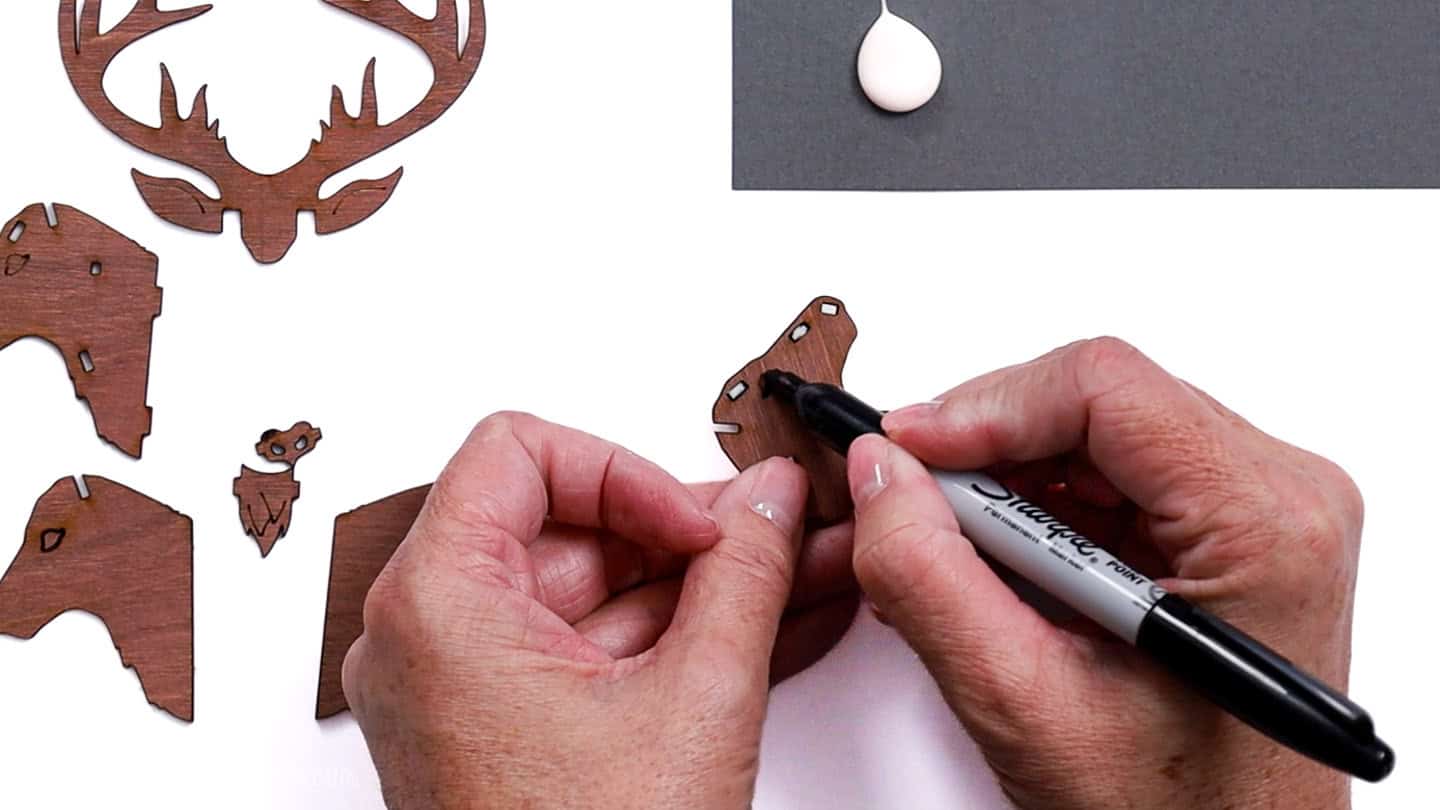
Start with the black sharpie marker and color over the engraved eye on the left and right side, and over the nose.
You don't need to stay in the lines because an outer piece will cover it.
Drop a little glob of wood glue onto a scrap piece of paper or plate.
I either dip the pieces into this blob of glue or brush it on with a paintbrush I have set aside for glue. I don't use my good paintbrushes for this.
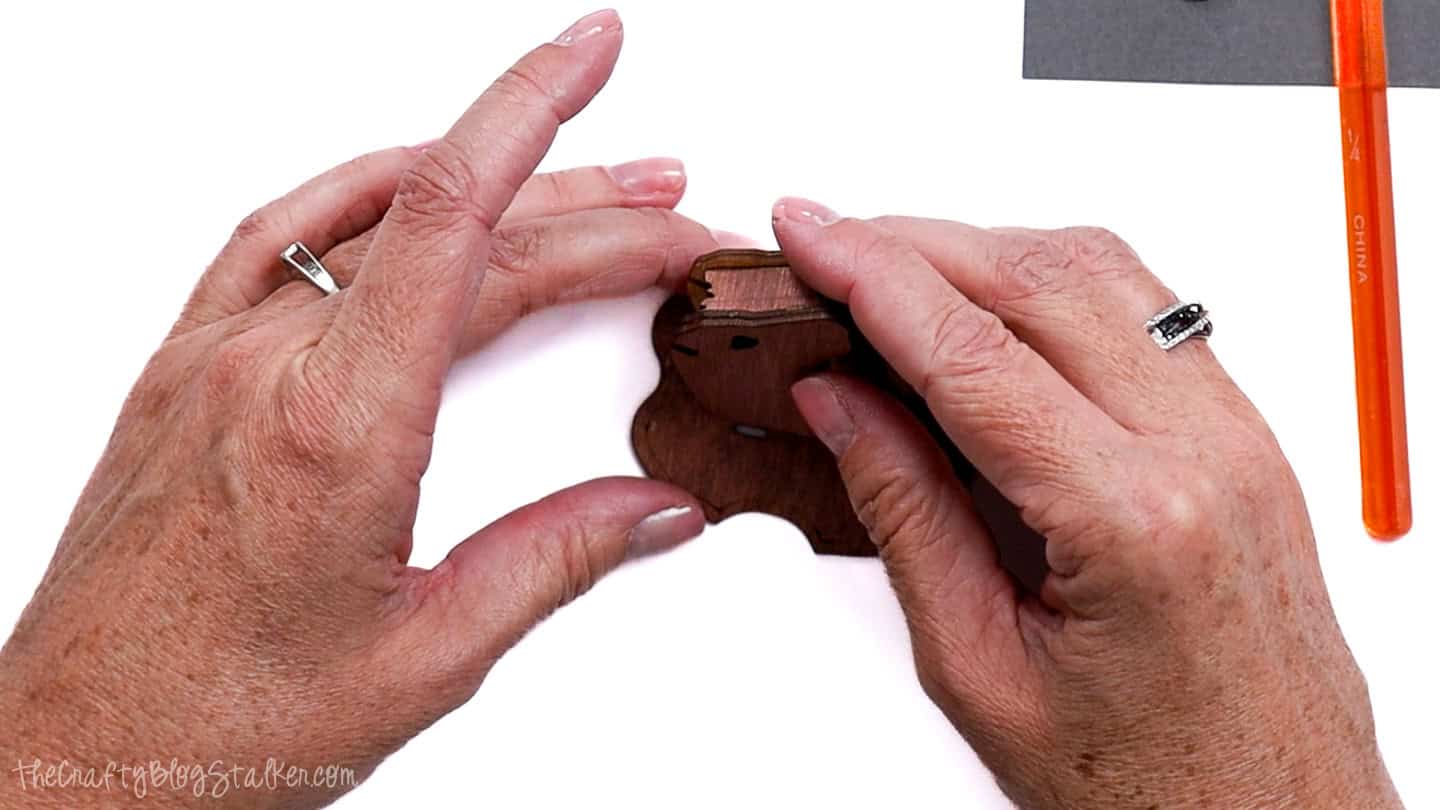
Each side of the reindeer has two pieces. One with holes and notches, and the other has the eye cutout.
Start with a side that has notches cut out, it doesn't matter which one, and lay it down with the raw side of the wood facing up.
Take the skinny rod piece, dip one end into the glue, and then push it into the hole in the middle of the head.

You will hear a little click when the piece locks into place.
Repeat with the forehead, nose, and beard pieces.

Brush a little wood glue onto each of the little tabs, then place the other side of the head, pushing slightly until the piece clicks.
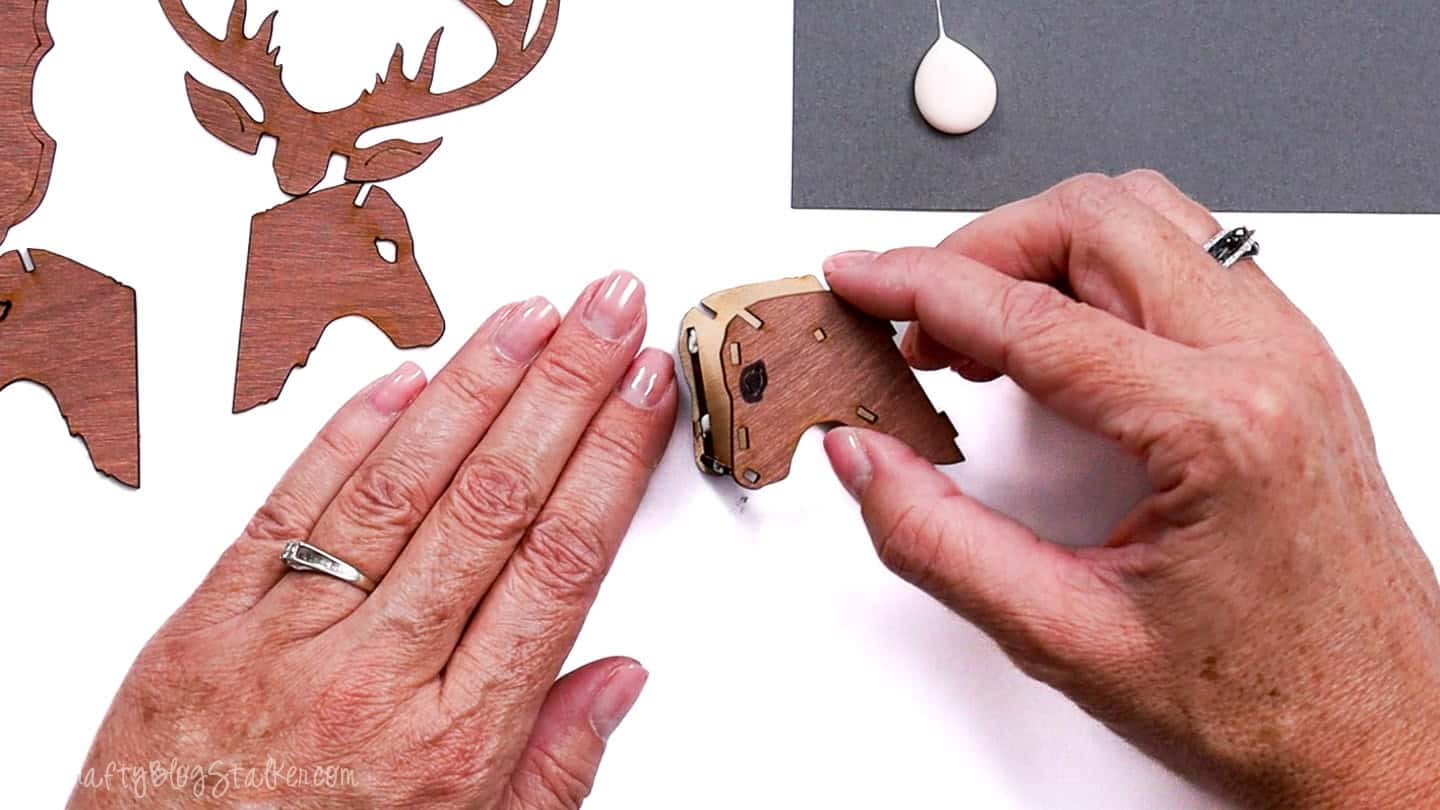
You may need to reach inside the pieces with a finger and gently push on a piece until everything is aligned.
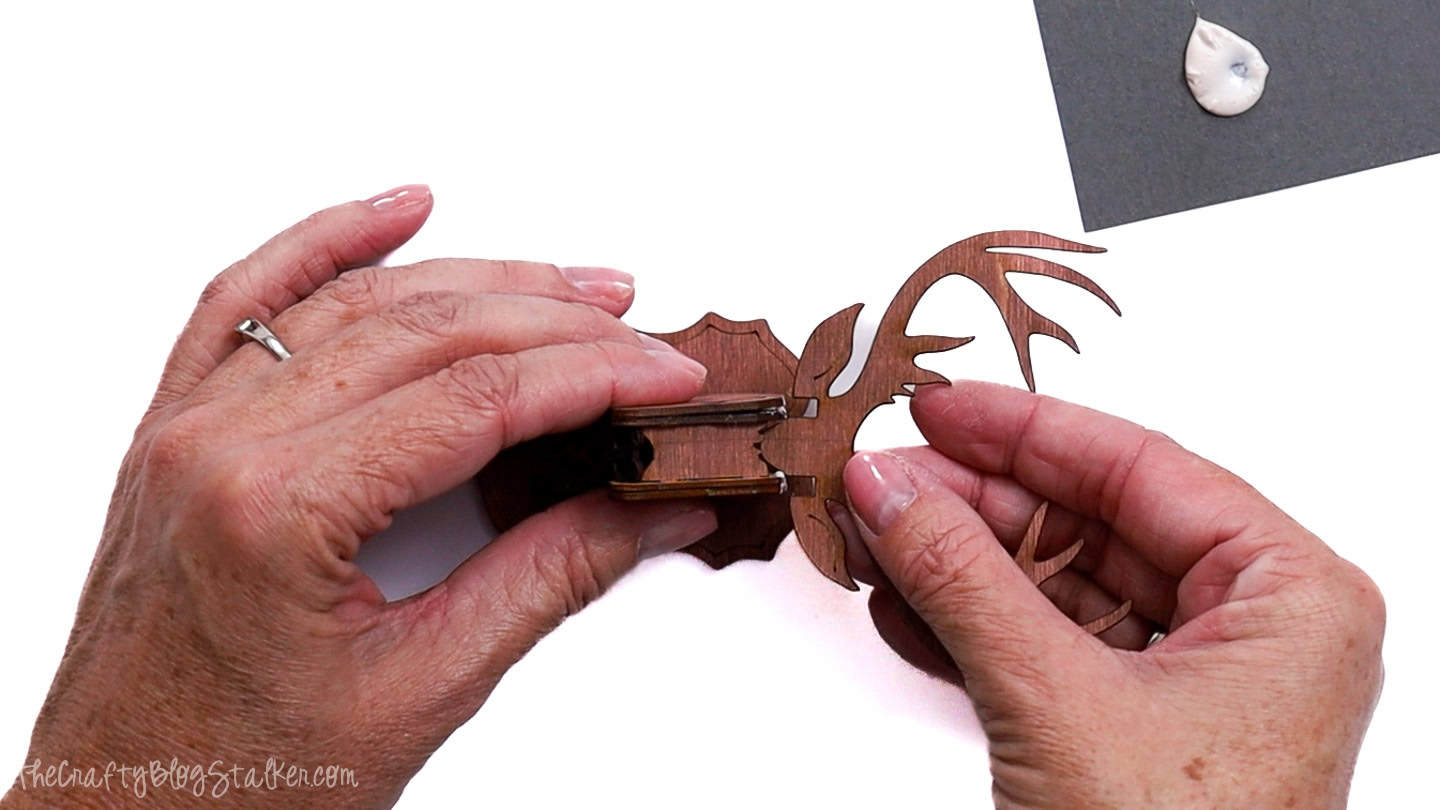
Apply some wood glue to the assembled side, covering those notches, and brush on a little more to the matching outer side.

Gently press the pieces together, align the edges, and repeat to attach the other side of the head.
Brush a bit of glue onto the notches at the back of the head, and then insert them into the back plate.
Apply glue to the back of the base plate and attach the back, aligning the edges.
Brush some glue into the notches on the top of the head, and then slide the antlers into place.
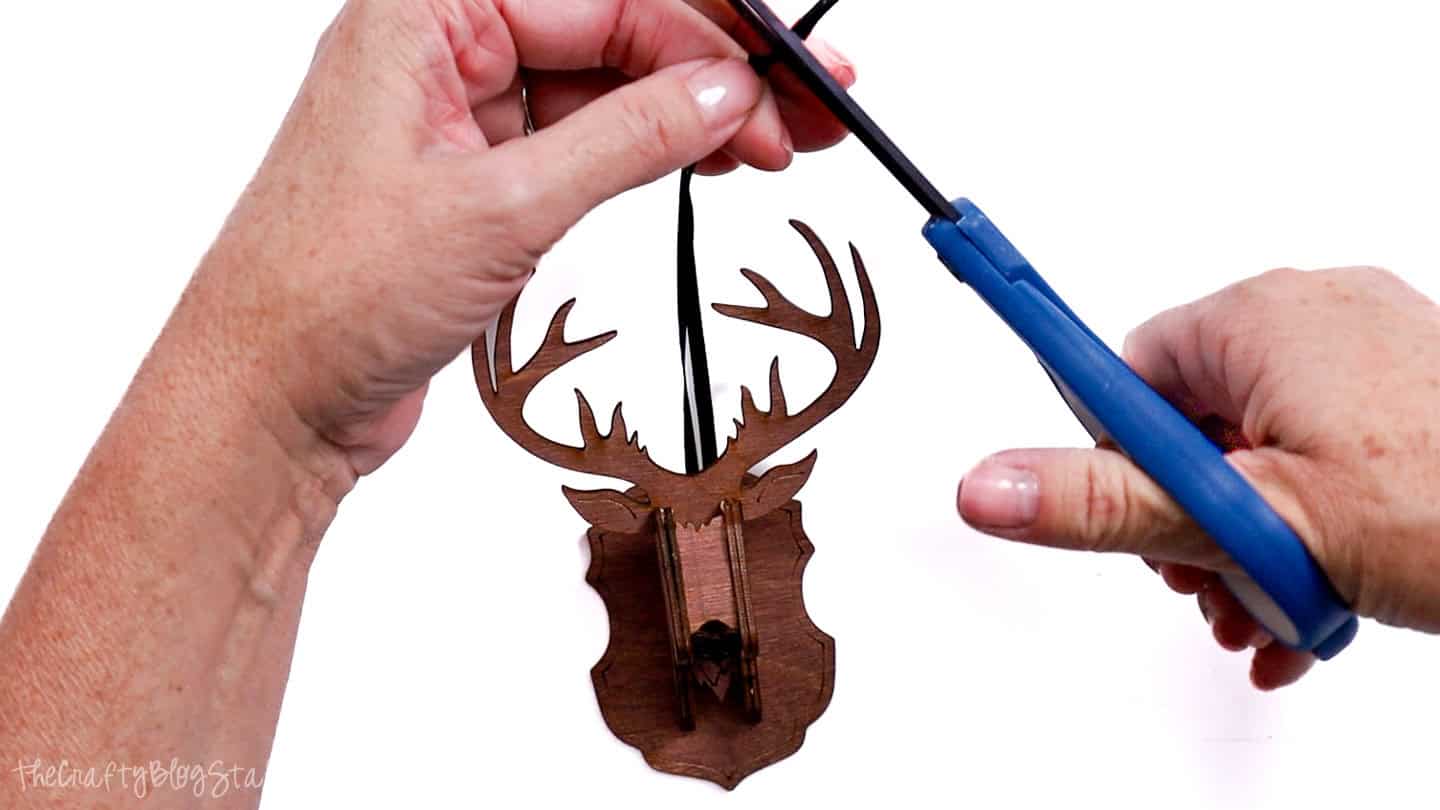
To create the hanger, cut a length of ribbon about 8 inches long, loop it under the thin bar, and bring it back up. Tie a knot in the string and cut off the excess.
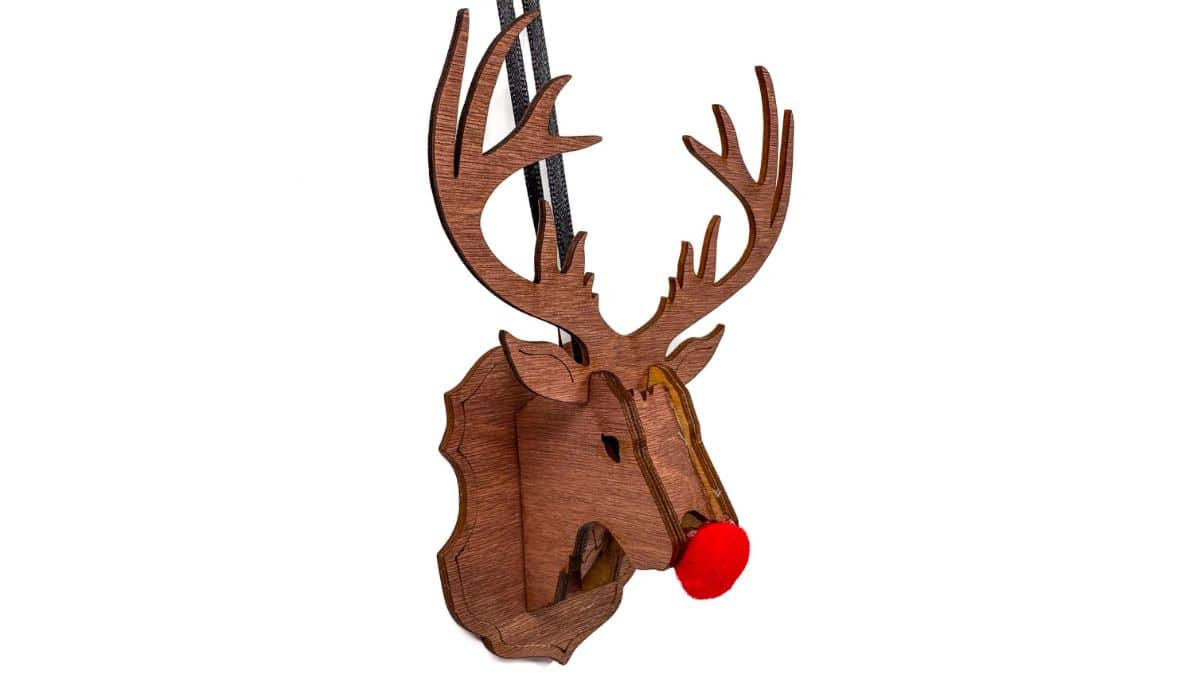
If you want to make the reindeer a Rudolph, simply add a dot of hot glue to the nose and press on a small red pom pom.
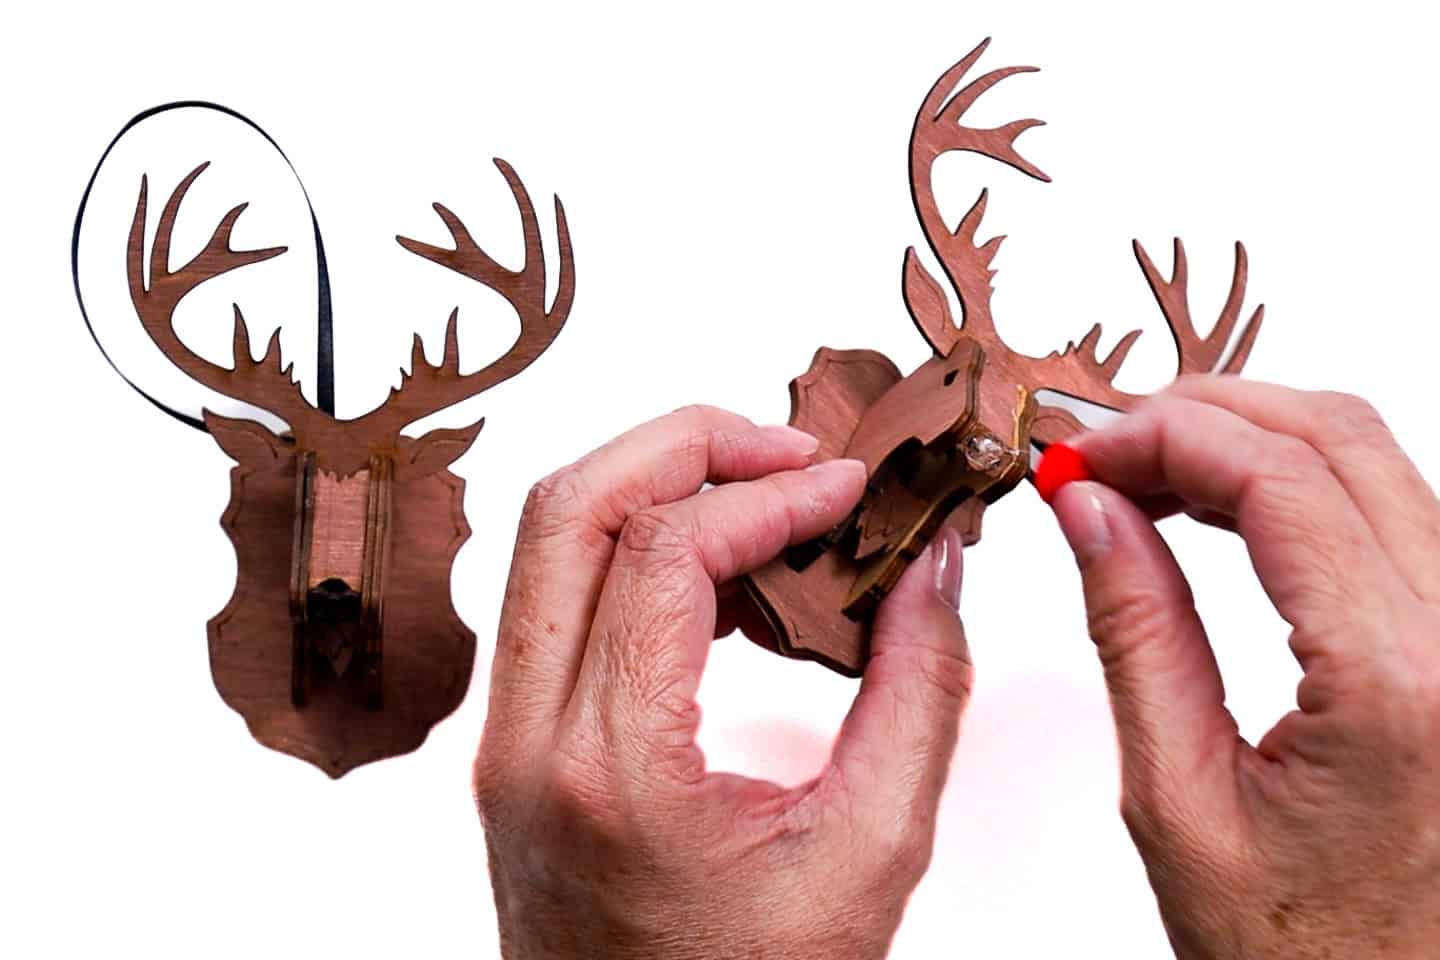
Whether you add the red nose or not, it is a super cute Christmas ornament and perfect for hanging or gifting!

12 Days of Christmas Ornaments
The above ornament is part of the 12 Days of Christmas Ornaments. Here are the rest of the ornaments.


Hi, I'm Katie!
I'm so glad you're here. Want to make something fabulous? I'm here to help!
Ann Martin
What a cute idea! I've seen big deer heads made out of corrugated cardboard, but not these tiny guys. Are they wood or paperboard?
Katie
Hi Ann, they are that real thin craft wood. I'm not entirely sure what you would call it :/. It doesn't bend though. Hope that helps ; ) Have a great week!
Ann
It does help, thanks!
christie
was there a brand name or exact name of the heads? I can't find them anywhere. 🙁
Katie
Hi Christie, I'm not sure of the brand names. I believe on the tags they were called "3D Deer Head", but I've already thrown them away. At my Michaels they were just back with all the ornaments with the unfinished type ornaments. Hope that helps!
Jenn @ EngineerMommy
Adorable idea! Thanks for sharing!
Sarah S
I hope these Deer Heads are available at Michael's again this year. I almost bought one last year, but now seeing the way you created the mounting, I HAVE to make these for my girlfriends. Such a cute idea.
Katie
Thanks Sarah! I hope they are available too cause I need some more ; )
Sarah S
I went today at lunch, and they weren't there! I'll try another Michael's, but it's not looking promising :(.