This post is sponsored by Plaid. All opinions expressed are my own.
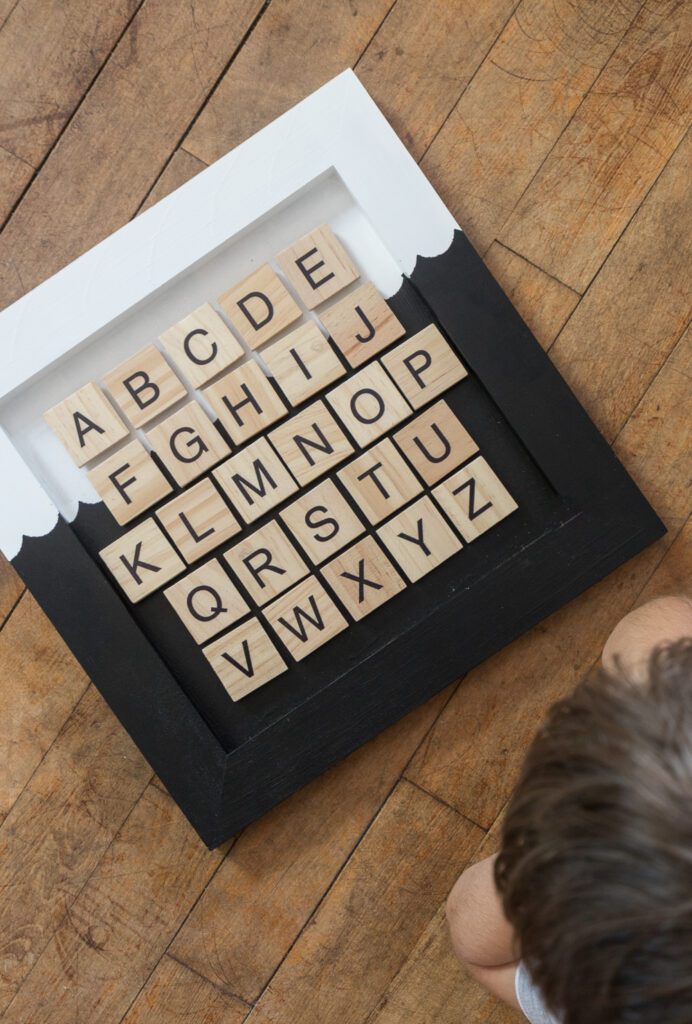
Kids will love this easy-to-make Magnetic Alphabet Chart where they can learn their letters, alphabet, and how to form simple words!

This year will be our first official full year of homeschooling our kids, and my youngest starts kindergarten. It's a little scary being responsible for teaching him to read, and I'm not sure why that feels worse to me than 5th grade. I think it has to do with the whole laying the foundation thing.
We are using Bob Jones Curriculum this year, but I needed some kind of educational distraction for my youngest while I work with the older kids. I thought this fun little Magnetic Alphabet Chart would help him with letter recognition and still be fun!
For this project I decided to go with the new Martha Stewart Multi-Surface Acrylic Paint. This is the perfect paint for all kinds of family craft and school projects with it's bright, cheerful palette featuring over 80 colors and six beautiful finishes: satin, glitter, pearl, metallic, neon, and glow-in-the-dark. This particular formula works well with stencils and can be applied on many surfaces including wood, terra cotta, ceramic, glass and tin.

Now, let's get started and make something fun today!
Supplies:
- 12"x12" Painting Panel
- Martha Stewart Multi-Surface Acrylic Paint
- Paintbrushes
- Shape Tape (no longer available)
- Scrabble Alphabet Tiles
- Magnetic Strip

Magnetic Alphabet Chart Tutorial for Kids
Begin by painting the unfinished painting panel in the color Snowball. Let it dry and re-coat following the manufacturer's directions.

Once that is fully dry apply a strip of the scallop shape tape. I didn't do any fancy measuring. I just aimed to put it at about ⅔ of the way up. Paint the lower section in the Black Belt paint. I removed my shape tape as soon as I was done applying the paint to make sure it didn't dry in place and ruin the finish.

While waiting on the paint to dry being preparing the alphabet tiles. I purchased the magnetic strip which is technically self adhesive, but I went ahead and used a hot glue gun to make sure it stood the test against my 5 year old. First cut little squares (52 to be exact) and then letting two squares become magnetic to make sure they were holding at their strongest direction. The direction of the magnetic tape does matter in regards to strength.
While the two magnets are connected, glue the set onto the back of the tiles.

Once all the tiles had magnets glued in place I arranged them onto the board like I wanted them and then eyeballed the placement. I put a dot of glue on the magnet to adhere it against the board and put it in place. This causes the magnets on the board to not be lined up perfectly, but when the tiles are in place it looks nice.

Magnetic Alphabet Chart Tutorial
Now just make sure all the glue has dried properly and then let your little kiddo get creative.

Be sure and follow along with Plaid on social media for more ideas and inspiration!
Facebook | Instagram | Pinterest | YouTube
For more Projects using Plaid Products click the images below:
How to Paint Watercolor Mountains


Andrea
This is so cute and creative! I don't have kids yet, but will definitely show this to my friends who do have kids!
Ty
I have a son who would love this. Letters + magnets is a great combo for him. Cool project!
Jessica
WOW! That looks great! You're a pretty cool mom! 😀
I wonder if I can use an ordinary frame for this project.
Barbara
Thanks for such a great tutorial!!!