
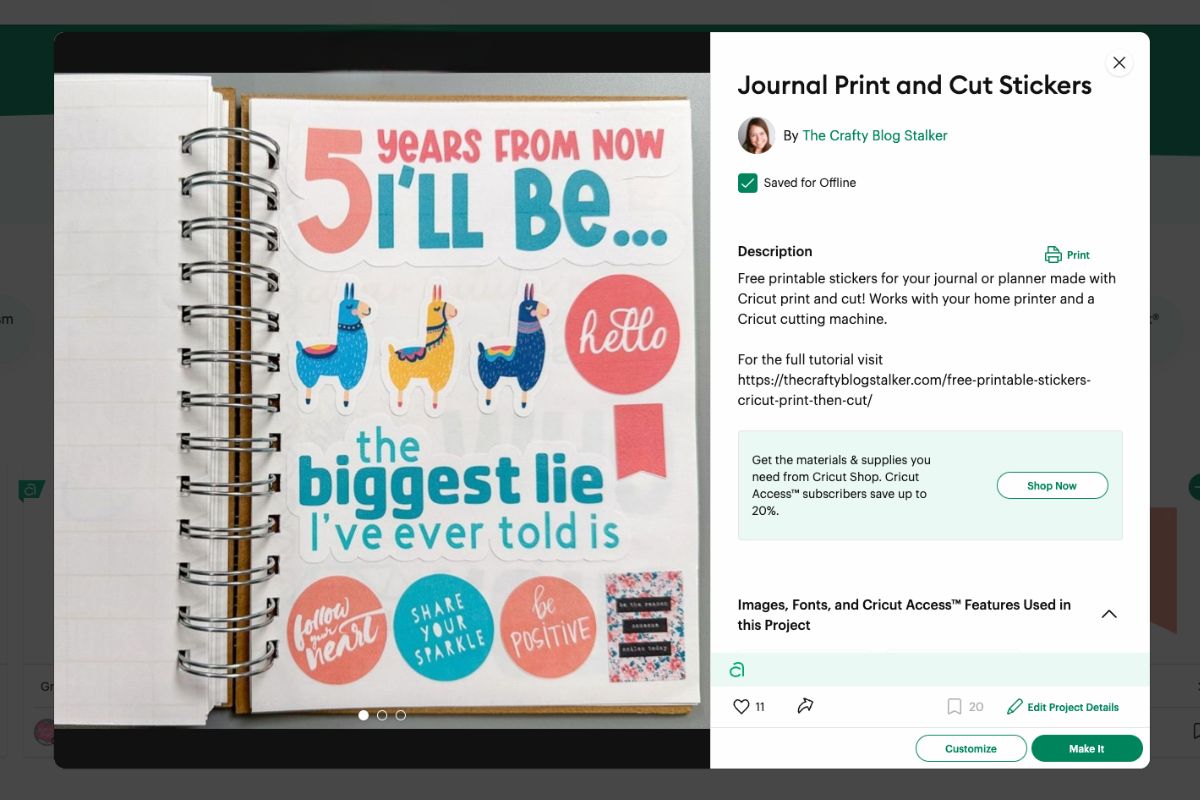
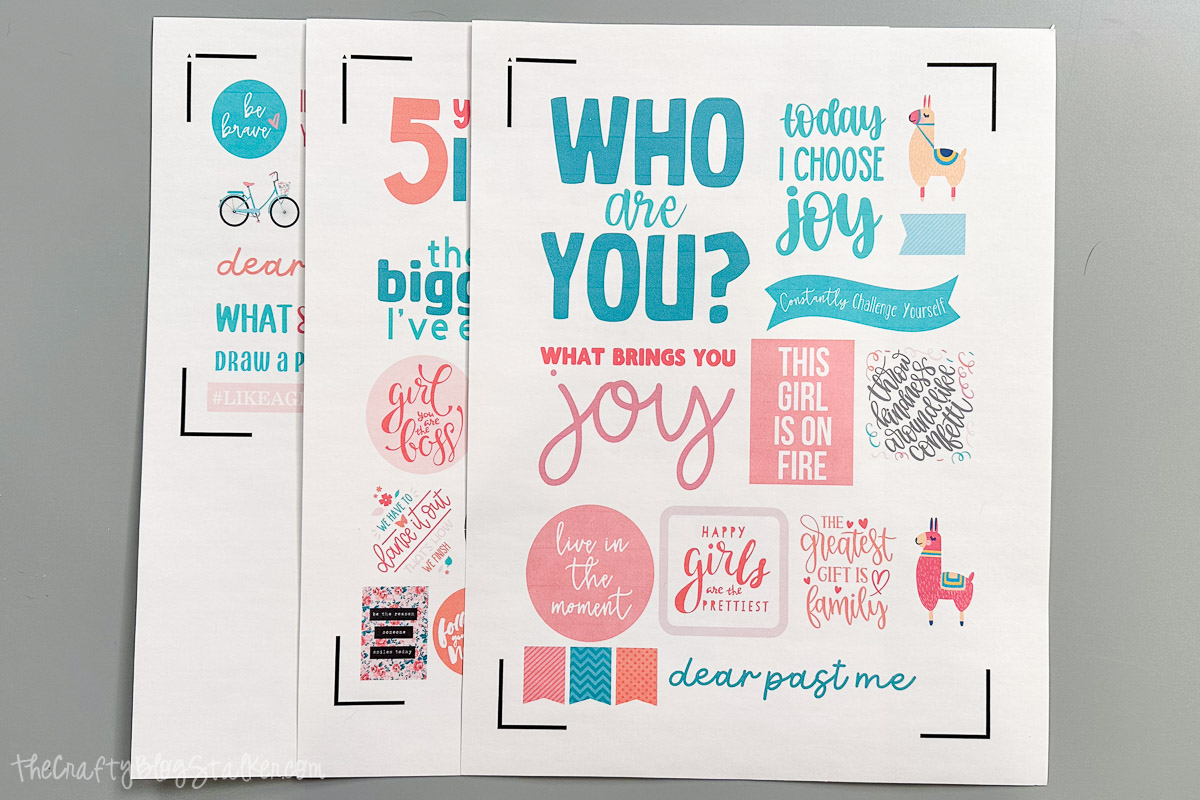
Make your journal uniquely yours with Cricut Print and Cut Stickers! They're easy to print and cut, perfect for adding a fun, personal touch to your pages.

Are you a planner and journal junkie too?
My latest obsession is carrying my journal everywhere, writing down ideas, making lists, and capturing special moments.
And, of course, no journal page is complete without stickers!
That's why I created this sticker-making file in Cricut Design Space filled with writing prompts, inspirational sayings, and-because they're adorable-cute llamas!

Cricut Design Space
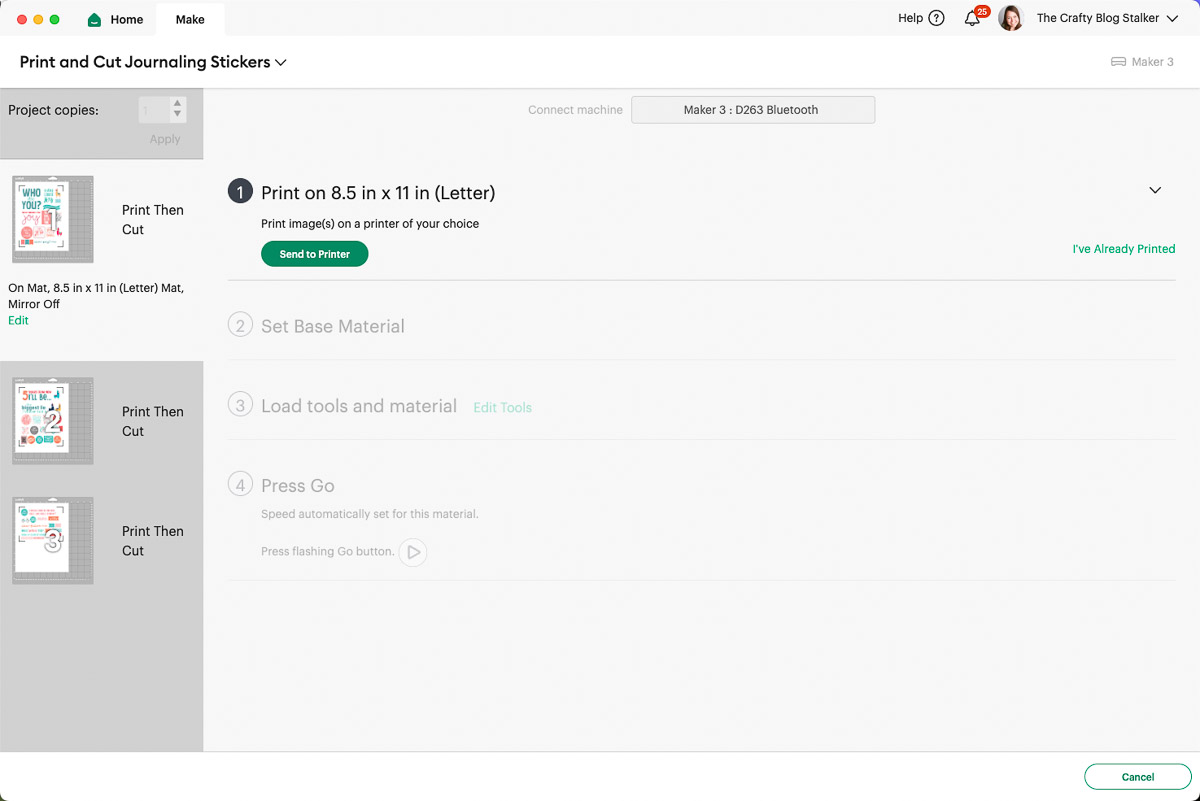
I have this complete project ready to go in Cricut Design Space.
Simply open the project and click "Make".
If you want to change the project, click "Customize".
These stickers were designed for my 7.5" x 5.5" journal, but you can resize them as needed.
Once you select Make It, you will be taken to your mat preview. This is the arrangement of the stickers on your printable sheet and cutting mat.
Select Continue in the bottom right corner.

On the next screen, click "Send To Printer". Make sure your printer is connected to your computer or device.
On the Print Setup, you can choose how many copies to print and whether to add bleed.
Bleed will extend the outer border of the sticker so that when you remove it from the sheet, there is no white border.
I already have a white border around all of these stickers, so bleed is unnecessary.
If this is the first time you are doing a print and cut with, you may want to print a test page to make sure it looks good and the sticker paper feeds ok into your printer.
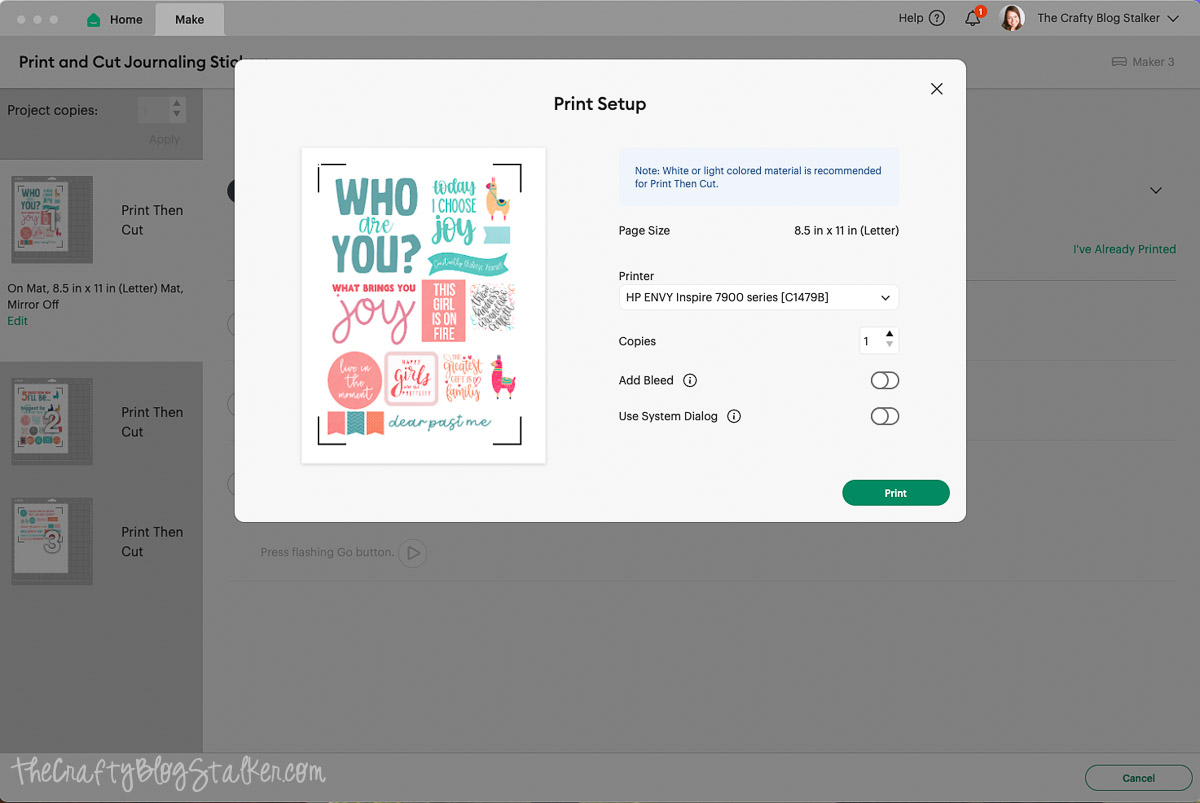
Once you are ready, select "Print" to send to the printer. OOHH look how pretty!!
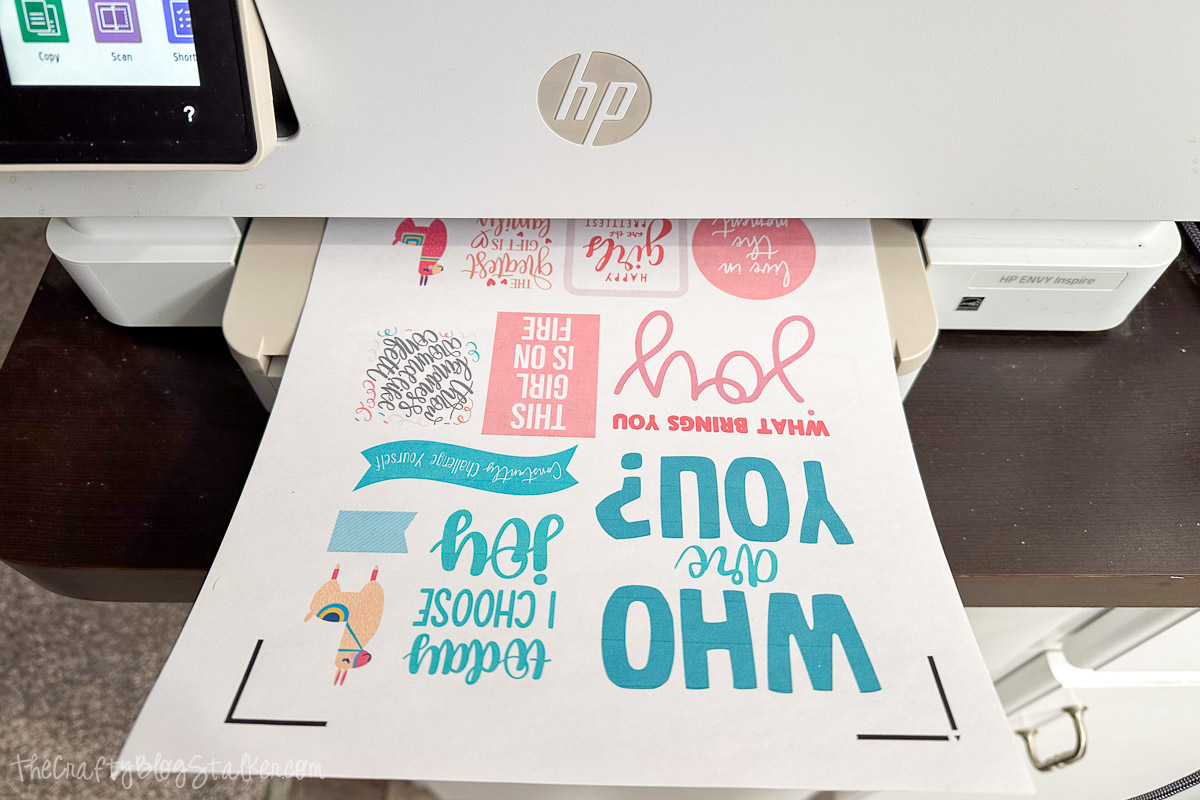
The black frame around the images is the registration guide for when you go to cut on the Cricut machine.
The machine reads those lines and knows it is cutting in the right spot.
You will have to go through the print screen for each sheet of stickers. It will not print all the sheets at once.
Now that the sheets are printed, it is time to cut them!
In Cricut Design Space select Sticker Paper.
If you don't see it displayed, select "Browse All Materials" and find your material from that menu.
For the pressure, select "Light" if you want it to cut through only the top sticker layer, or select "More" to cut through both the sticker and liner.

Lay the printed sticker sheet into the top left corner of the Standard Grip Mat and follow the prompts on the Cricut Maker.
When the arrow light blinks, load the mat.
When the Cricut light blinks, push to begin cutting.
Once the Cricut has begun, you will see a small light underneath the blade housing.
The machine is searching for those registration marks to confirm where it should cut. It will check for the line in several places.
Then the Cricut Maker will begin cutting out your fabulous new planner stickers!

Once the first sheet is complete, remove from the mat and place the next printed sheet on the mat. Repeat until all sheets are done.
Weed
Depending on the cut pressure, you may need to weed the sticker sheet.
I did light pressure, so only the first layer was cut.
Lift up a corner of the sheet with a weeding tool and gently pull to remove the excess.
As you can see, I did this while my sticker sheet was still on the mat, but it works the same if you remove the sheet first.

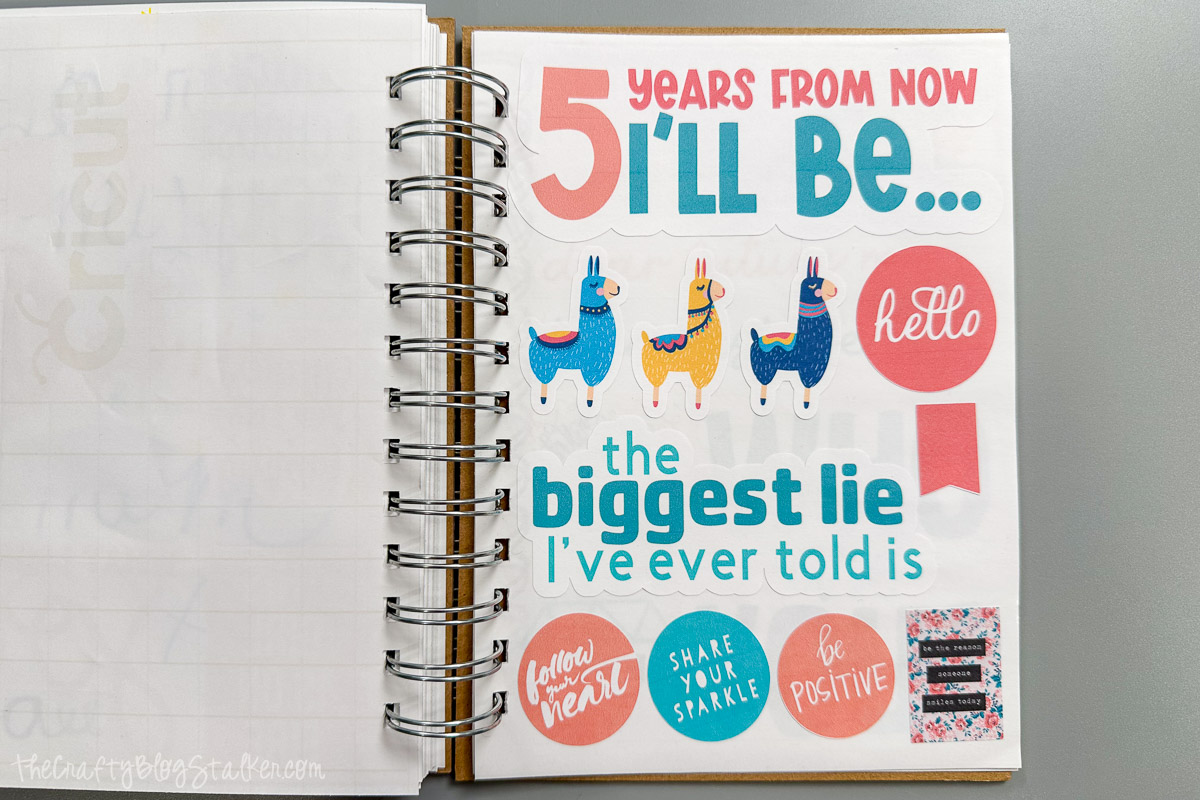
Add Stickers to Journal
Your stickers are now ready to use!
When binding my handmade journal, I knew I would want a few pages for stickers, so I added a few sticker paper pages.
So I could move the stickers over to my journal.

It took some clever arranging but I got them all transferred to my journal.
Visit my complete journal tutorial to see how it all came together!
That is fine if you don't want to create your own unique journal.
You can print and cut your stickers, then keep them with your journal supplies!
Do you want to learn sticker design?
You can design and cut stickers without Cricut Access and I'll show how!
Common Mistakes and Troubleshooting
The problem I see the most is that the Cricut is not cutting correctly, even with the registration marks.
If this happens to you, try calibrating your Cricut's print and cut function.
The problem can also be with your home printer. Make sure you can print high-quality images and designs.
I use an HP Envy Inspire Printer and I absolutely love it! It scans, copies, and prints beautifully.


sherri
I clicked on the above link to get your free printable stickers but it says the file is set to private 🙁
Katie
Sherri, I am so sorry you are having troubles. I have double-checked and my settings are set to public. Did you sign into Cricut Design Space first?
Renee
I am also being told that they are a private file 🙁
Katie
Thank you Renee. I will take a look and see what is going on.
Susan Johns
Are these still available?, I can"t find in design space. Thanks, Susan
Katie Adams
Yes, they are! I have updated the link in the post, but here is that updated link.
https://design.cricut.com/landing/project-detail/5c91d1d2c4a71c05bb399406
Liz
Hi Katie,
I am unable to download or use these. It says $105.00
Katie Adams
You will need to have Cricut Access to use these designs, otherwise you will be charged per file that the design uses.
Carla
The llama designs sound adorable! It’s a bit unfortunate that some users had trouble accessing the files, maybe a note at the beginning about needing Cricut Access would help avoid confusion.
Katie Adams
Hi Carla, I will do that. Thanks!