

The Foil Quill, combined with the Cricut Maker, creates beautiful foiled images! We'll be making a handmade journal cover in this step-by-step tutorial!
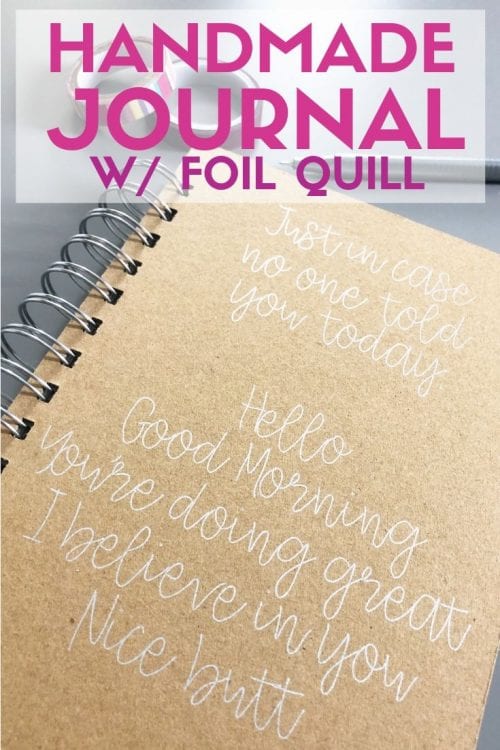
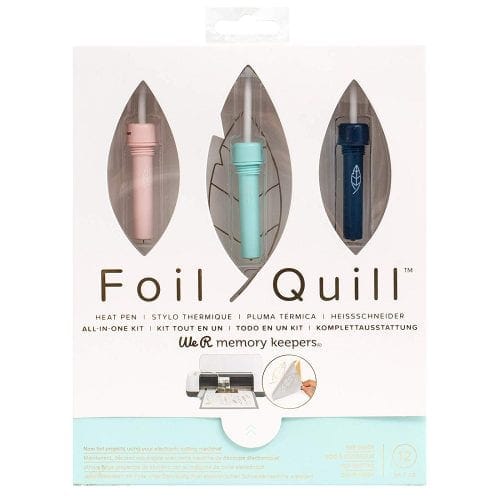
Do you love the look of foil? That shimmery shine attracts the eye and is so fun to add to craft projects! My favorite tool to add that foil shine is the Foil Quill made by We R Memory Makers. Even better, it can be used with your Cricut Cutting Machine!
What is the Foil Quill?
The Foil Quill is a tool that can be used with most cutting machines to create beautiful foil projects. The kit comes with 4 adaptors that can be used with the Silhouette, Brother, Cricut, and Sizzix cutting machines. Simply insert one of the Foil Quill tips into your cutting machine, choose a design, and let your machine do the work!
Handmade Journal Tutorial Using the Foil Quill
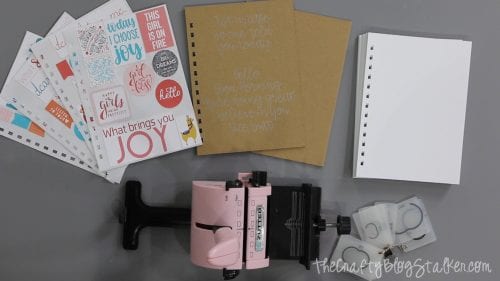
Supplies Used:
Affiliate links below may be too similar items when exact items couldn't be found online.
- Foil Quill
- Cricut Cutting Machine
- Knife Blade
- Foil Quill Journal Cover - Cricut Design Space
- Journal Stickers - Cricut Design Space
- Chipboard
- White Cardstock 5.5" x 7.5" pack
- Zutter Bind it All
- 1" Binding Wires
- Wire Cutters
The finished book measures 5.75 inches by 7.75 inches.
Like videos? I do have a video tutorial if you would prefer to watch the tutorial. Please subscribe to my YouTube Channel so you don't miss out on any future video tutorials!
How to Install the Foil Quill in the Cricut Maker
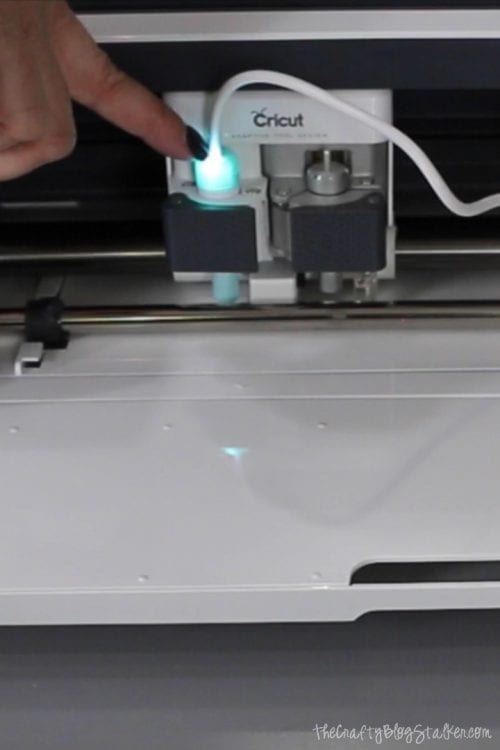
The Foil Quill Kit comes with 4 different screw-in adapters. For the Cricut, we will use adapter C. C for Cricut so it is easy to remember! Twist the adapter on the foil quill pen you want to use. There are three different sizes. For this project, we are using the standard pen.
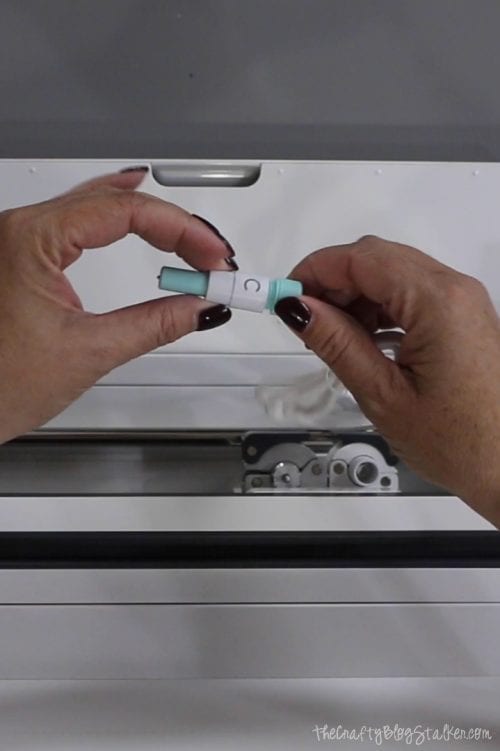
In the "A" housing there is a white plastic piece that holds a pen or a maker. Remove this piece by carefully pushing up from the bottom and pulling up from the top with both hands. It may seem like it is stuck and won't come out, but it will.
Keep this piece close because you will need to put it back in place to be able to use pens and markers with the machine.
Slide the Foil Quill pen into the "A" housing and snap the door shut.
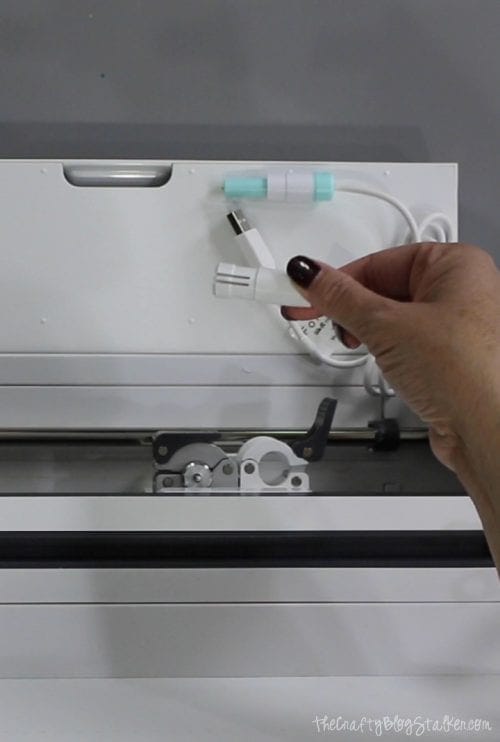
To plug the Foil Quill in you can use the USB on the side of the machine or plug into a different USB plug. If you plug the Foil Quill directly into the machine this void your warranty with Cricut. So to be safe I used a nearby plug.
Once the quill is plugged there will be a light at the top of the pen. The pen needs to preheat for 5 minutes before use. Make sure to put the metal plate between the pen and the base of the machine while preheating so it doesn't hurt the plastic of the machine.
In the video above I go through each step so if you want a better visual of how to install the Foil Quill Pen watch the video.
Journal Covers in Cricut Design Space
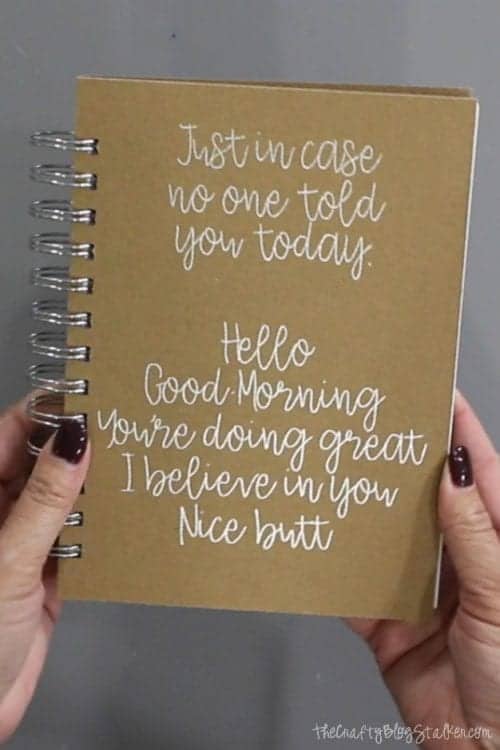
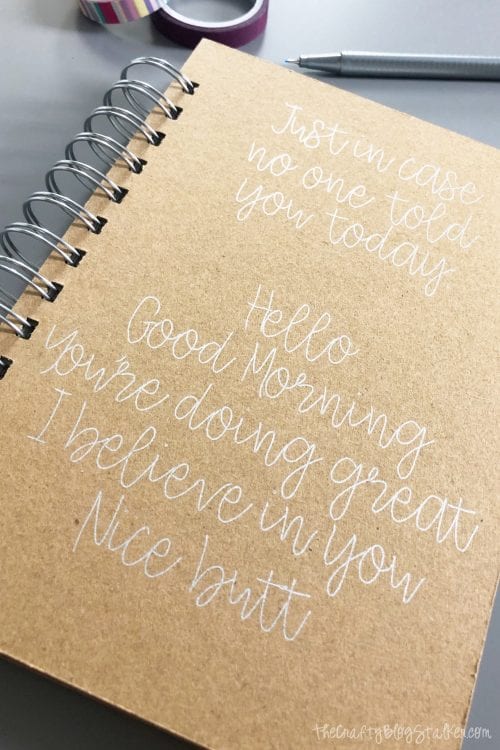
I created the text for the handmade journal in Cricut Design Space using the Babette Font. You can create your own journal cover or use mine on Cricut Design Space!
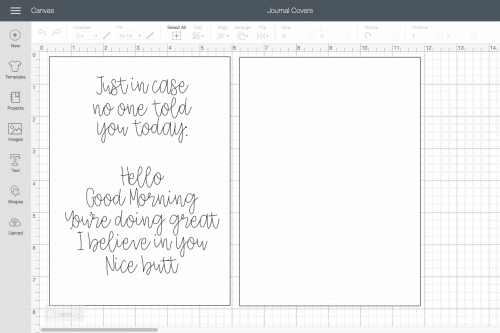
The Cricut Maker will draw and then cut. That means when I send the project to the machine it will write the text first with the Foil Quill and then cut the Chipboard with the Knife blade.
When you select "Make It" in Cricut Design Space, you will be taken to a mat preview page. This will show you where the text for the journal over will be so you know where to tape the foil sheet to the chipboard.
Use the Strong Grip Mat and tape the edges of the chipboard to the mat using washi tape or painter's tape. Then tape the foil sheet to the chipboard.
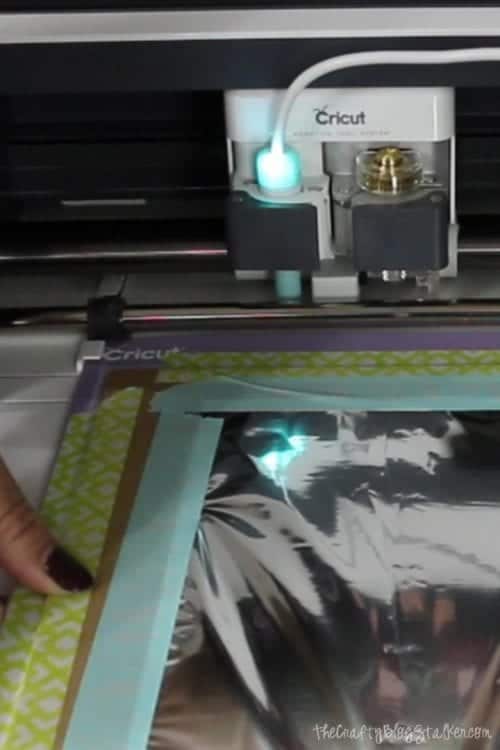
Once the Foil Quill is preheated, press the blinking arrow button to load the mat and the blinking logo button to begin the project.
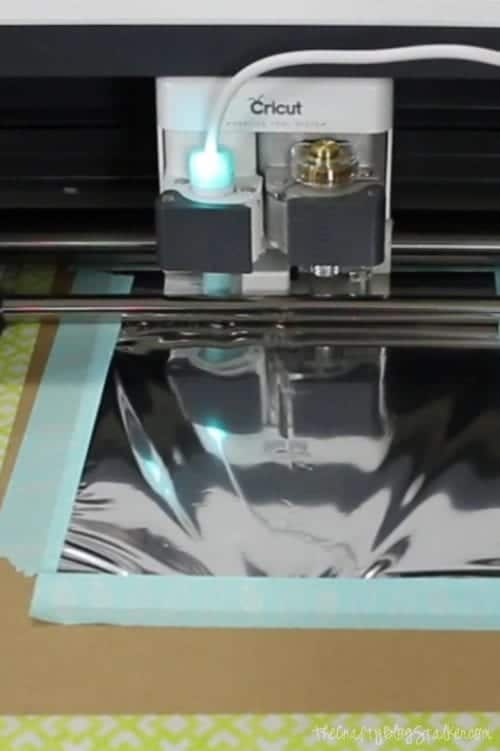
Once the Foil Quill pen is done with the text you can pause the machine and carefully remove the foil sheet. Make sure to only pause, do not remove the entire mat. I only did this because the cut was inside where I taped the foil sheet and I didn't want it to wad up and interfere with the cut.
Remove the mat once the machine is done cutting. It will take several passes over the chipboard to get it cut out completely.

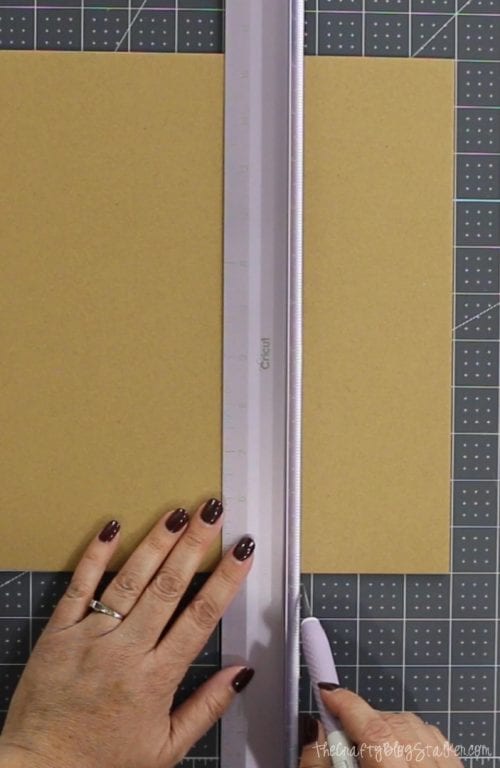
You can either cut the back journal cover with the Cricut Maker as well or cut it with a ruler and a craft knife since it is just a rectangle.
Using the Zutter Bind it All
We are done with the Cricut Maker and the Foil Quill. Now we are going to bring in the Zutter Bind it All. The Zutter is a binding system. There are several different binding systems out there and many of them will work, but I have the Zutter so that is what I am going to use.
Before we can bind the journal we need to punch the binding holes.
On the Zutter, set the guide to "C" for punching the holes in the cover. Place the chipboard cover in the opening, up against the guide. Then pull down the handle to punch.
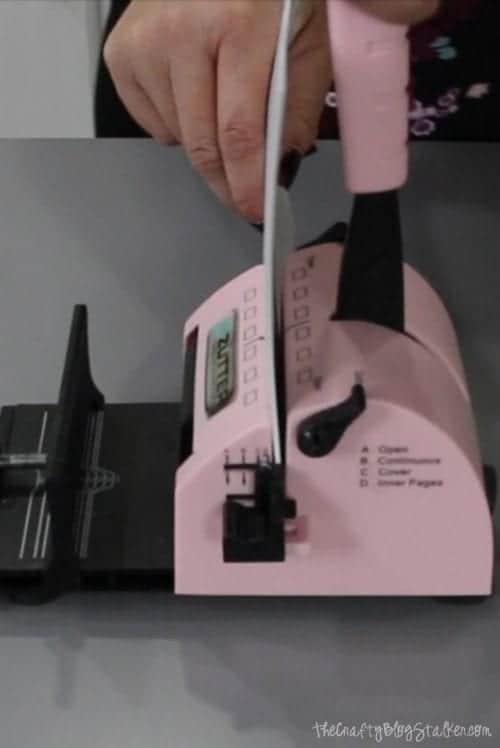
Remove the journal cover and set the guide to "B" to make continuous hole punches. Place hole 5 in the notch guide and pull the handle down again. Remove and then place hole 6 in the notch guide. Punch again. You will have 13 holes punched along the side. Repeat for the back cover.
For the filler, pages set the guide to "D" and repeat the steps above to punch the binding holes. You can only cut about 7-10 pieces of paper at a time so you will have to do the pages in small batches.
When all of the pages and cover are punched we can build the book. Align the holes and stack with the back cover, filler pages, then the front cover. Take the back cover and flip over to the front. Feed the wire prongs through the holes.
Set the Zutter to 1-inch binding and place the journal with the wire binding inside the spacer and pull the handle down. The wall pinches the wire to close it at just the right thickness.
And your handmade journal is finished!
The finished Handmade Journal
The journal is all finished! See wasn't that easy?
Look at all of these blank pages for journaling!

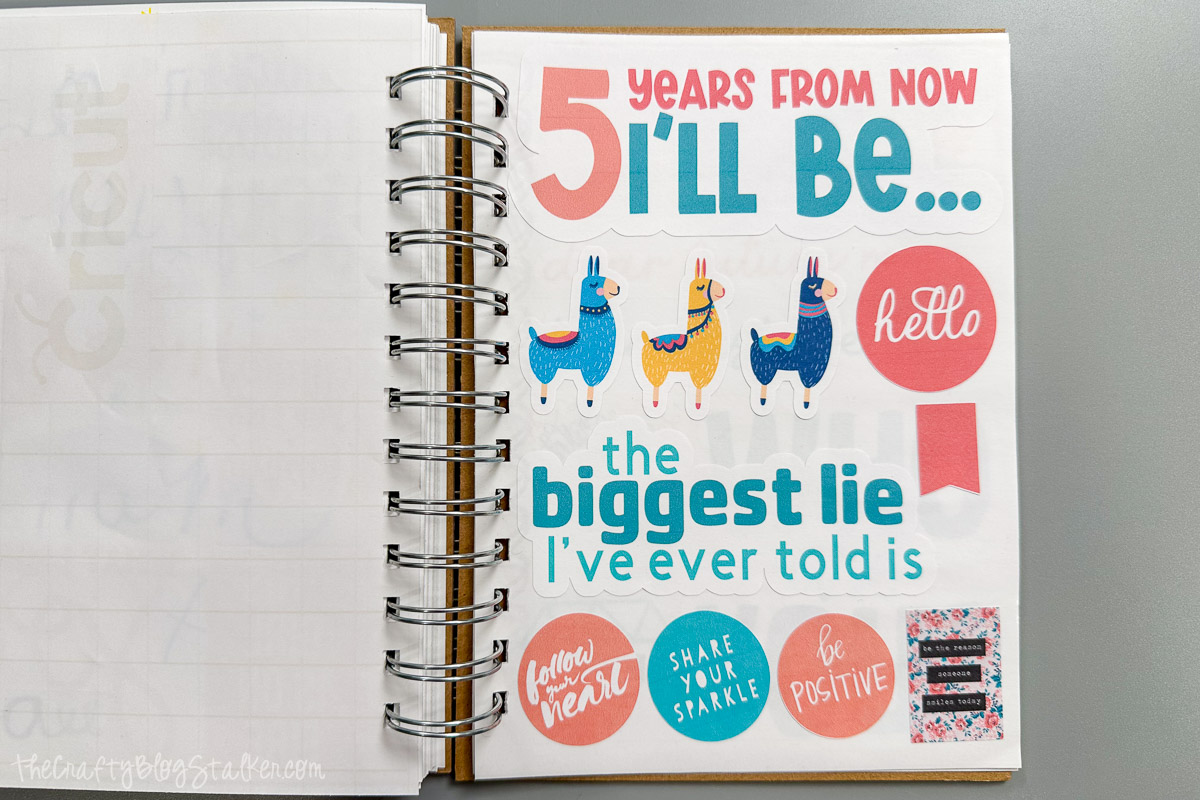
Want to add Journal Prompt Stickers too? I designed these in Cricut Design Space and you are welcome to print and cut them right from my design in Cricut Design Space!
Now to get busy journaling!
What do you like to keep track of in your journal?
Crafting Essentials
- The Cricut Cutting Machine is easily my favorite crafting tool. We use it in so many of our tutorials!
- These MakerX Crafting Tools are perfect for keeping in the craft room and are always ready when needed!
- This Fiskars Paper Trimmer is easy to use and cuts nicely without frayed edges.
- These Scotch Precision Scissors cut like a dream, and you get multiple pairs in a pack!