
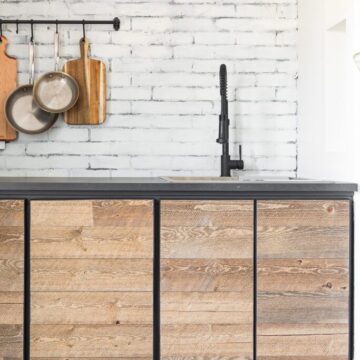
Painting over faux brick is an easy way to update a space with texture and a bold industrial style.
It is week 2 of the One Room Challenge, and this week I am sharing a full tutorial on painting over faux brick for our space.
This project shows how to create an industrial faux brick wall using paint, so it works for anyone who wants texture and character without major construction.
I have always loved the exposed-brick look you see in NYC lofts, and this was my way of bringing a little of that vibe to our kitchenette.
Painting over faux brick gave us the industrial feel while keeping the space practical and not too kitchen-heavy.
Jump to:
Skill Level: Easy
Total Time: 2 Day minimum
Supply List
Some links may lead to similar items when the exact item is unavailable.
- Faux Brick Panels
- Black and White Paint
- Sheetrock Compound
- Sheetrock Knife
- Masonry Coater
- Lint Free Rags
- Paint Brush
- Small Paint Roller
- Paint Tray
- Stiff Bristle Brush
- Putty Knife
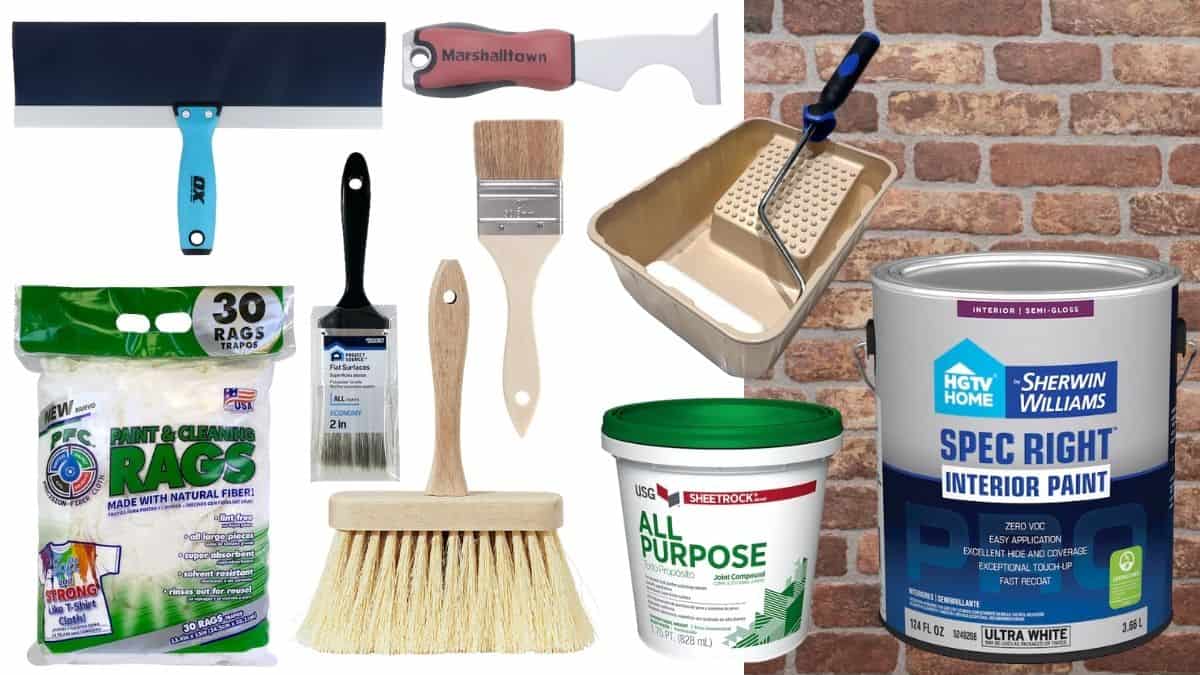
The paint colors I used are Behr Cracked Pepper, Behr Swiss Coffee, and Sherwin-Williams Reserved White.
This project is highly subjective and easy to adapt to your personal style.
I actually did not love the final result, so I fixed it by going whiter than I originally planned.
I'm going to show you each step I took, but you might not need all of them depending on your vision.
If you are trying to replicate this look, I'll give you some tips on what I might do differently.
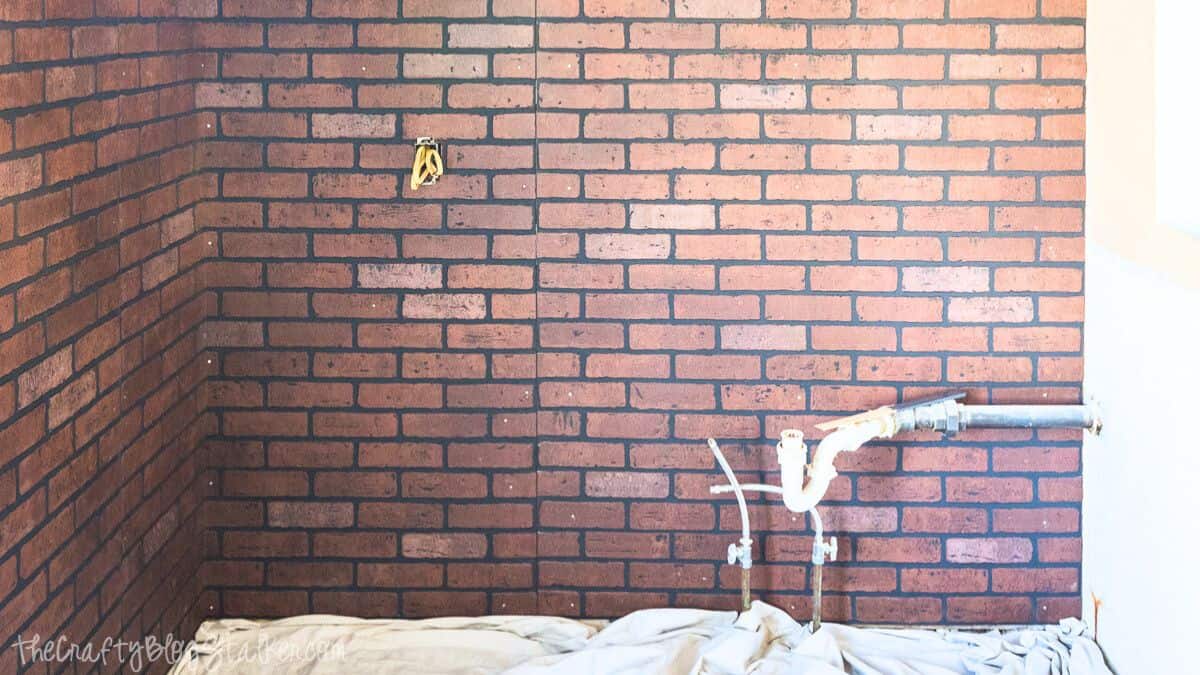
Install Faux Brick Panels
First, I installed these brick panels.
Depending on your space, it may be tricky to hide the seam lines, but they will be well hidden with the technique I am sharing.
If you want to hide that seam a little better, you can cut out some bricks and intertwine them, and then fill the gaps with a mortar repair caulk.
Here are my corner walls. This will be a small kitchenette.
Distress with Sheetrock Compound
I originally wanted to use Plaster of Paris, but it dries much faster and doesn't let you work with the product and fix it as you go.
The downside of my chosen method is the 24-hour dry time. Make sure to keep that in mind when planning out your timeline.
I used a drywall knife to apply the compound and just kind of slapped it up there. I had to get used to working with it to achieve the results I wanted, and I tried applying it at different angles to avoid everything looking as if it were applied in the same direction.
I found that using the knife to push up along the grout lines gave it a little more definition, but this is really just an artistic choice about how you want to apply it.
Play around with it and maybe even practice on some scrap panels if you aren't totally comfortable working with it.
It is helpful to decide in advance how much of the brick you want to cover.

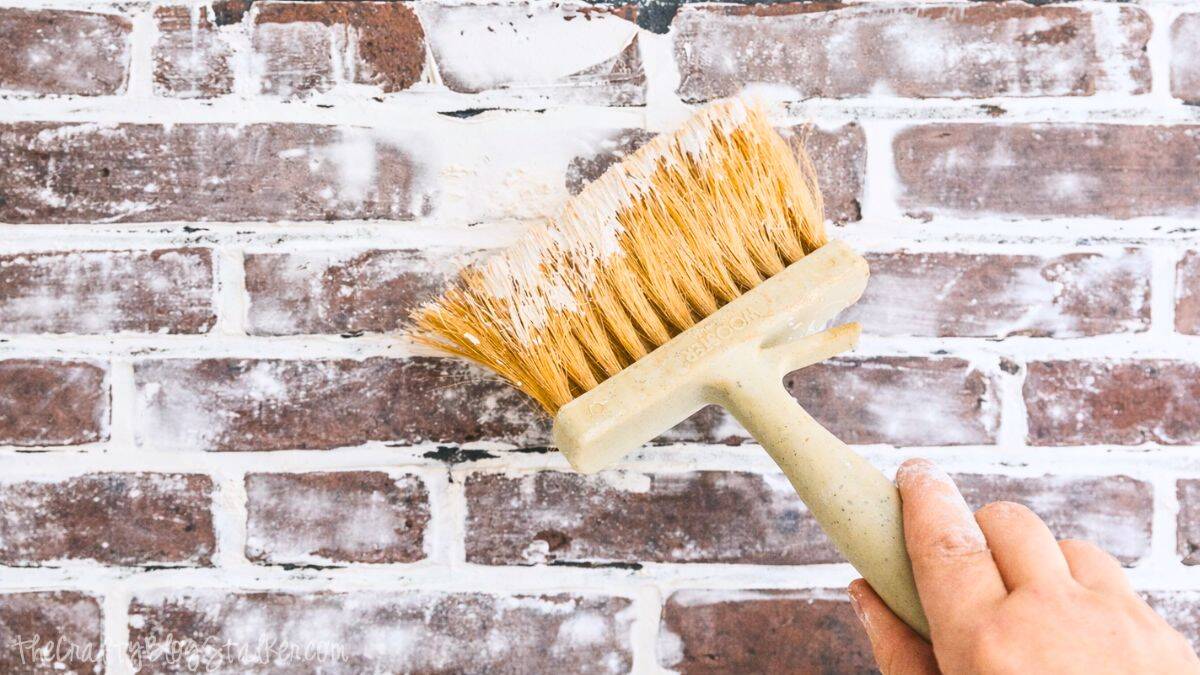
Then I took a masonry coater brush and lightly ran over the compound to give it an authentic feel.
Otherwise, it looks very smooth. This gives brush strokes that feel a little more organic to me.
Experiment with pushing up in certain spots to get different looks. Think of it like molding clay, and just work the material until it looks the way you want.
Before it's dry, run your fingers along the mortar lines. Since this isn't a real brick, you don't want to lose the mortar lines' dimensions.
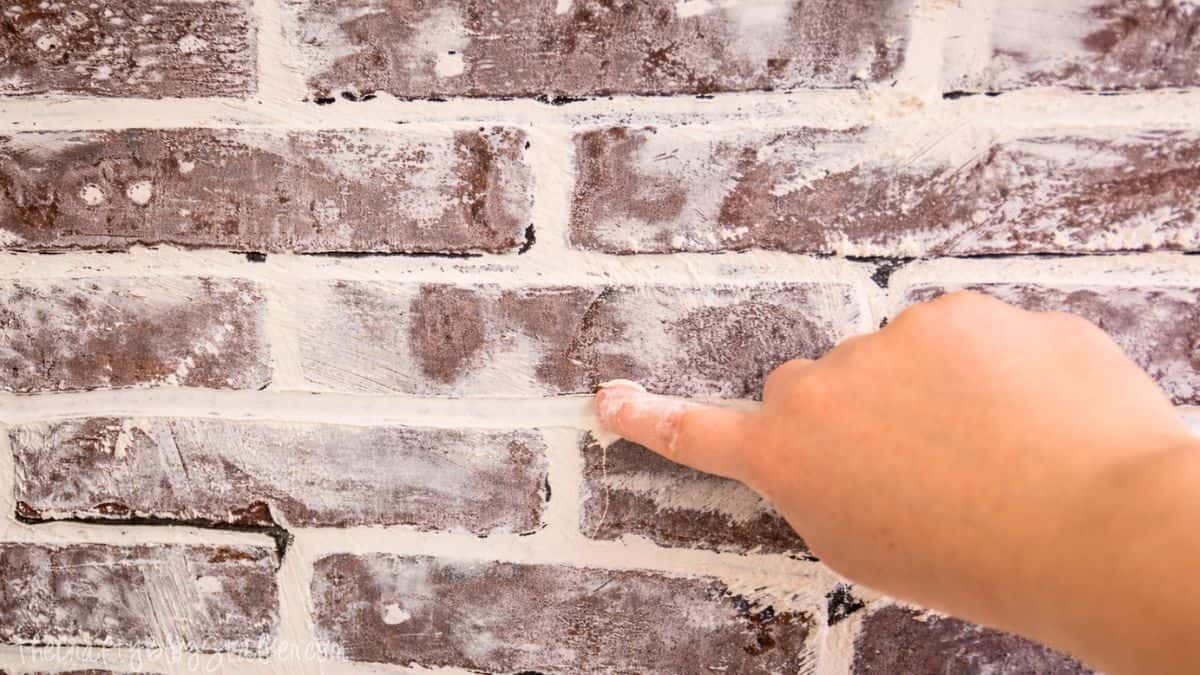
I worked in small sections to make sure I could correct any mistakes right away.
When it's all applied, you'll still be able to blend anything you see.
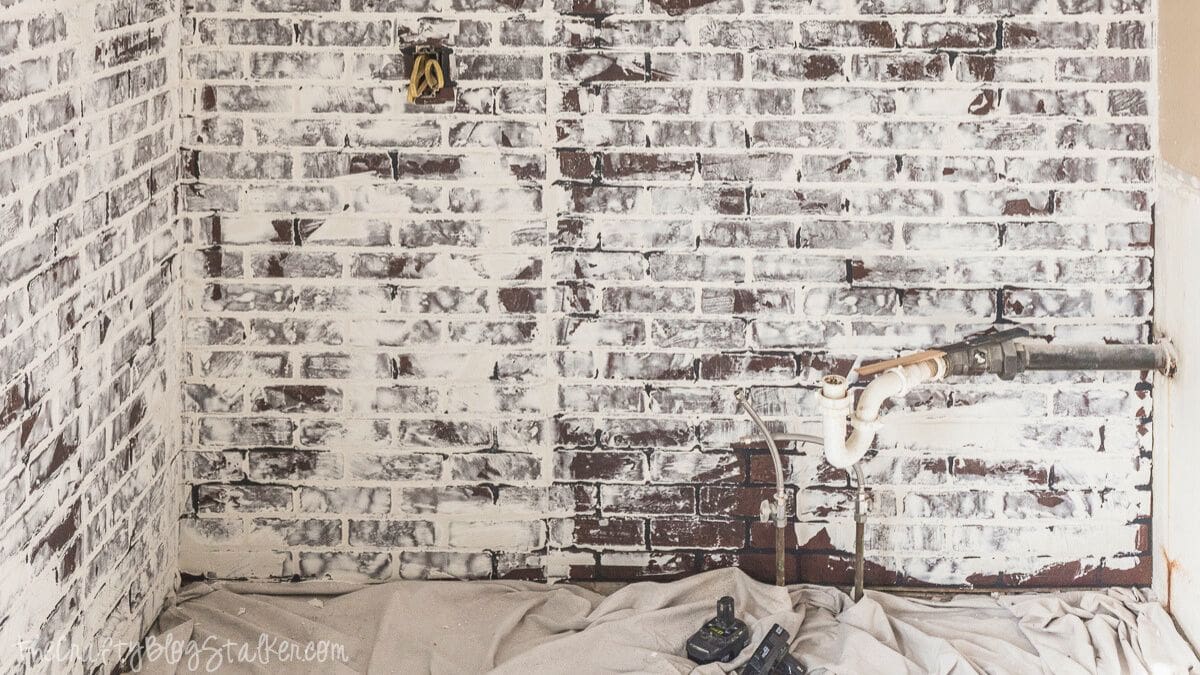
Graywash and Whitewash
Once all the sheetrock compound had dried, I did a simple gray wash using a watered-down paint mixture. (
I mixed about 1 part Behr Cracker Pepper paint to 6 parts water, stirred it thoroughly, applied it with a paintbrush, and immediately wiped it down with a lint-free rag.
When finished, I had applied 2 coats of the gray wash. You can see the differences below.
However, I'd probably suggest doing just 1 coat, since I ended up dry-brushing over the second coat anyway.
Once the graywash dried, I used a small paint roller to apply a watered-down white wash.
I used the same ratio of Reserved White paint to water. I just mixed it up in a paint tray and kinda sloshed it on there.
Again, this is very artistic, so there's no exact method.
Once I rolled the paint on, I took a lint-free rag and wiped it all together so there were no paint drips. You can also use your paint scraper to distress the paint to get a more aged look.
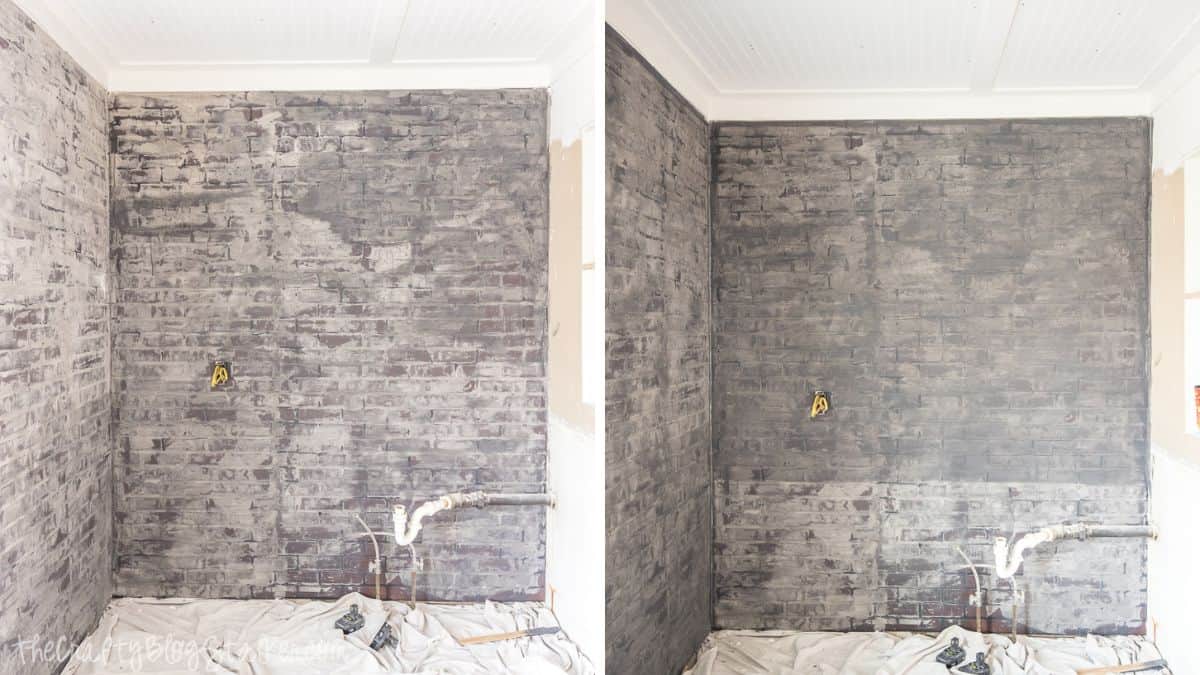
Ok, once I applied the whitewash, I wasn't super happy with how it looked, so I started dipping my rag back into the gray wash and rubbing it around. You can see some of that progress in the photo below.
After rubbing the gray wash back over the top, I just wasn't happy. It looked too messy and had a bluish tint.
Had this been on real brick, I think it would have worked a little more to my advantage. The brick dimensions were getting a bit lost since I was working with faux brick panels.
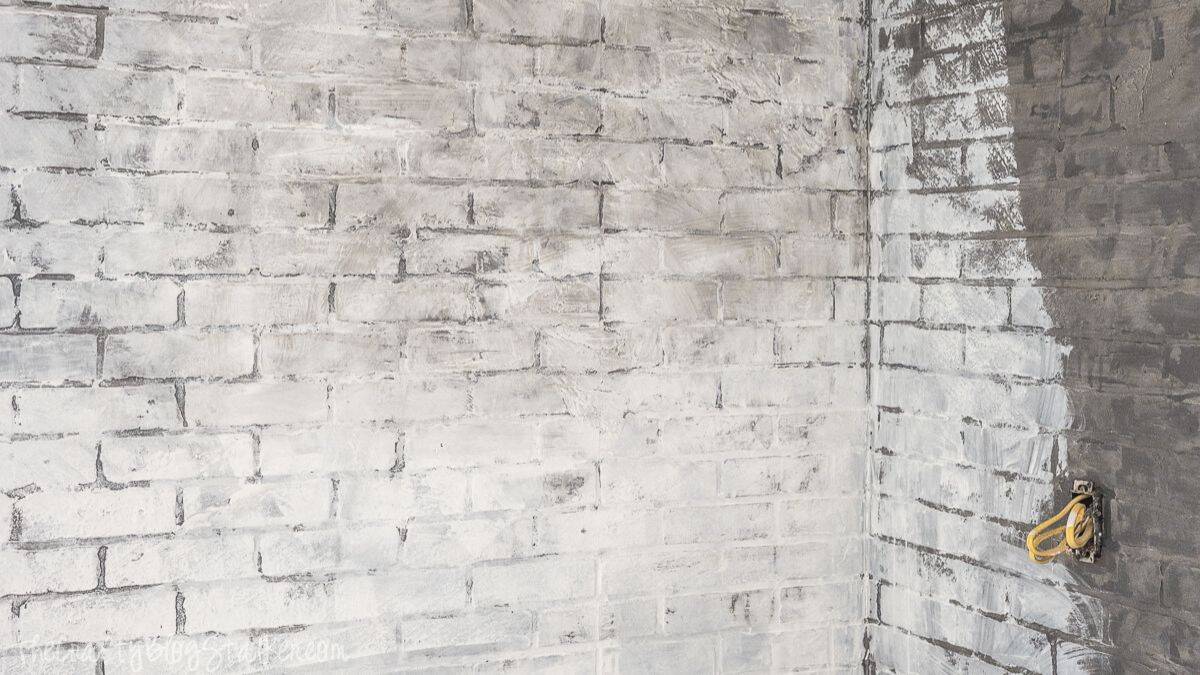
Dry Brush Final Layer
To get rid of that bluish tint, I decided to dry-brush each individual brick, avoiding the middle mortar lines.
This time, I used Behr Swiss Coffee paint because of its warmer tint, which gave the overall look I wanted.
I worked in rows, and once I finished with a row, I'd take the brush and just rub it back and forth to blend it all. This was done with practically no paint on the brush.
In the photo below, you can see my progress. I started dry brushing from the bottom and worked my way up.

Once you have finished dry brushing, I actually went back and dipped my rag in the gray wash again to sort of define the mortar lines where I felt like they were lost.
I know this feels like a lot of layers of paint. You certainly don't have to do everything I did, but I will say that adding multiple layers and distressing as you go really adds dimension by revealing what you did underneath.
So take this tutorial as a guide and see what you can come up with!
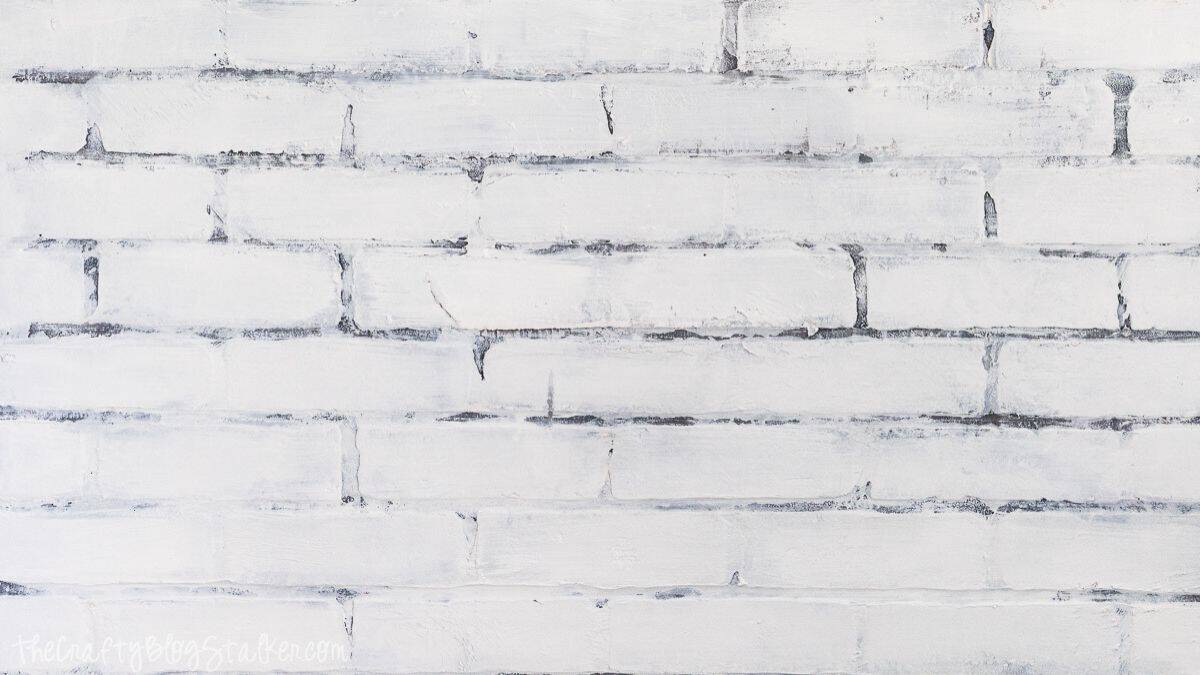
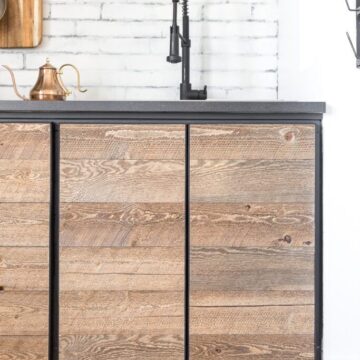
After a bit of trial and error, I absolutely love the finished look!

Want to see the finished room? You find it here, Rustic Industrial Kitchenette Reveal. It's my new favorite room in the house!
More Home Improvement Ideas
Do you have a space that needs a little updating? Here is a little inspiration!


Hi, I'm Katie!
I'm so glad you're here. Want to make something fabulous? I'm here to help!

Virginia Fynes
Looks amazing! Looking forward to seeing what you're doing with this space!
Katie
Thank you Virginia!! : )
Angela Nickerson
I'm intrigued! I can't wait to see how this turns out!
Katie
Thank you! It's really coming together. I got nervous in the beginning, lol!
Catherine
Wow! That's beautiful! I love the texture and depth the panels give, but the finish you chose is brilliant. Really transformed the wall!
Katie
Thank you so much Catherine!!
Kelli
It turned out so cute! Projects like this are so scary in the middle; good job pressing through!
Katie
omg yes! So scary in the middle! I'm always like .... "uhhh.... hope this works out". I do lots of staring lol
Libbie
Katie,
This turned out so well! I've seen these panels before and thought ugh. You mades your beautiful! Following along as I can't wait to see how this comes together.
🙂
Tammy
OMG you just gave me an Idea for my Upstairs Loft. Its an industrial themed area and I can't wait to try this on my large empty wall. I can wait to see how your finished room looks. Super excited. Keep up the good work girl.
Kate
I really want to see the end result! It looks great so far. I'm sure the styled room is going to look really nice.
Richella J Parham
WOW! Your wall looks amazing. Love the way you adapted your plan as you went along. Thanks for sharing your whole process!
Thanks for joining the Grace at Home party at Imparting Grace! I'm featuring you this week.
laura
hi katie
sharing this tutorial on my weekend post, the weekend edit. I love it. I tried a wallpaper brick, but it has no depth. I love this and that's it is available at Lowes! Thank you! laura
Kirsten
You. Are. Awesome! This is exactly what I have been wanting to do, thanks!