
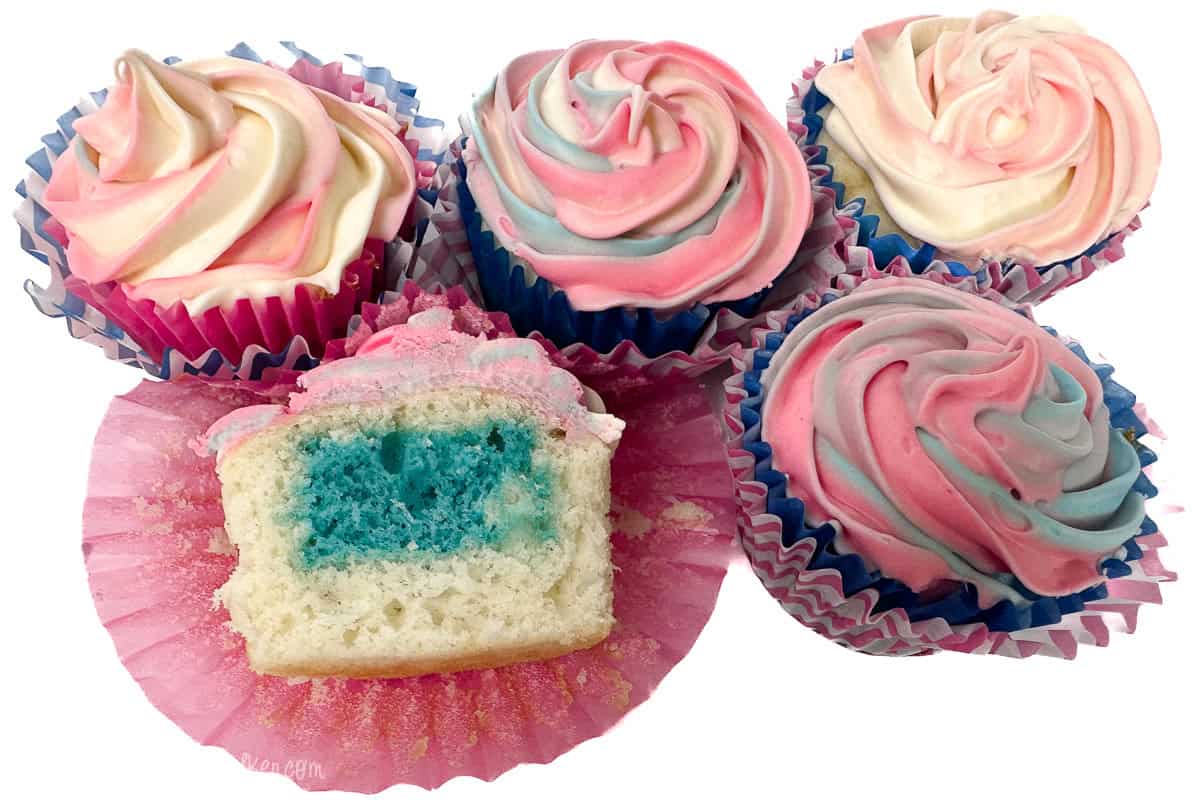
Share your big news with easy gender reveal cupcakes. They're quick to bake, fun to serve, and perfect for a low-stress baby shower treat.
My daughter is pregnant, which means I will be a grandma, and I couldn't be more excited!
When she asked me to make some cupcakes for the gender reveal party, I was all in.
I got the inside scoop before anyone else (yes, even before the parents), and keeping that secret was more complicated than I thought.
If you've been tasked with the same job, these easy gender reveal cupcakes are simple to make, fun to serve, and a delicious way to reveal if it's a boy or a girl.
Jump to:
Ingredients
Scroll down for the complete recipe with ingredient measurements.
- White Cake Mix
- Eggs
- Vegetable Oil
- Buttercream Frosting
- Heavy Whipping Cream
- Cooking Spray

You will also need a few additional supplies.
Gender Reveal Cupcakes with a Cake Mix
Equipment
Ingredients
Cupcakes
- 2 box White Cake Mix
- 8 Egg Whites (per box instructions)
- 2 ½ cup Water (per box instructions)
- 1 cup Vegetable Oil (per box instructions)
Frosting
- 32 ounces Buttercream Tub Frosting
- Heavy Whipping Cream as needed
- Powdered Sugar as needed
- Pink and Blue Food Coloring
Instructions
Pink or Blue Cake
- First, make the colored cake that will be hidden inside the cupcake. Follow the directions on the back of the box for the egg white recipe. This will create a whiter batter that is better for coloring.
- Flour and grease the inside of an 18-inch baking sheet that has a depth of at least 1 inch.
- Pour the batter into the baking sheet and bake for 20-25 minutes until cooked through, and a toothpick inserted the center comes out clean.
- Allow to cool completely.
- Once cool, use the 2-inch circle cookie cutter to cut small circles of the colored cake.
White Cake
- Make the second white cake mix following the directions on the back of the box for the egg white recipe. The whiter the cake the better the color stands out.
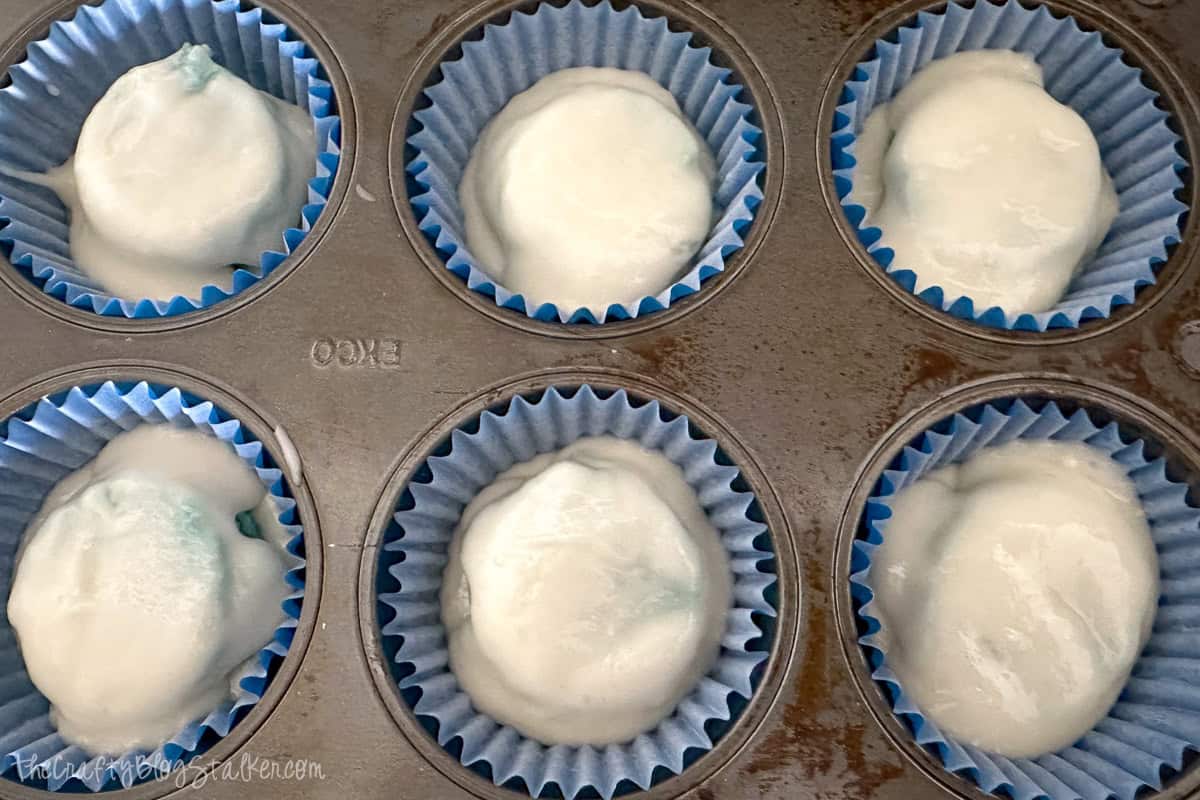
- Line the cupcake tin with paper baking cups and fill ¼ - ⅓ with white cake batter.
- Insert a circle cake piece, centering it in the cup. Fill the cup to about ⅔ - ¾, be careful not to overfill.
- Bake for an additional 18-20 minutes, or until cooked through. Allow cupcakes to cool completely.
Buttercream Frosting
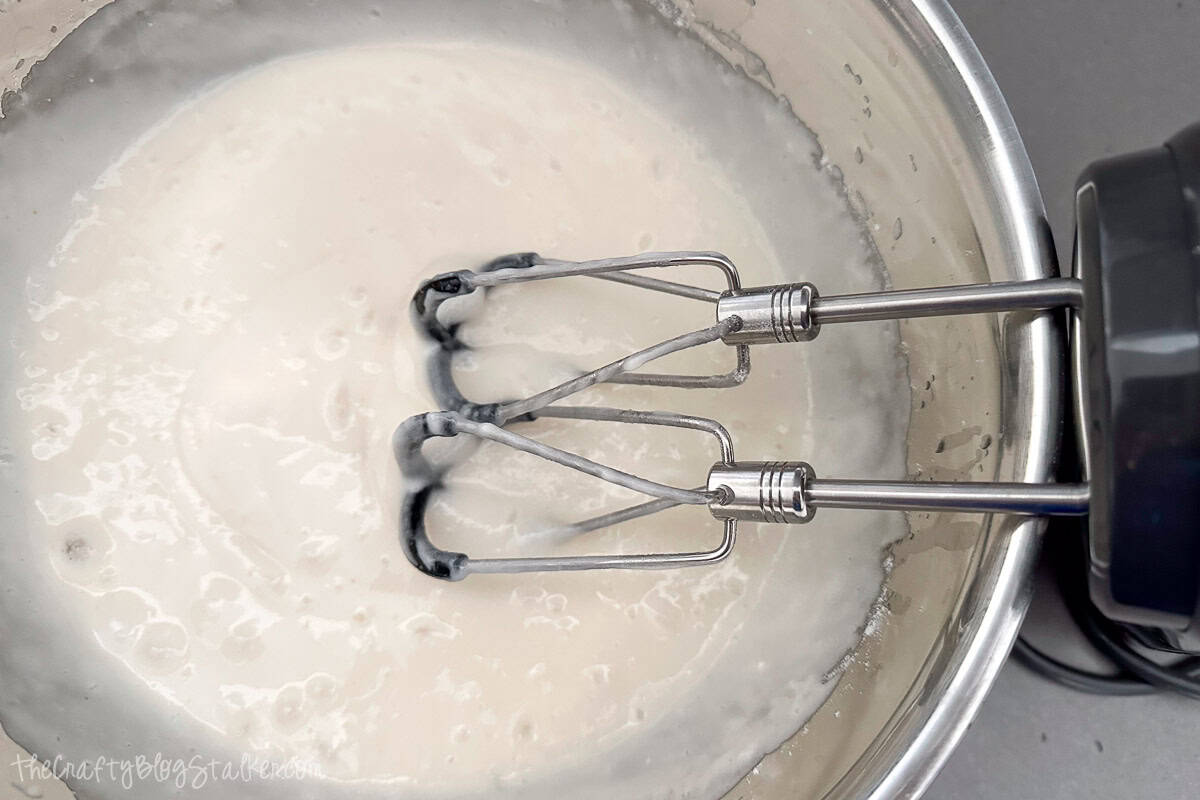
- Scoop the frosting out of the tub and into a mixing bowl.
- Use a hand mixer to whip the butter to give it a lighter and fluffier texture.
- Optional: Add a tablespoon or two of heavy whipping cream for a more homemade flavor. This will thin the frosting, so if needed add some powdered sugar to thicken the frosting back up. It needs to be thicker to use in a pipe bag.
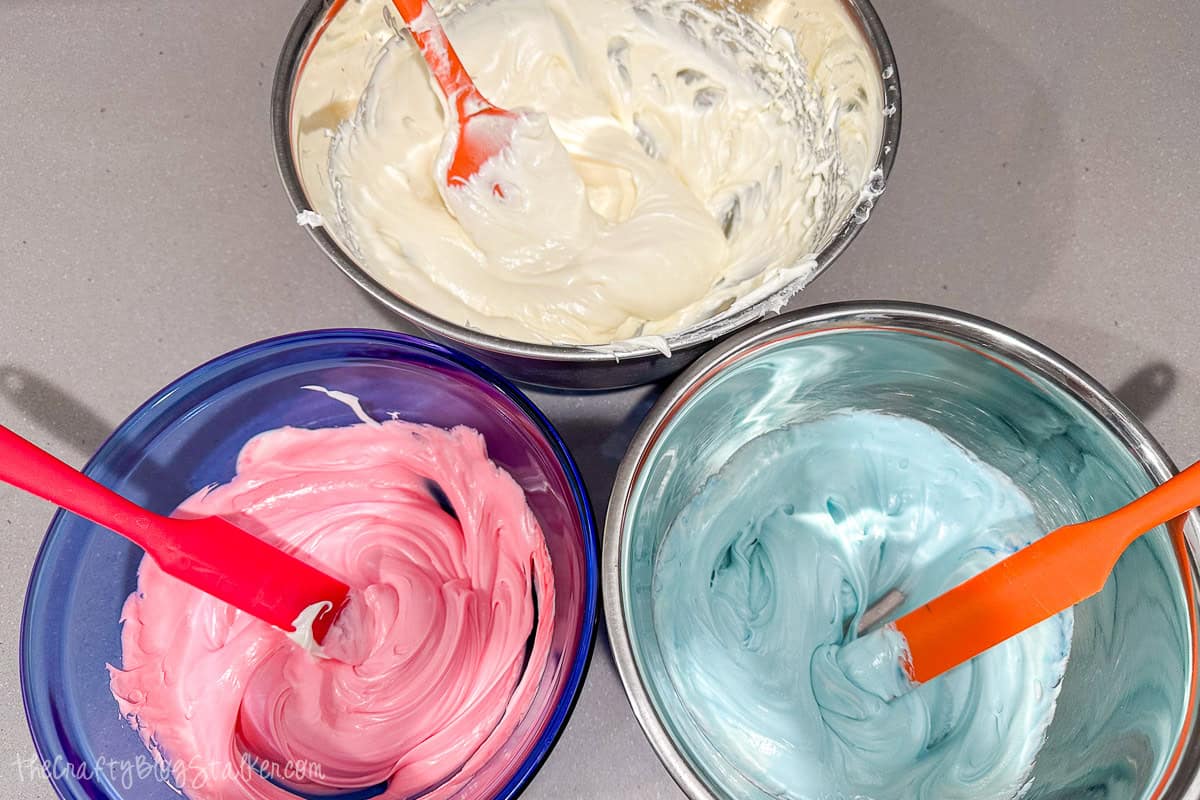
- Divide the frosting into three different mixing bowl. Create a bowl of pink frosting, a bowl of blue frosting, and keep one bowl white.
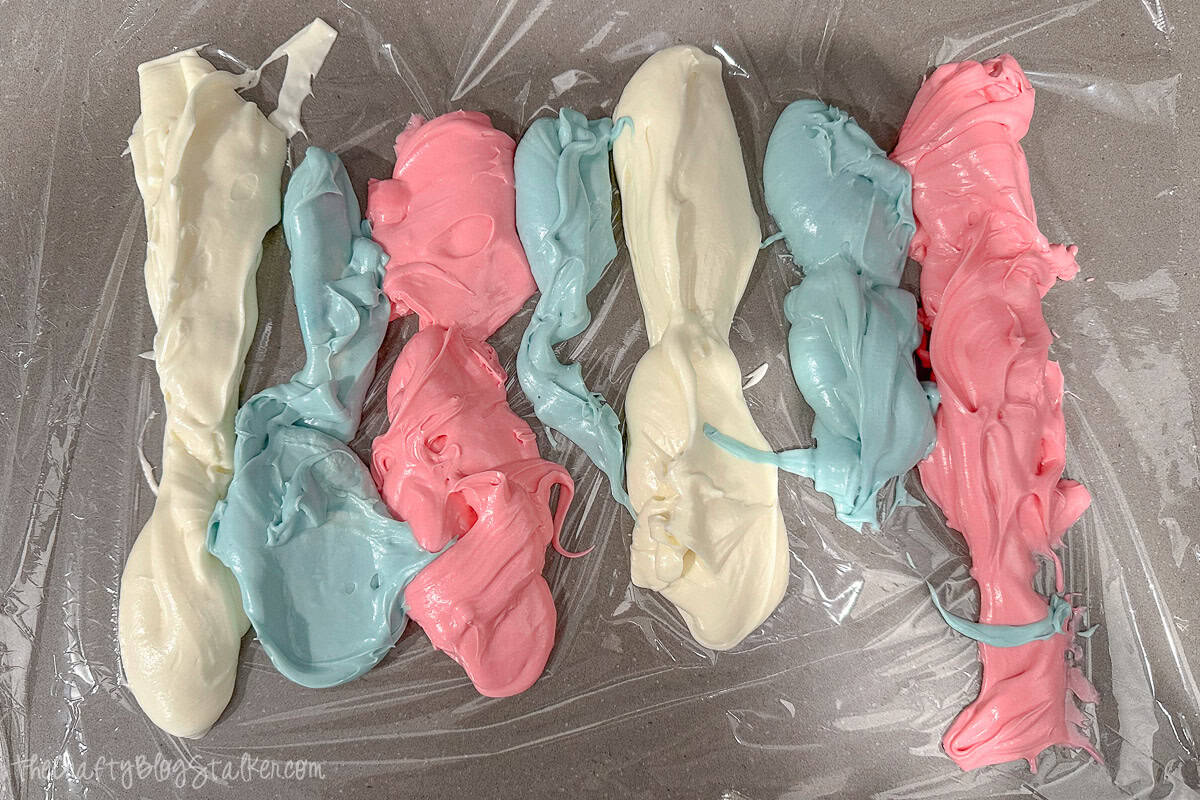
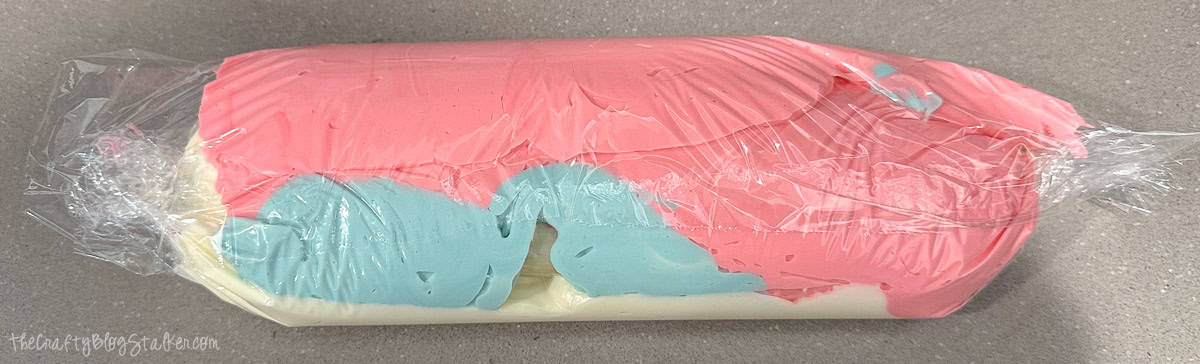
- Layout a large sheet of plastic wrap and add rows of the different colors of frosting. Roll the plastic wrap so you know have a tube of multi colored frosting.
- Insert the tip into the pipe bag and then add the tube of frosting, leaving it in the plastic wrap. Don't worry, it will squeeze out of the plastic.
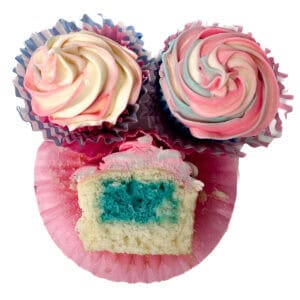
- Pipe swirls of pink and blue frosting onto the top of the cooled cupcakes.
Nutrition
Baking Tips
I found it easier to use two mixes instead of trying to half the batter, but if you need fewer than 12 cupcakes, you should be fine with 1 mix.
Bake according to the egg white recipe for both the colored cake and the white cake. When using the whole egg, the batter turns a yellow color.
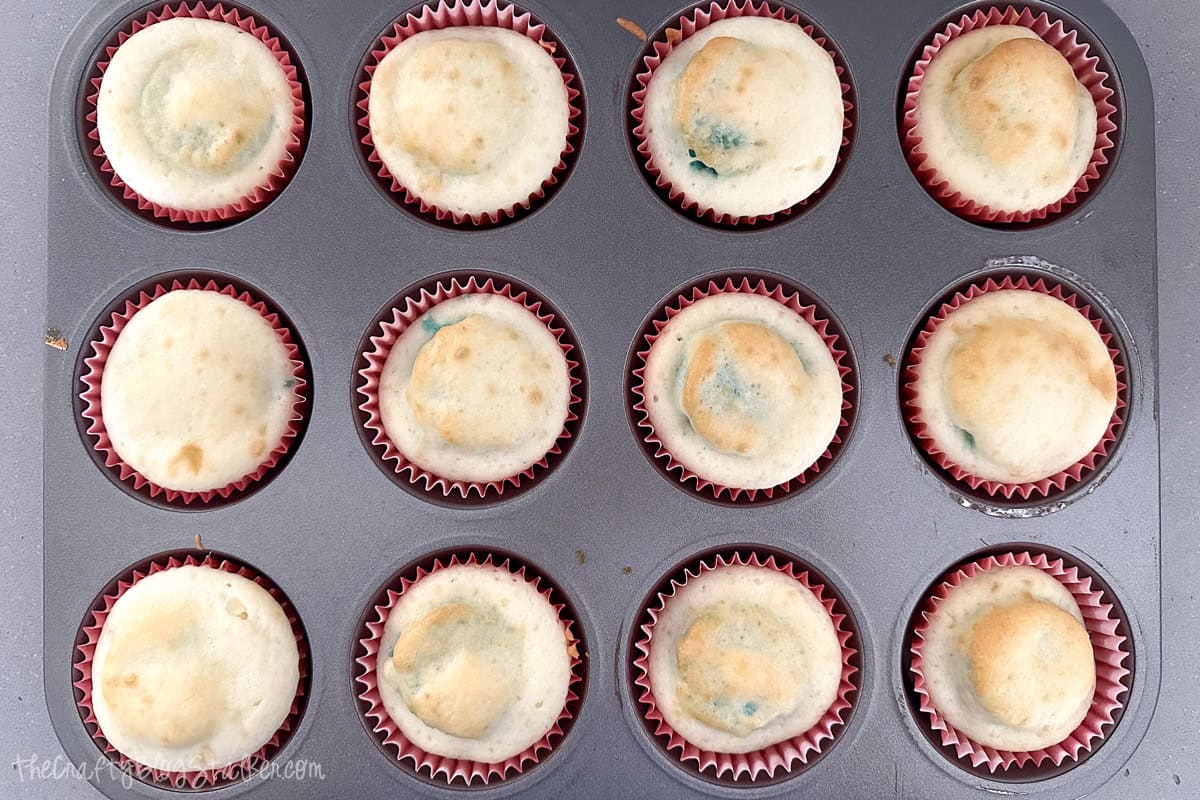
When filling the cupcakes, center the colored cake as much as you can. Any part that is too close to the edge may be revealed when unwrapping.
A little of the color might show through the top when done baking but the frosting will cover up those spots.
Frosting Tips
When dividing the frosting into three bowls, the largest bowl should be the white frosting.
This is what my frosting looked like when laying rows of the frosting onto the plastic wrap.
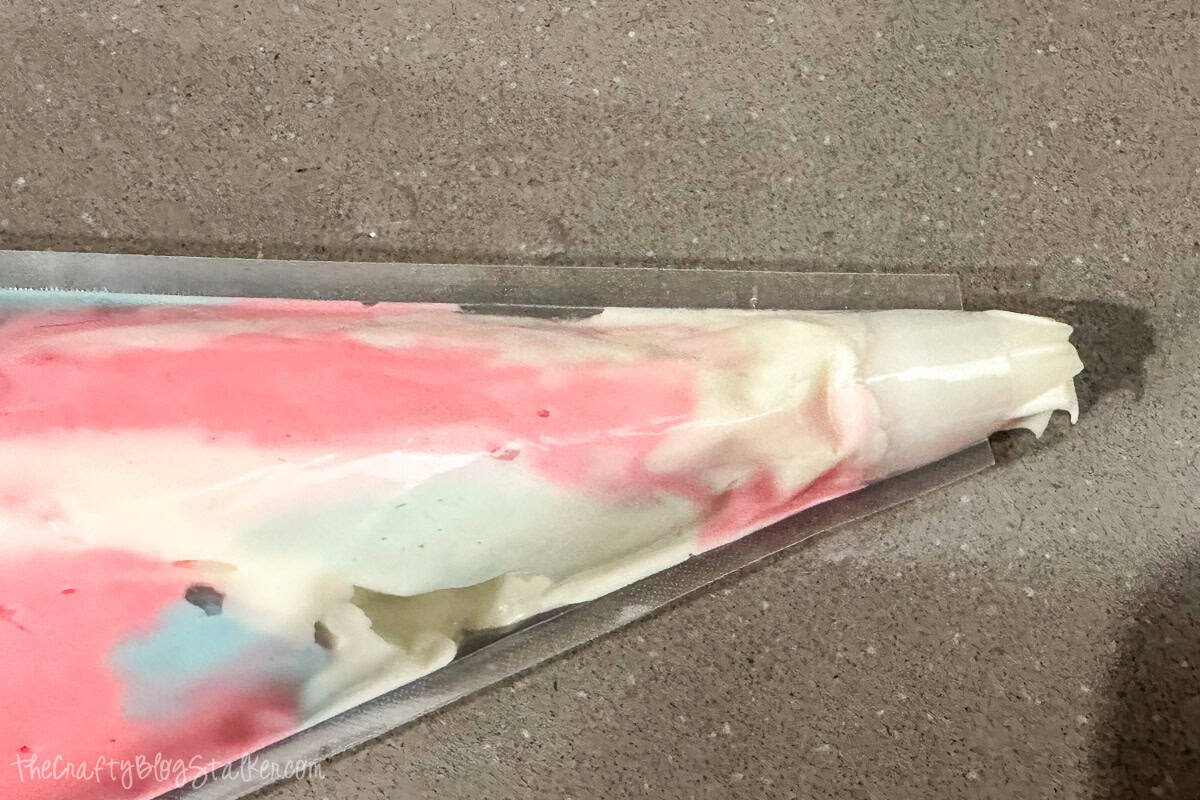
Then rolled into the tube. There will be layers of plastic wrap in the frosting since it is rolled, but it will squeeze out just fine.
Cut one end of the plastic wrap off as close to the frosting as possible, and then carefully put it in the plastic bag.
* I used a regular plastic storage bag as my pipe bag, but genuine pipe bags do work a little better.
I just piped simple swirls of frosting, but feel free to get as fancy as you'd like!
Cupcake Carrier
The gender reveal party was not at my house, which meant I had to travel with my cupcakes, and it wasn't close. It was about 2.5 hours away.
To make sure the cupcakes arrived in perfect condition, I used this Cupcake Carrier.
It was perfect. It held 24 cupcakes, and the sections were spaced out enough that they didn't even touch.

The Big Reveal
The party was a huge success!
We had a potluck with sloppy joes, played a few baby guessing games, and the big reveal was for dessert.
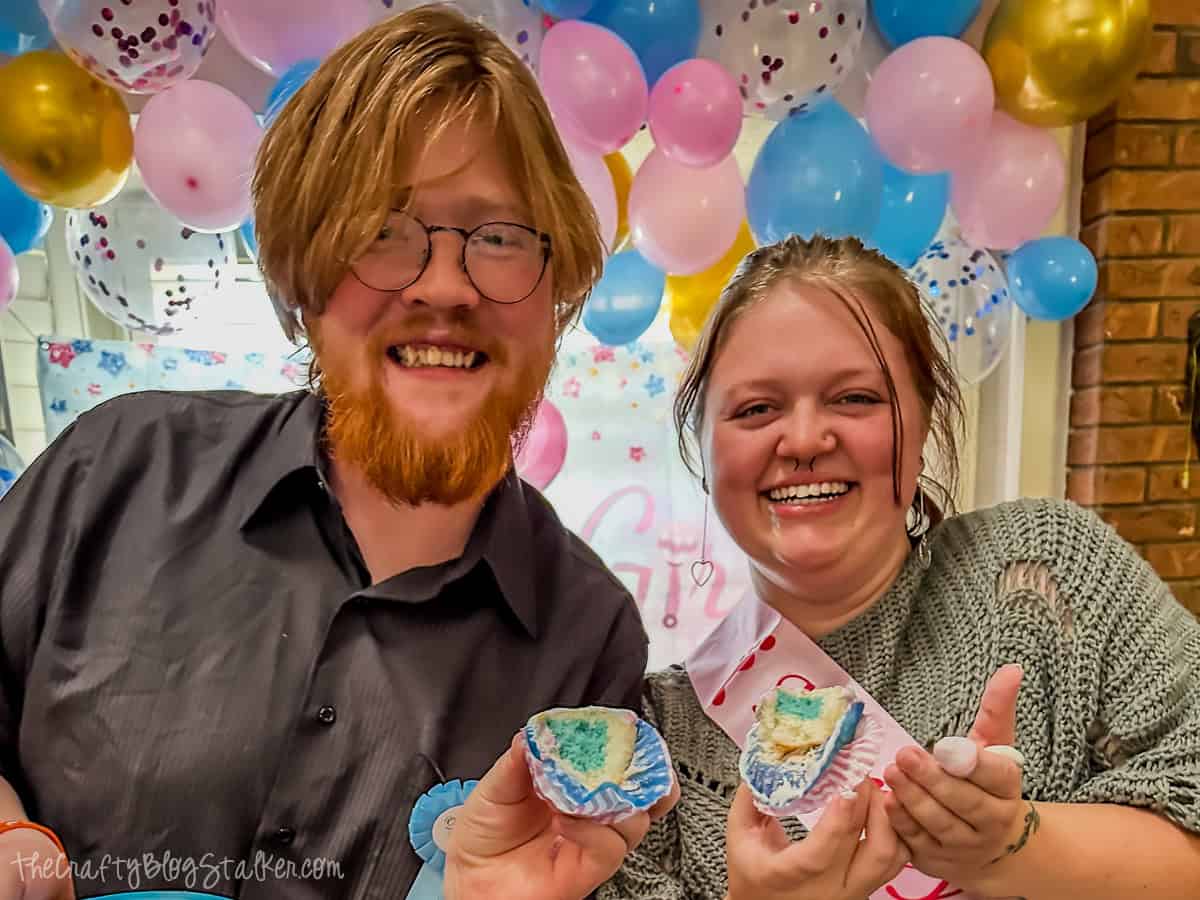
It's a boy! But you already knew that. 😆
We are all thrilled to welcome a little guy to the family.
More Baby Themed Tutorials
Now that there is a baby on the way, there are so many fun things to make! Here are a few ideas.


Hi, I'm Katie!
I'm so glad you're here. Want to make something fabulous? I'm here to help!