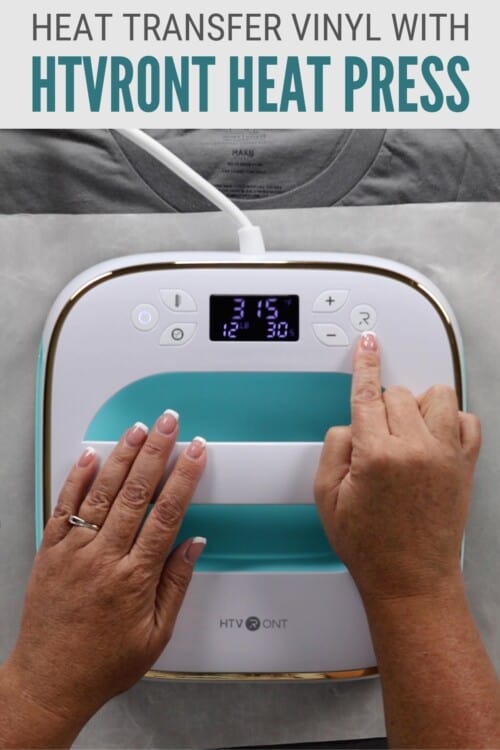
This tutorial will teach you how to make a happy camper tee using heat transfer vinyl and the HTVRont Heat Press. Make a fun shirt for your outdoor adventures. Products for this tutorial were supplied by HTVRont. If you make a purchase using the links below, we may earn a commission.
Having the right tool for the job is so important and it applies to crafting too!
Using the right tools give your projects a higher level of quality, and can even help you make it a little quicker.
Today I am talking all about the HTVRont Heat, and that is definitely the right tool when it comes to applying Heat Transfer Vinyl, or Iron-on Materials.
Craft Video Tutorial:
Like videos? I have a video tutorial for you! Subscribe to my YouTube Channel so you don't miss any future videos!
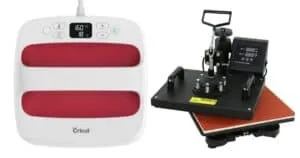
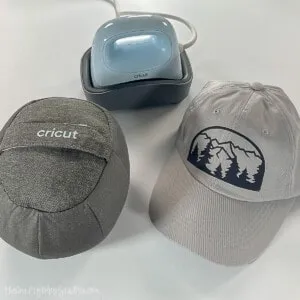
The HTVRont Heat Press:
Before I get into the Happy Camper Tee project, I want to showcase the heat press that I will be using.
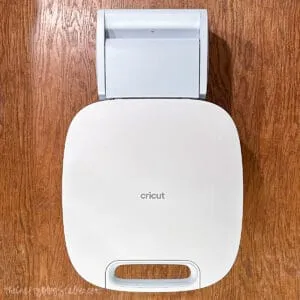
The HTVRont Heat Press is a beautiful tool. I love the turquoise with the trim of gold all away around the top. It's so pretty, the pictures just don't do it justice.
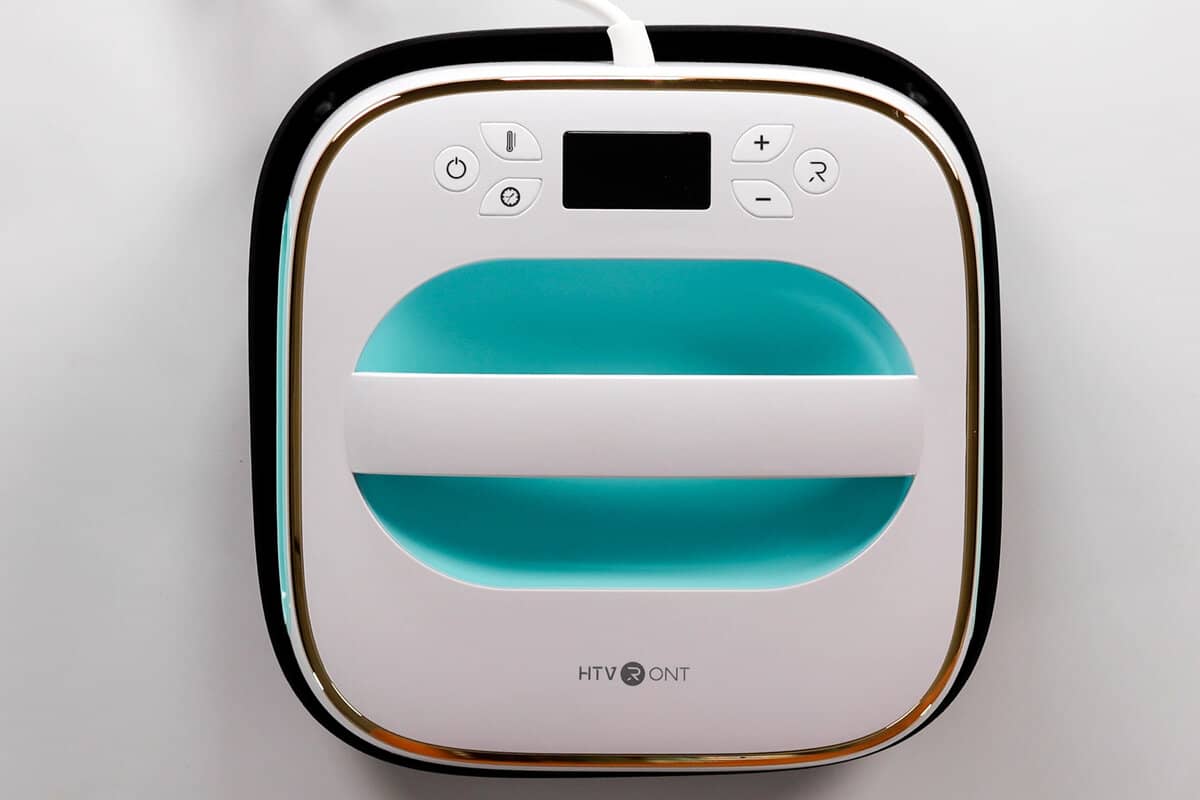
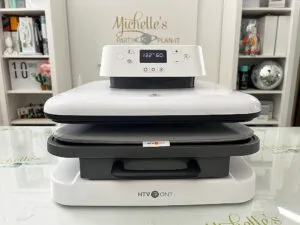
It is a 10 x 10 inch heat press, meaning the flat heating plate at the base of the machine measures 10 x10 inches, and the body of the machine is only slightly larger.
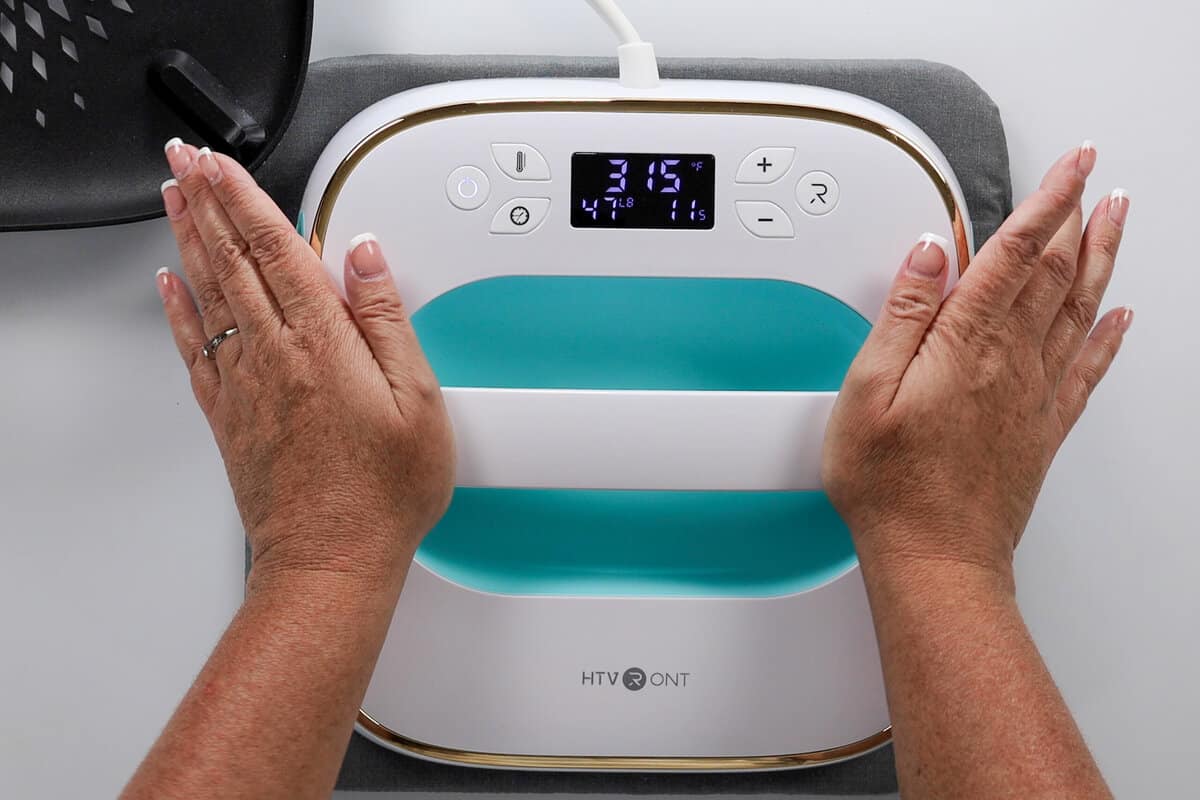
The panel includes a digital display and 6 buttons, so you can set the temperature and time to whatever you need.
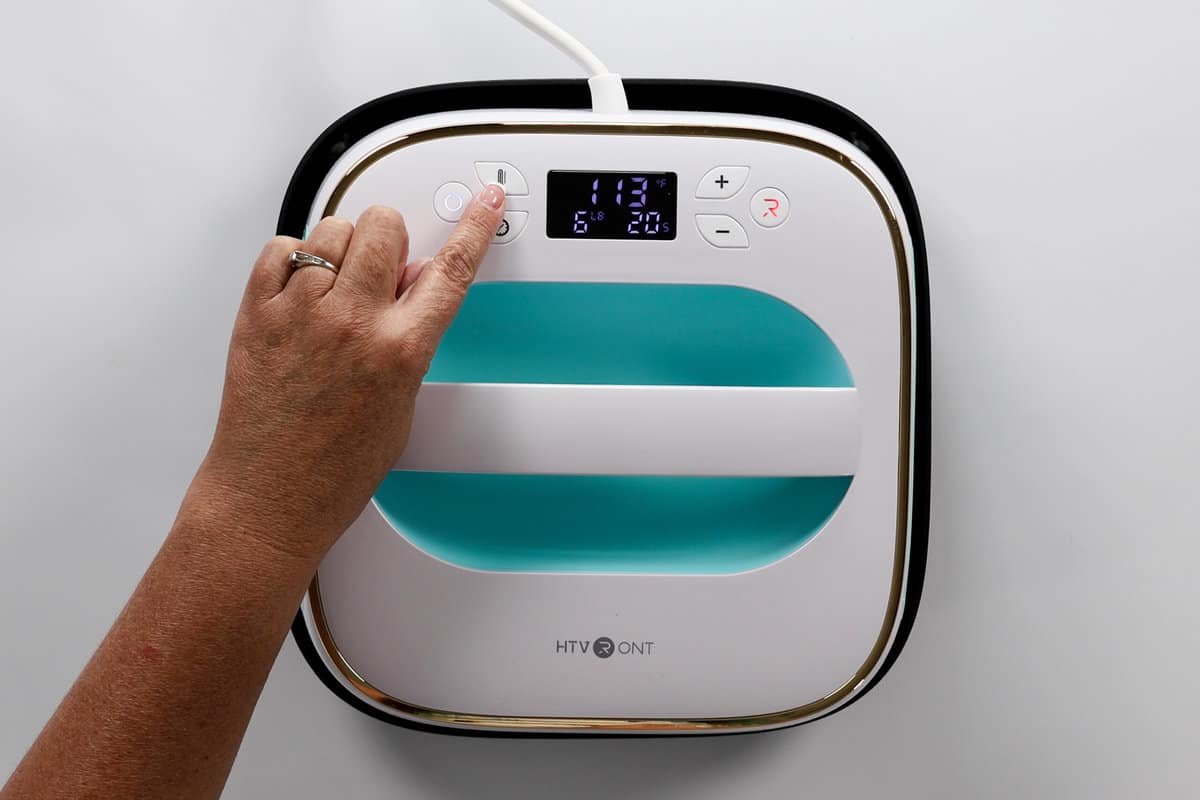
My favorite feature is the new pressure display function. Once the timer has been started on the heat press, the digital display will show the amount of pressure in pounds. This lets the user make sure they are applying consistent pressure while pressing.
It is super helpful and I never even realized I needed it. Now it is a must!
The box includes the heat press, the safety base, an instruction booklet, and a canvas tote bag to store it in.
This heat press is currently priced at $79 on HTVRont.com. This is such a great price for a high-quality heat press!
The HTVRont Heat Press Machine will work with T-shirts, onesies, totes, flags, banners, home decor and so much more!
Supplies You'll Need to Create this Project:
- Tshirt Blank
- Cutting Machine
- Happy Camper SVG File
- Heat Transfer Vinyl
- Weeding Tools
- Teflon Sheet
- Heat Press Mat
- HTVRont Heat Press

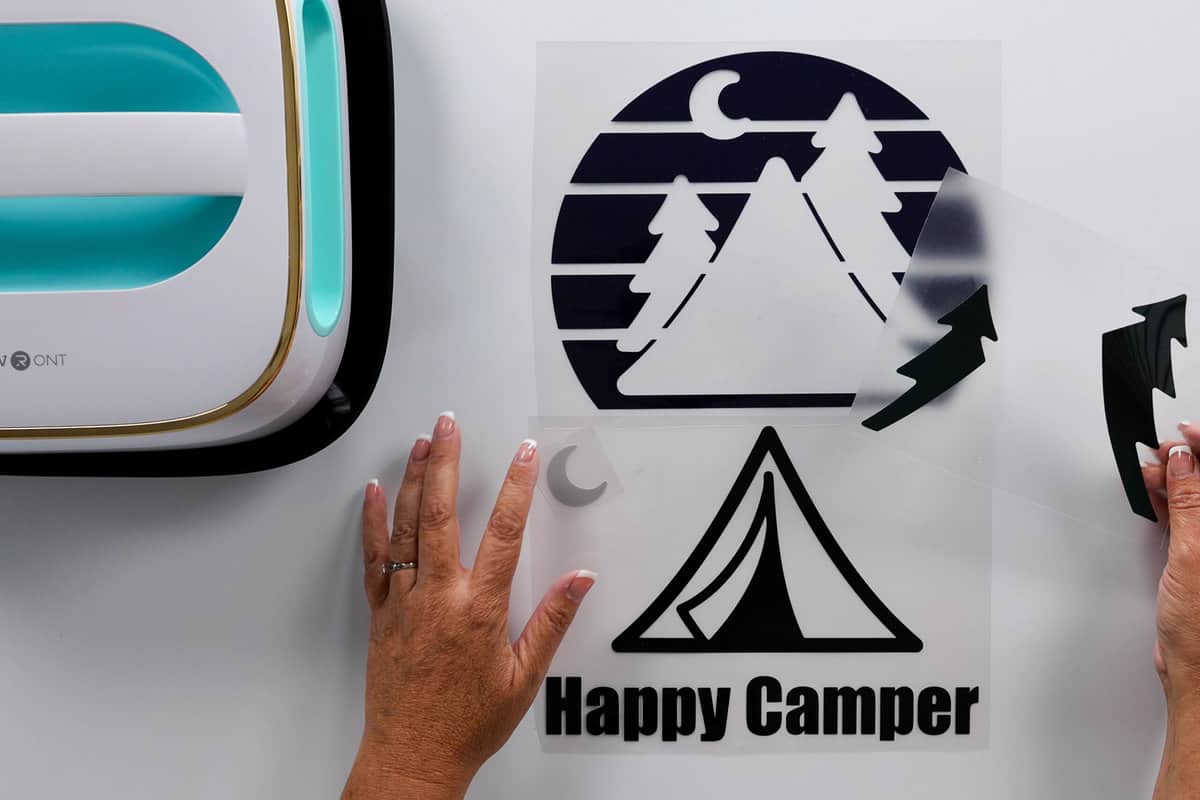
Measuring, Cutting, and Weeding:
The first step in any HTV project is to measure, you want to know the size to cut the design so it fits the shirt properly.
I am applying the design to a men's large t-shirt and sized the design to have a width of 9 inches.
Upload the design into your cutting machine software. Size the design as needed and then cut on heat transfer vinyl.
This design has 3 layers or colors. I used black, navy, forest green, and silver gray, but you can use whatever colors you like best.
Once cut, weed the HTV so you are only left with the positive of the design.
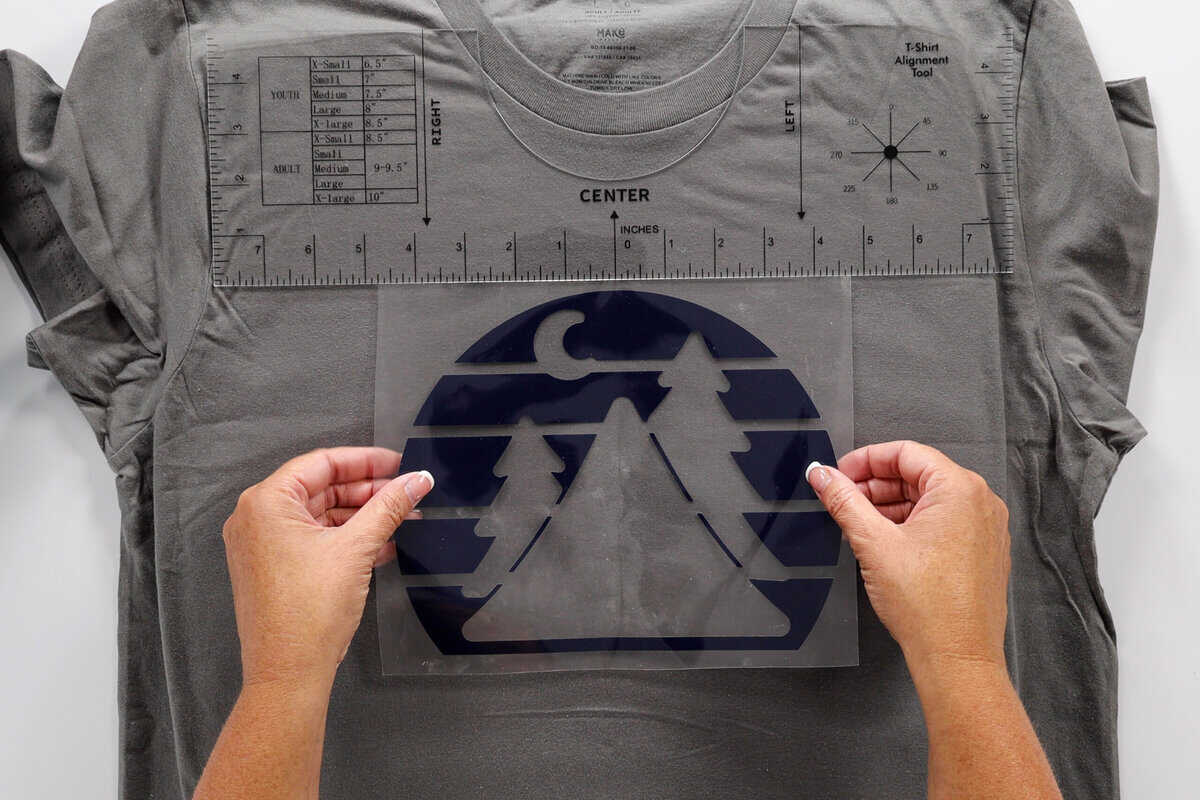
Design Placement on a T-Shirt:
Before I apply the design, I need to know where to put it.
I want the design on the front center of my shirt. To find the front center, fold the shirt in half lengthwise and lightly iron. This will leave a slight crease line on the front of the shirt.
On an adult shirt, you want to start the design about 2 - 3 inches down from the collar. You can measure down with a ruler, but I like having a t-shirt ruler to help guide me. Plus it helps me make sure the design is straight.
To find the center line on the design, fold the design in half and light crease the HTV back sheet, not the design itself.
Then I can align the center fold on the shirt with the center fold of the design, and everything is perfectly lined up!
Layering HTV on a Shirt:
Now it is time to start layering!
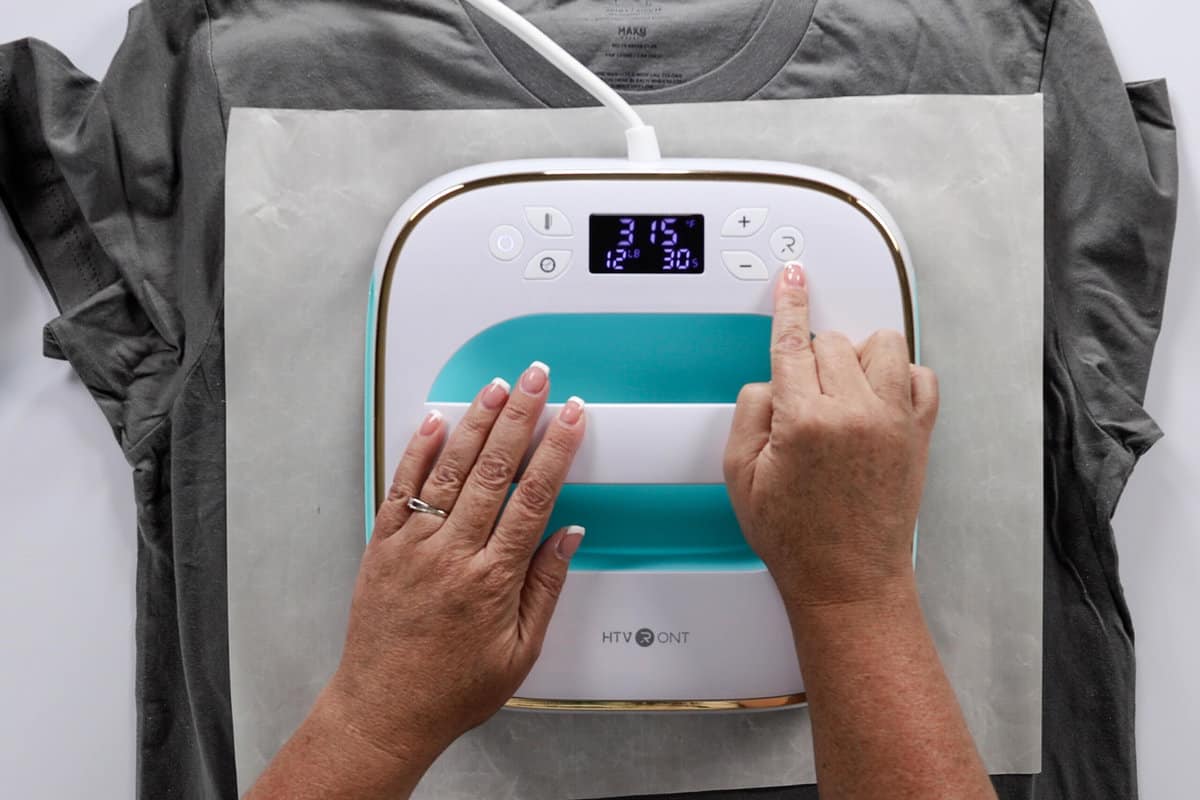
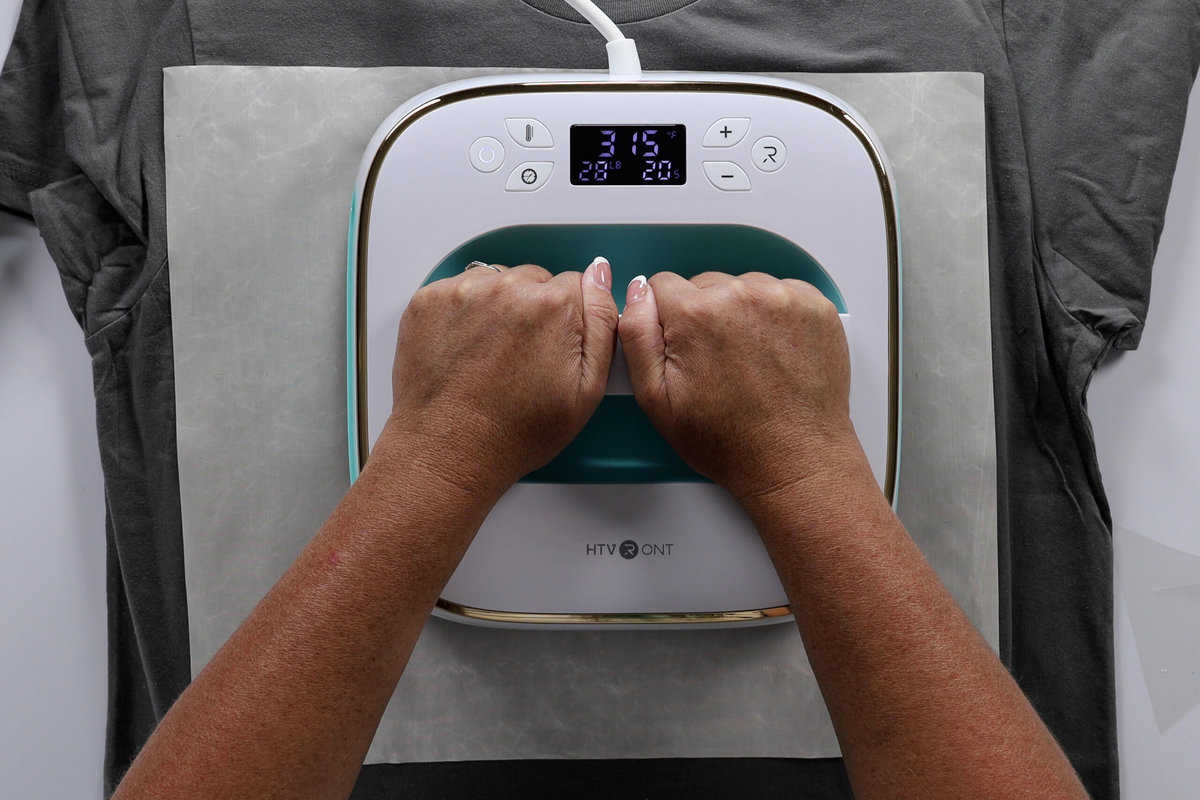
As a good rule of thumb, I always follow the recommended heat settings for the products that I am using.
For my heat transfer vinyl, it is 315º for 30 seconds.
Since we are adding a couple of layers, I will cut that time in half to 15 seconds, for the first couple of layers, and then for the final layer, I will press the full time of 30 seconds.
Even though I am cutting the press time in half, since there are so many layers, the HTV will still get its required time for a successful bond.
Apply the first navy layer using the centering technique described above. The backing sheet to the HTV is a little sticky so that will hold it in place, as long as you don't move it around too much.
Cover the design with the Teflon Sheet and press for 15 seconds.
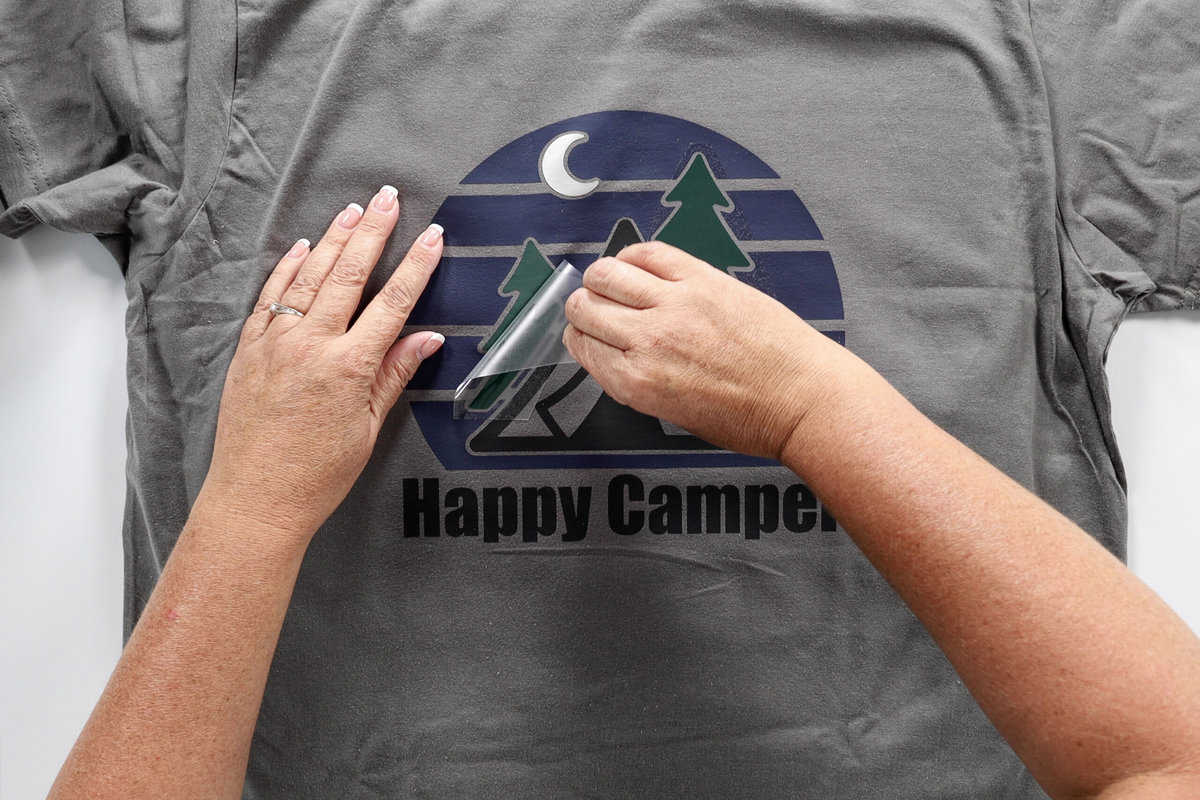
This HTV is a cool peel, meaning the backing sheet should not be hot when it is removed.
To help cool the HTV, grab the shirt by the bottom and lightly flap it to help bring cooler air around the shirt.
Once cooled, peel the backing sheet away from the design.
Center the second black layer into the design.
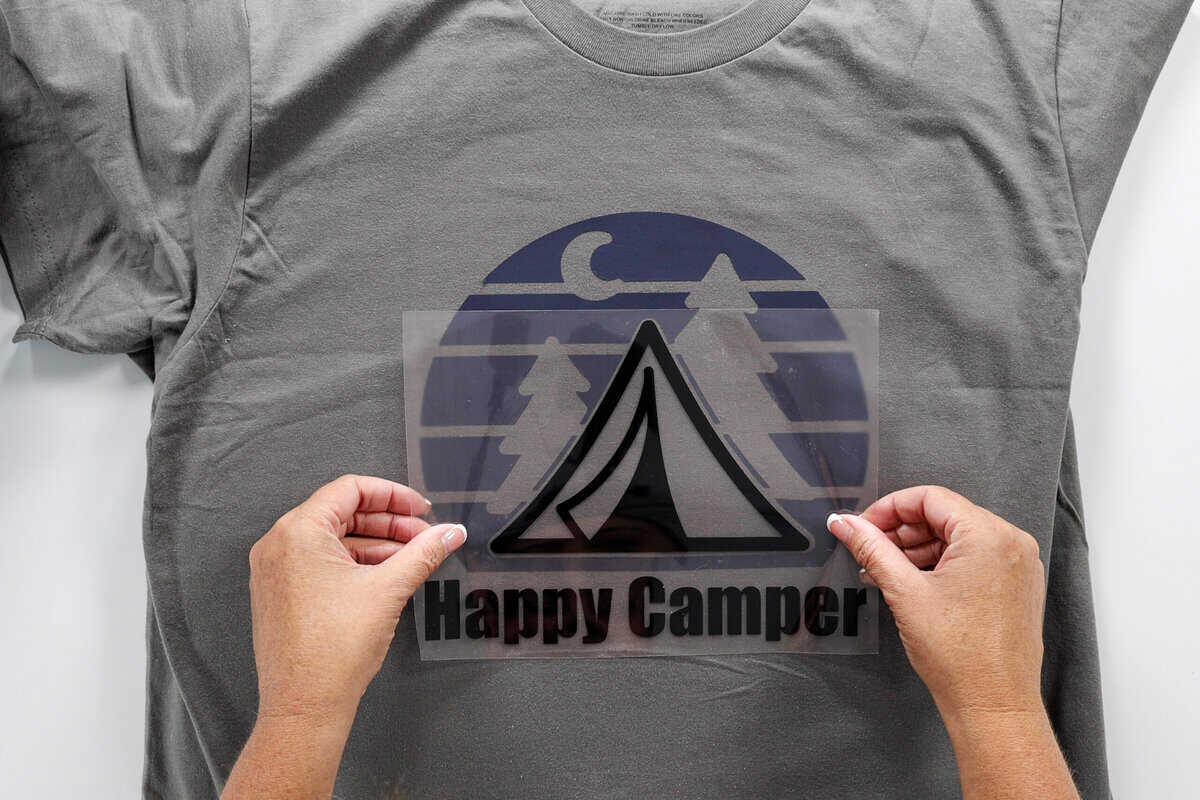
Recover with the Teflon Sheet and then press again for 15 seconds.
Flap the shirt to cool, and then remove the backing sheet.
For layers 3 and 4, we are going to apply them both at the same time.
Trim the backing sheet around the trees, so you have two pieces instead of one.
Then place the two trees and the moon into place on the design.
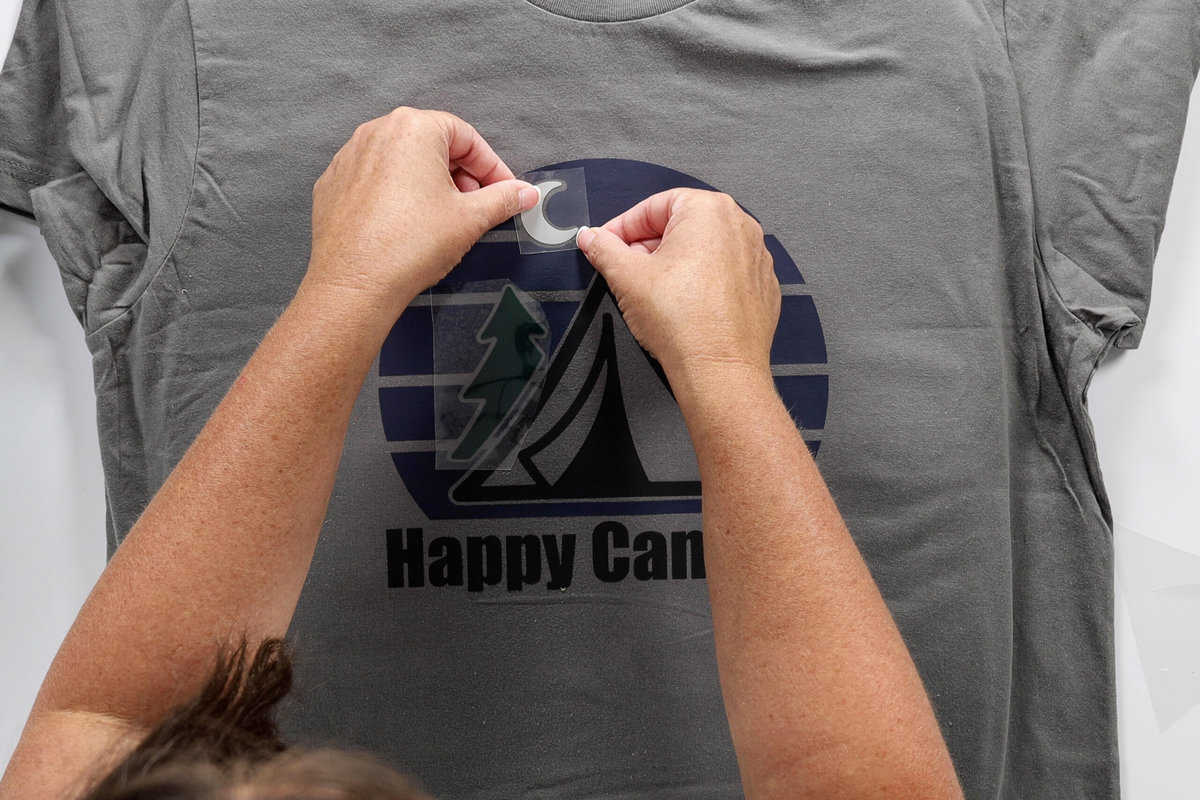
Recover with the Teflon Sheet, and this time press for the complete 30 seconds.
Flap the shirt one last time to cool, and remove the pieces of the backing sheet from the design.
To really set the HTV, turn the shirt over and iron the back of the shirt for 15 more seconds.
My shirt is finished and I can now be a happy camper. All that is left is to actually go camping!
Frequently Asked Questions:
I love to answer all of your questions! Please reach out if you have more.
What is the purpose of a heat press?
A heat press provides constant heat and pressure to an item.
A heat press is typically used to apply either a heat transfer vinyl or a sublimation print to a base object like a shirt or a tote. Consistent heat and pressure are required for these materials to stick or transfer to their base.
Do you need a different heat press for vinyl and sublimation?
No, you do not! You can use the same heat press for heat transfer vinyl and sublimation.
What is the best size heat press to get?
This is not a question I can answer for you. It really depends on what you will be making the most.
Heat presses come in all sizes. Large heat presses can be 16 x 24 inches while the mini handheld press is only 3.5 x 2 inches, and there is everything in between.
You wouldn't want to press a 3 foot design with a mini handheld press, so think about what you will be making the most of.
Personally, I love the 10 x 10 inch size. It's not huge but not tiny either. If you do a lot of shirts or tote bags then this size is perfect.
How do I choose a heat press?
Different machines have different options, and there are lots of different presses out there to choose from.
Look at what you will be making the most of, and what features are important to you.
For example, the HTVRont Heat Press shows you the pressure per pound you are applying to the press. If you work with material where you need precise pressure applied, then this heat press might be best for you.
Our Crafting Essentials:
- The Cricut Cutting Machine is easily our favorite crafting tool. We use it in so many of our tutorials!
- These MakerX Crafting Tools are perfect for keeping in the craft room and are always ready when needed!
- This Fiskars Paper Trimmer is easy to use and cuts nicely without frayed edges.
- These Scotch Precision Scissors cut like a dream, and you get multiple pairs in a pack!
Recommended Posts


Katie Adams
Creator at The Crafty Blog Stalker
- April Simply Earth Essential Oil Recipe Box
- Easter Bunny Candy Holder with Free SVG
- How to Make a Laser-Cut Christmas Barn Ornament
- Shaker Snowman Decor with Cricut SnapMat
- Seal a Diamond Painting and What Sealant to Use
- How to Make Arabesque Tile Ornaments with a Free SVG
- 22 of the Tastiest Non-Alcoholic Drinks for a Refreshing Summer
- What Kind of Paint to Use on Glass with a Video Tutorial
- Sublimation Tumbler and Free Cow PDF
- Summer Printable Search and Find Pictures
- How to Make a DIY Pool Noodle Lightsaber
- How to Install the Deep Cut Blade in the Cricut Explore
Leave a Reply